
How to Enhance Your Home’s Curb Appeal with a Variety of Plants
Adding an assortment of plants in your front yard, to create curb appeal in your landscape design.
When you drive by houses, or take a walk in your neighborhood you notice how spectacular some people’s homes are when they fill their front yards with all kinds of plants, shrubs, flowers, and trees. It gives that extra to the home to make it hard to look away.
…Then I would get back to our own house and see nothing but grass – how boring. This was my very first start at landscaping, when I started on our own front yard. I didn’t know what I was doing, or how big of an area I wanted to start planting, whether I’d be using rock or much… I was at a loss, but was taking notes during my long walks with my dog, to get ideas from others, although I’m not even sure my end result was anything like what my neighbors have done.
What To Consider When You Want to Landscape around Your Home
Hardiness Zone, Sun Requirements, Plant Size…
I began my search for shrubs in my zone, that could handle late afternoon sun, and wouldn’t get too large for the space. These are important factors to consider, as you want to make sure your plant selection will thrive in the location you place them, and will not outgrow the area, which would result in having to remove them and start over again at some point in their life.
Design Layout
Since this was my first real try at landscaping, I didn’t know how large of a project I wanted to give myself. Besides, the idea of tearing up perfectly good grass was a hard decision to make, especially when we were planting grass seed the year prior in this very spot.
I started out small, and would show my husband by marking up the yard with spray paint, or through a quick sketch over an image on my tablet, where I’d like the bed to extend to.
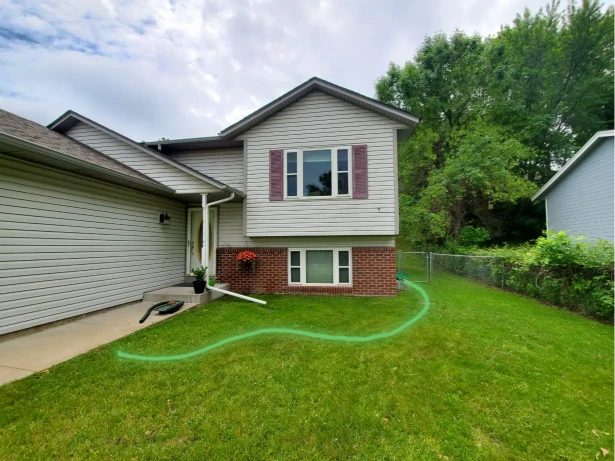
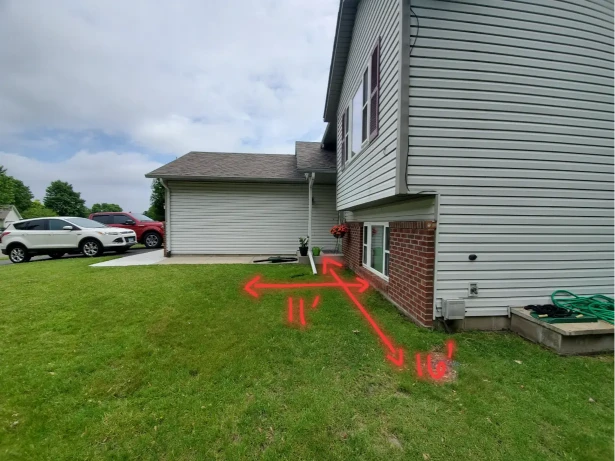
I think this was harder for him, as I remember the first time showing him, he was a bit shocked at how far out from the house I was planning to design this garden, haha. What’s even funnier now, is the fact that this area I ended up designing was even larger than my original sketch.
I kept extending it out further and further during my planning stages, and would explain why I had to make it larger and to trust me as it would look nice in the end. 🙂 I think he was in a similar situation as I was though and needed to see it on paper to get the full picture.
Should You Consider Using Design Tools?
I decided to look online for one of those online design tools and ended up finding one through BHG called Garden Puzzle. I paid for a standard plan to allow just enough of their features that I could get the vision I had out of my head. This helped me tremendously (as well as my husband to see what I was thinking), and I began to get more excited to work on our yard.
I find being able to physically see what I’m visualizing in my head to be the most productive option for me. It’s so hard to have this thought floating around, and not being able to clearly explain that same image I’ve been dreaming up in my head, with another person.
There have been times that I would get out paper or my tablet to start sketching, but even then it would be difficult to draw well enough to capture what you’re trying to imagine. With this software tool I found, I was able to upload a picture of our front yard, and use their plants to fill in the blank spaces. It may not have had the right type of plants, but allowed me to choose similar looking plants to complete the picture.
Here’s an image of what I had done, but as you will see it’s not the exact look I ended with, but very close!
Finding the Right Plants For Your Landscape
It can be very daunting when trying to figure out the right type of plants to fill a space in your garden. As discussed above, at least I had a general idea of what I’d like these plants to look like and roughly the size I’d need to focus on.
We don’t have a large front yard, and our house isn’t huge, so I wanted to make sure these plants wouldn’t outgrow their space at maturity. Also I love to mix different types of plants together to display different colors and shapes of their leaves, since you won’t always be working with blooming types each time – I find it beneficial to display how appealing they can be by their foliage alone.
Another thing to consider is whether they are deciduous shrubs, and lose their foliage at the end of the season, or if they retain their green foliage all year round like evergreens or coniferous shrubs. I love both, and find they all have a purpose in your landscape design.
Which Plant Varieties Did I Go With?
Arborvitae
I’m so happy I decided to incorporate the Technito Globe Arborvitae into my plans, as this is a coniferous type that remains beautifully green all year. I even love the winter interest it provides during the snowier months, with the foliage being layered with white snow. Although our winters here in Minnesota can be quite harsh at times, these poor plants end up being covered almost completely under the snow. Haha, not so much of a winter interest during these months, but overlooked since that’s expected.
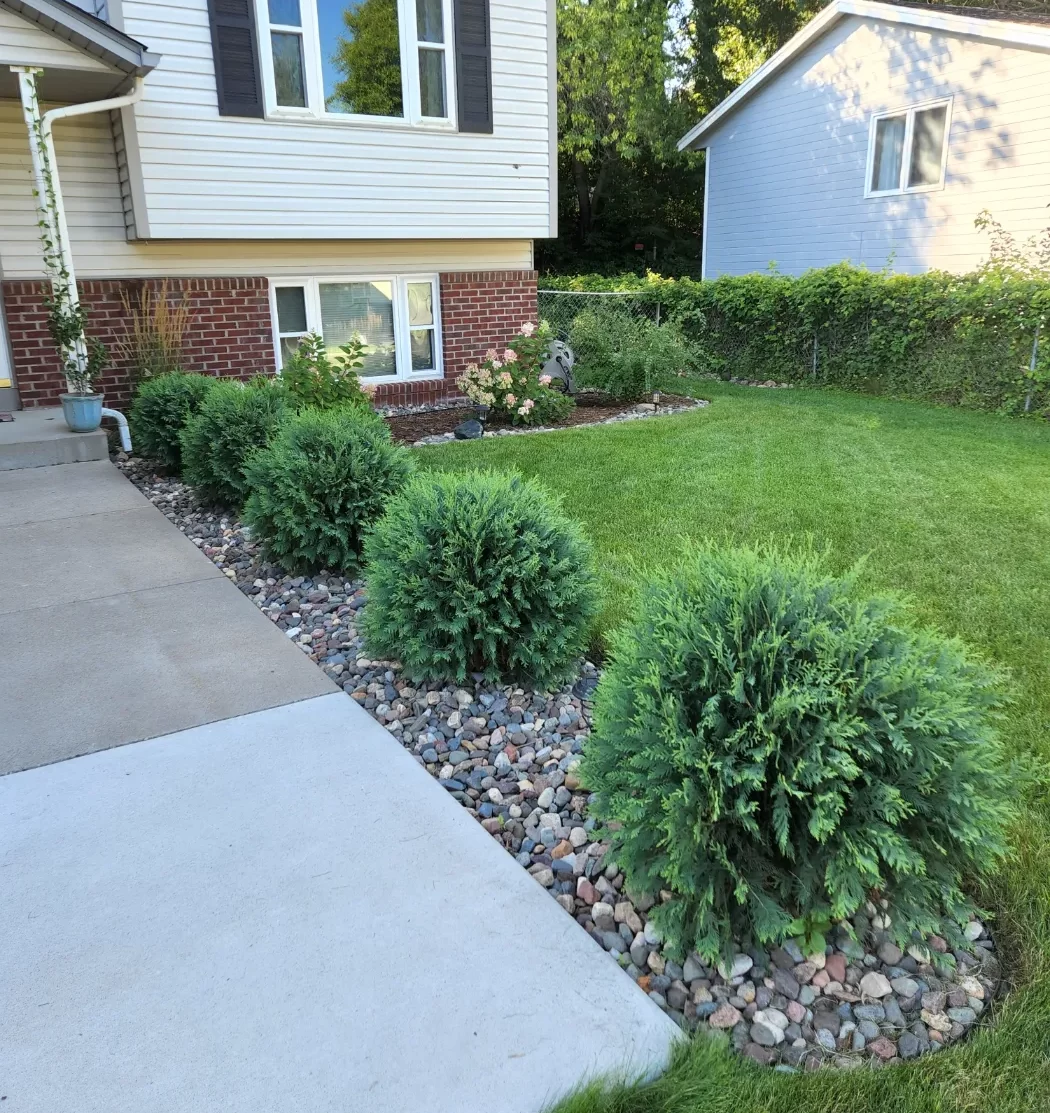
These are also great because they stay fairly formed in a globe shape, and with a little Spring trimming they tend to keep to their smaller size. Supposedly they should only grow to be about 2 feet all the way around, however I think they are capable of getting larger if allowed, so keep this in mind if you decide to grow these in your own gardens.
Note: Spring pruning is definitely recommended to maintain their size, and should help the plant push for a fuller growth as well.
Hydrangeas
I decided to use the all so common panicle hydrangeas as my main focal point in this design, as they were the right size I was looking for. I chose to go with Little Quick Fire Hydrangea Paniculata because I loved the added pink tones the flowers have. Although I may have reconsidered if I knew how much they would blend in with the red brick against our house during the fall months… They are still very beautiful, and offer a nice sized bloom later in the season, as well as being simple to care for with some Spring pruning and fertilizer to start them off. There is really nothing more needed by me besides watering if we get any extended dry periods with no rain.
Note: I also find it beneficial to keep similar plants throughout your garden designs because why make it harder on yourself to remember how to take care of everything once it’s been planted?
I knew I’d be adding more hydrangeas in my garden design because they do so well here in Minnesota, and offer so many varieties to choose from to keep it from getting too repetitive and boring.
Spiraea
I needed to add a larger taller shrub at the corner of our house so it could balance the rest of my design. The row of arborvitae made the left side heavier, so I thought by adding in this Renaissance Bridal Wreath Spirea it could provide that necessary balance with its overflowing branches that are completely covered in tiny white flowers in the Spring. I really wished they lasted longer, but the other reason I chose this plant was for the foliage.
This shrub has tiny leaves that cascade down the flowing branches, later showing a beautiful green color in the foliage early Spring once the flowers have dropped. In the Fall they will start to turn a reddish yellow color that bring the right amount of interest, when everything else starts to lose their vibrant colors in the garden.
These shrubs should reach about 6 feet tall and a little wider. This may not be ideal for the corner of our house, but I have seen how these can be pruned into a vase shape which sold me on the idea of adding it to my garden. Our spirea still has a while to reach its mature size since the first year the rabbits chewed it to the ground, but I have been working at protecting it since to allow it to grow a bit larger.
Ornamental Grass
With all my designs, I’ve found myself adding in ornamental grass. There is just something about how it looks against other plants. It will add a little extra interest with its upright shape, and the way the grass blades wave in the wind. I feel everyone needs to add some ornamental grass in their own landscapes. I chose to add Karl Foerster Feather Reed Grass, and tuck it away in the corner since it provides a good height to peek out behind my shrubs.
Grass is also incredibly easy to care for. I leave it standing tall throughout winter, as this allows some protection around the base of the plant to keep it from getting too cold. Then come Spring I just hack it down to the ground to allow that fresh new grass to start emerging.
This grass grows rather quickly too, and it goes through these phases that I find so beautiful. The seed heads at the top have a soft purple hue colored flower at first before they turn tan. I love when they look this way, but are also very appealing after too.
Disclosure: Please know there are links shared that may be affiliate links, meaning at no additional cost to you, I could earn a small commission if you click on a link within my post. You can read more about this here.
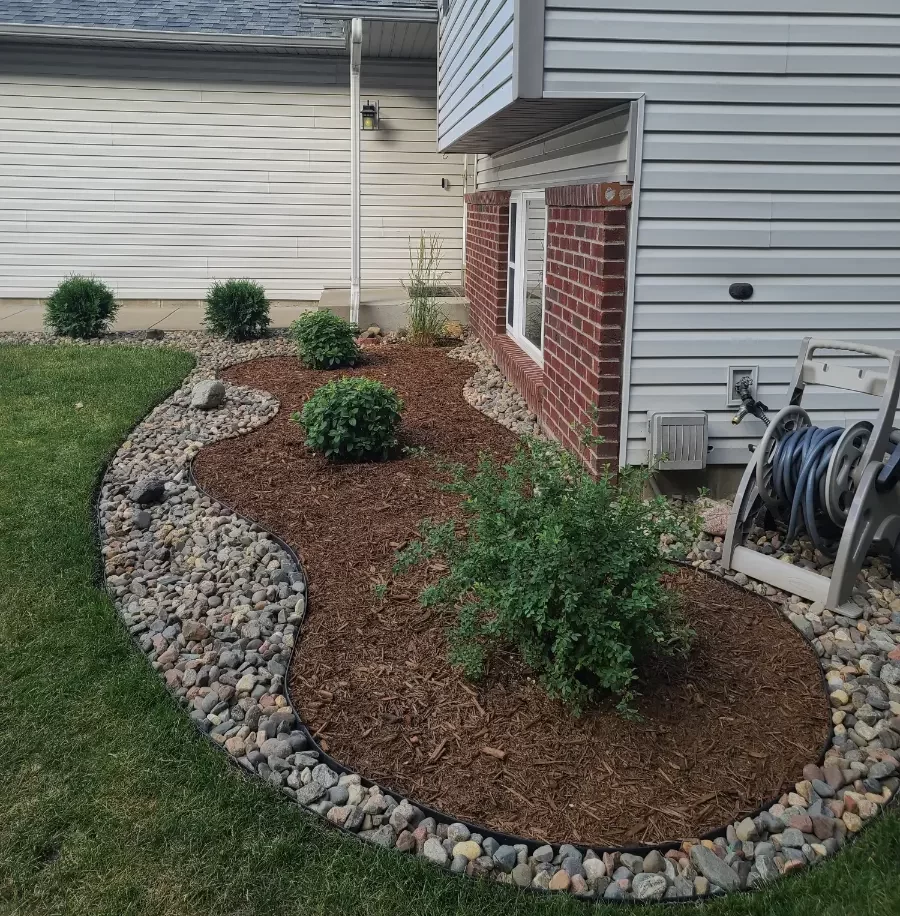
Create Clean Lines With Rock & Mulch
I ended up choosing to add both mulch and river rock in my design because of the clean look it would provide, but also to give my plants the right growing conditions.
Why Choose River Rock?
I looked into my options early on, and knew that rock would give me that long lasting coverage, unlike mulch that would require a refresh every so often when it started to decompose. Rock was a more expensive choice by far, but if you do some research you might find a reasonable rate through a local landscaping company within your budget, and they deliver it to your home.
To be honest, it’s well worth going this route when deciding on adding rock to your landscapes. Everything else we had a truck for, and picked up ourselves, but when you are dealing with covering the area around your house with river rock, the volume you would need certainly requires a dump truck delivery.
It doesn’t even look like a lot when they drop it in your driveway either, however in the end it covers the area well. Just make sure you calculate what’s needed correctly, and ask for assistance if you are unsure. We got lucky I think, because I tried to do the math, but was not a professional by any means. I say “got lucky” due to my actual designs changing as I went, so with the addition of mulch in my design, I would have needed much more river rock if I chose to use less mulch.
Why Include Wood Mulch?
The decision to add mulch to the beds was certainly due to providing my plants with a better growing condition than being surrounded by rocks and getting heated too quickly from being in a sunnier location.
Another main reason was for the actual design itself. I find that creating a layout with mulch surrounded by rock, has such a clean look and they contrast so well together. It was a bit difficult at first to decide how exactly I wanted these two to balance each other out, but that’s where using garden edging helps, as you can see the layout before adding in any of the plants and materials.
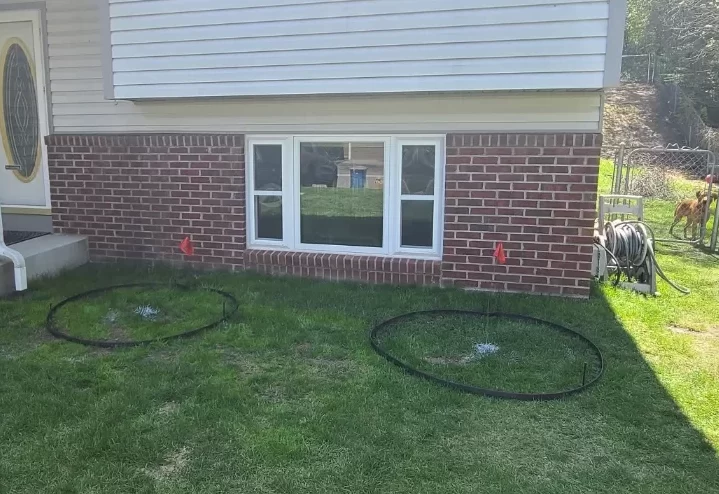
Should You Use Garden Edging?
I find any landscape should have some sort of edging. Not only does this help maintain your garden and materials and keep it within its space it’s meant for, but it certainly provides better guidance in your garden layout.
I chose to go with a simple no dig type of edging because I wanted to keep this as easy as I could, and this landscape edging doesn’t require you to dig into your soil, which was ideal for me as I would find so many rocks as well as roots in some areas. If this is what you feel would work best for you too I’ve linked this No-Dig Landscape Edging here if you’d like to check it out.
I also like how easy this is to stake into the ground as you begin to shape your area out to get the full picture. Just know that it will require you to unravel, so it’s best to do this on a nice sunny day that you can let it lay flat in your yard to allow the plastic to heat up and be much easier to manage when you get around to your garden project. More advice through my own experience, if you’re willing to take the time, is bending it the opposite direction and wrap it up again which can get tricky, but really speeds up the process of it flattening out.
There are several kinds of edging and different looks you can choose for your own landscaping, but I’ve stuck with this option because it has always been available for me when I needed more and gives me the bigger picture with simple staking and making my temporary garden layout during my design plan.
Prepare for Changes
Throughout this entire project, I was making tweaks here and there, and although similar to my vision in the beginning I definitely tried different things along the way. This is why I find it so important to really put in the time to research your options before starting your own landscaping around your home.
This way when you really dive in, you can move along comfortably, and feel confident in what you are doing. Otherwise you might start, and push the rest off for too long while you question what should be done next.
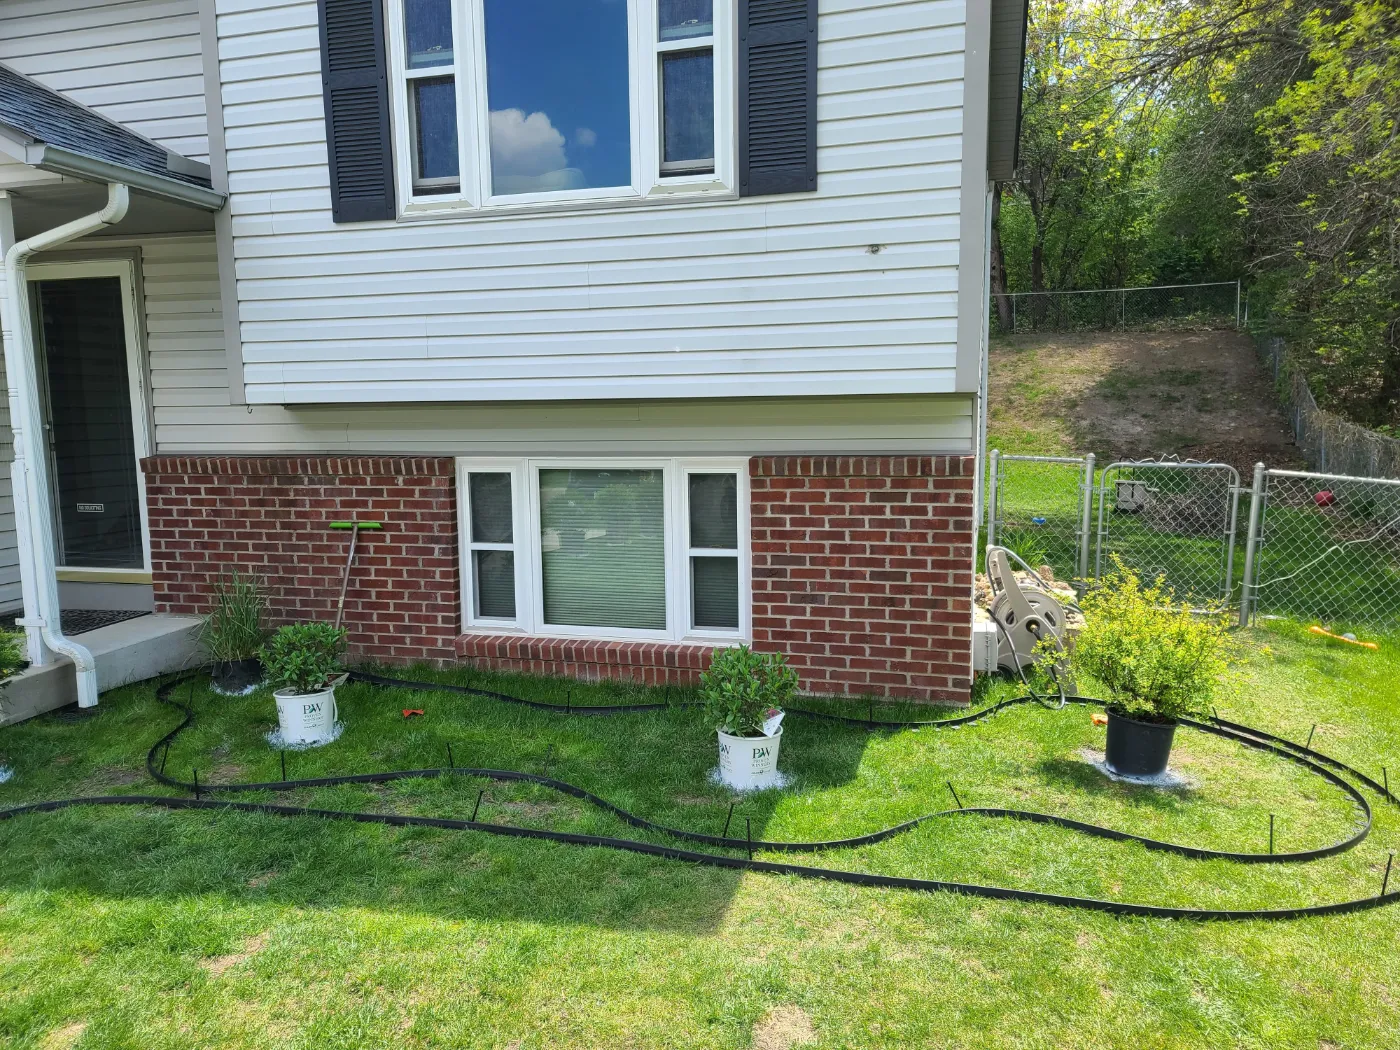
Enjoy the Process:
As you can see here, I was thinking about only my plants and thought I just needed to provide enough area of mulch to surround the plant through its mature size. Not realizing at the time what this looked like as I was staking in the edging to get the big picture. I pulled out my phone to record it as part of my overall project process, but started to laugh at myself as there was NO WAY I was going to keep this look in our front yard.
The added flags made this image all that more hilarious, and I can’t recall why I felt the need to include them since I had already marked up the plant location with spray paint. This could have looked a lot different once the actual plants were in place, but just the vision alone made me change my mind. I had to share the humor with my husband first, of course. If you don’t see it, maybe I need to get my mind out of the gutter. ;-P
When Or If To Use Landscape Fabric
I find landscape fabric is very controversial to many, and each of you will have your own opinion on it, which is perfectly fair. When I first started my research I assumed landscape fabric was supposed to be used in all landscaping designs, since it gave you that fresh starting off point by covering up the soil beneath it allowing you to make your plant placement, toss your mulch on top and be weed and grass free.
However soon you come to realize, or find in your research, that it will help temporarily, yes, but with time the weed seeds and grass do find their way above the fabric. Dirt will eventually blow into the beds as well, and that fabric will serve little purpose.
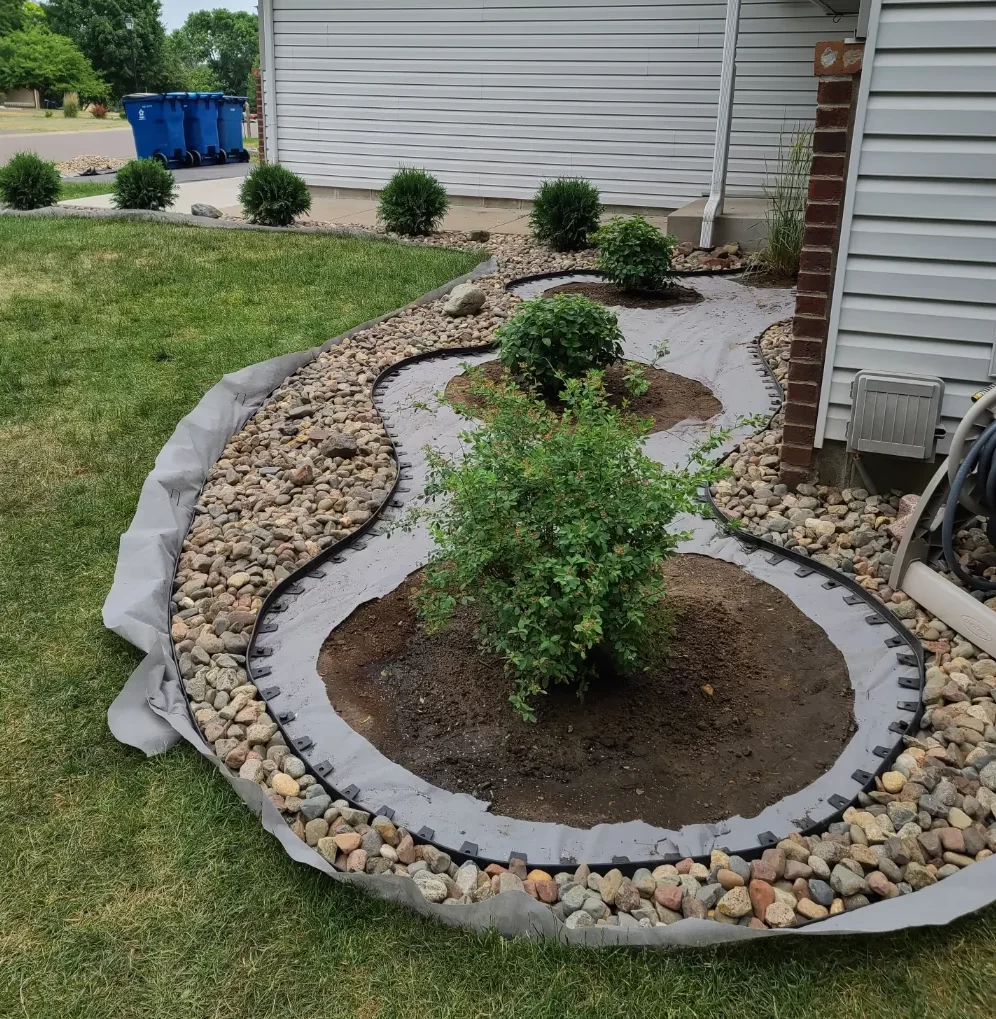
Use Landscape Fabric With Purpose
I chose to use the fabric in the areas that I plan to lay rock. I did have it overlap slightly into the mulched areas, however this past year I realized my plants were growing wider than I must have expected when laying the fabric down, so I pulled away the mulch and started cutting out a wider space. I tore out a lot of fabric this year, as I really wanted the wood mulch to decompose into the soil, and benefit the drainage for the plants.
Use Fabric To Keep Things Simple (Temporarily)
Other ways I’ve used this fabric is when I was too lazy to rip out turf. Honestly the worst part of any garden or landscape project. I absolutely loathe having to clear an area of grass, just to spread mulch and add my plants.
Last year I chose to lay down fabric to plant a new arborvitae tree/shrub, and pile it with mulch on top. This worked beautifully as I pulled back the mulch this following Spring and took my utility knife and cut out the fabric, leaving nothing but dirt beneath. I threw the mulch back on top and gave myself props for saving myself the backache.
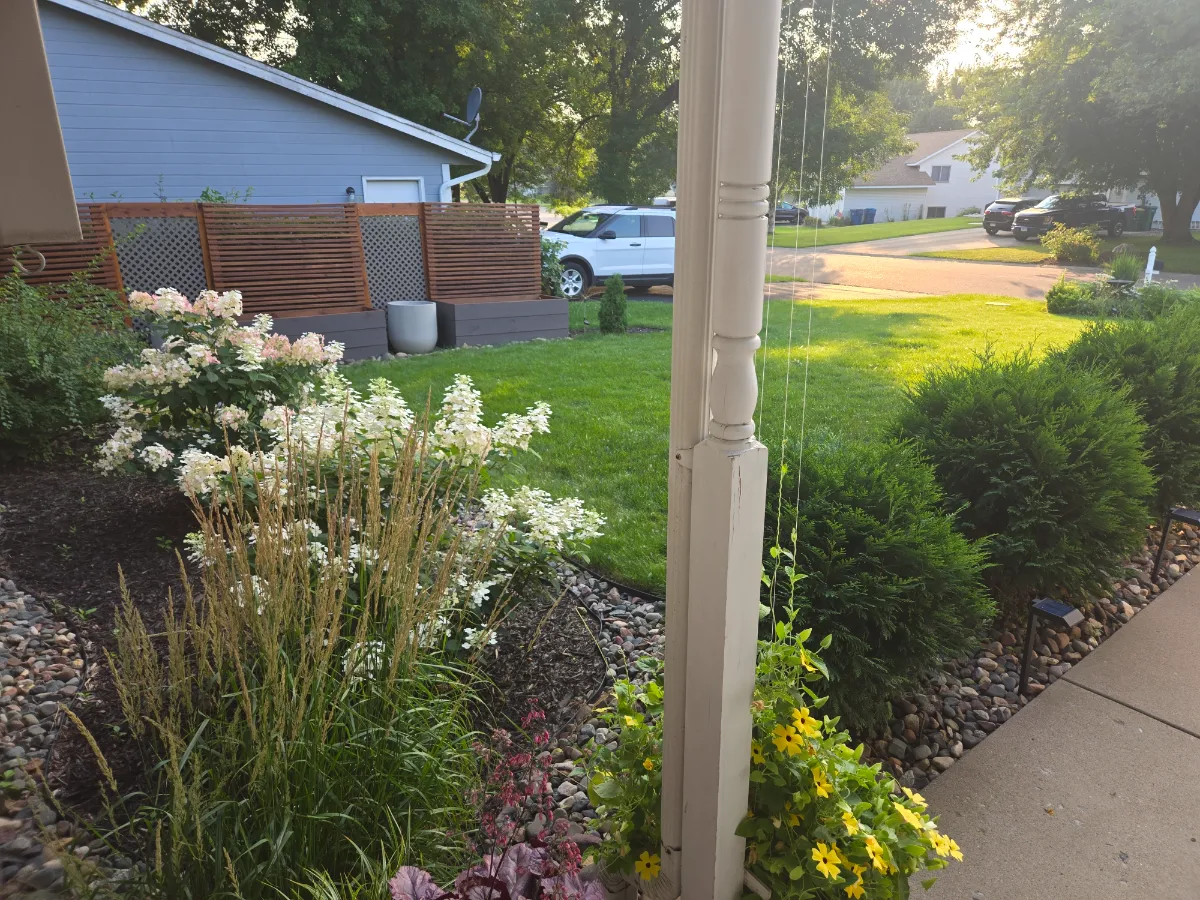
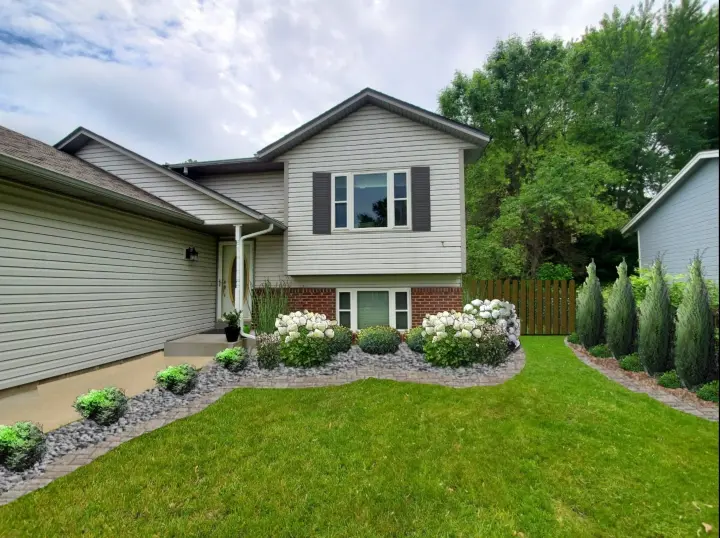
Enjoy the View
After all the sweat and tears, you can step back and truly enjoy your hard work. Take the time to reminisce of the day you spent your entire afternoon in the hot blazing sun with multiple shovels in your hand, trying to maneuver them in such a way so that you could pull out that massive boulder you happened to find while digging a hole for one of your shrubs…
There will always be a lot of effort you put into each of your projects, but in the end you will truly be happy with yourself and your accomplishments. You will even start to notice that you are already visualizing what other additions you can add to your space to really start creating your own oasis.
Thank you for taking the time to read about my experience, and hopefully you gained some helpful insights or inspiration. Maybe even enjoyed a chuckle through my process. Either way, I appreciate you reading, and wish you the best luck on your own projects.
If you like what you see, or learned anything, please tell me about it by commenting down below!
Happy Gardening!🌿