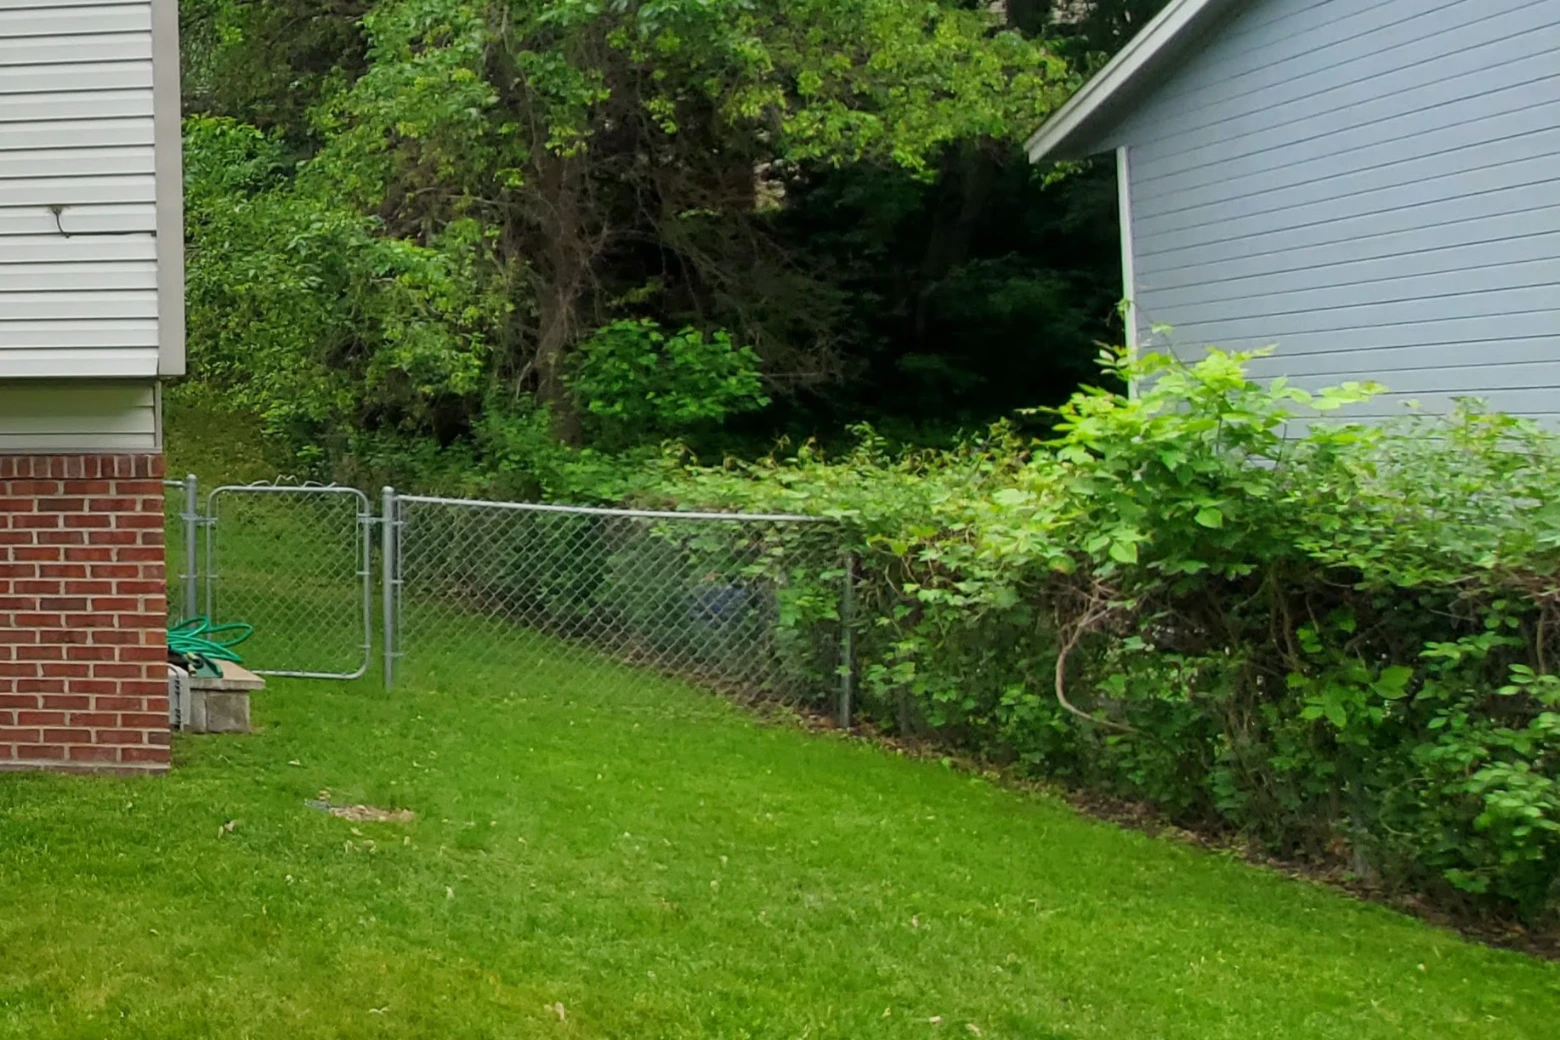
We’ve lived in our home for several years now, and every year I had to battle our neighbor’s overgrown grape vines that become infested with Japanese Beetles. They were loud and annoying as they would buzz around their plant, demolishing the leaves until they were nothing. Unsightly for sure, but when I had to mow near their fence, I would get hundreds of them flying every which way. Not to mention, how many times I’ve had to chop these things back just to get within 3 feet of the fence.
You can imagine I’ve thought of every way to get rid of these annoying vines, but chose to go with raised beds that would allow me to get use out of this area in our yard that before would only be looked at in disgust.
What To Do About The Invasive Vines?
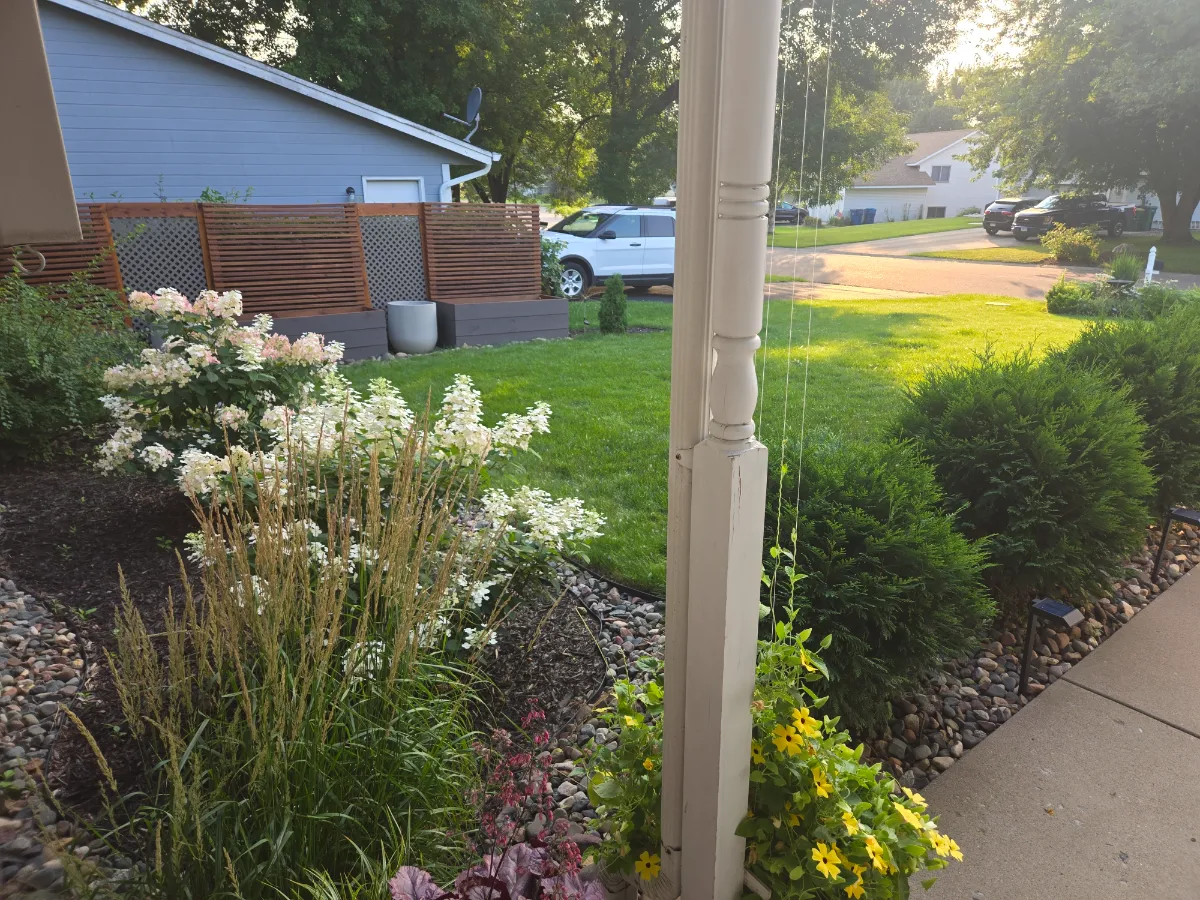
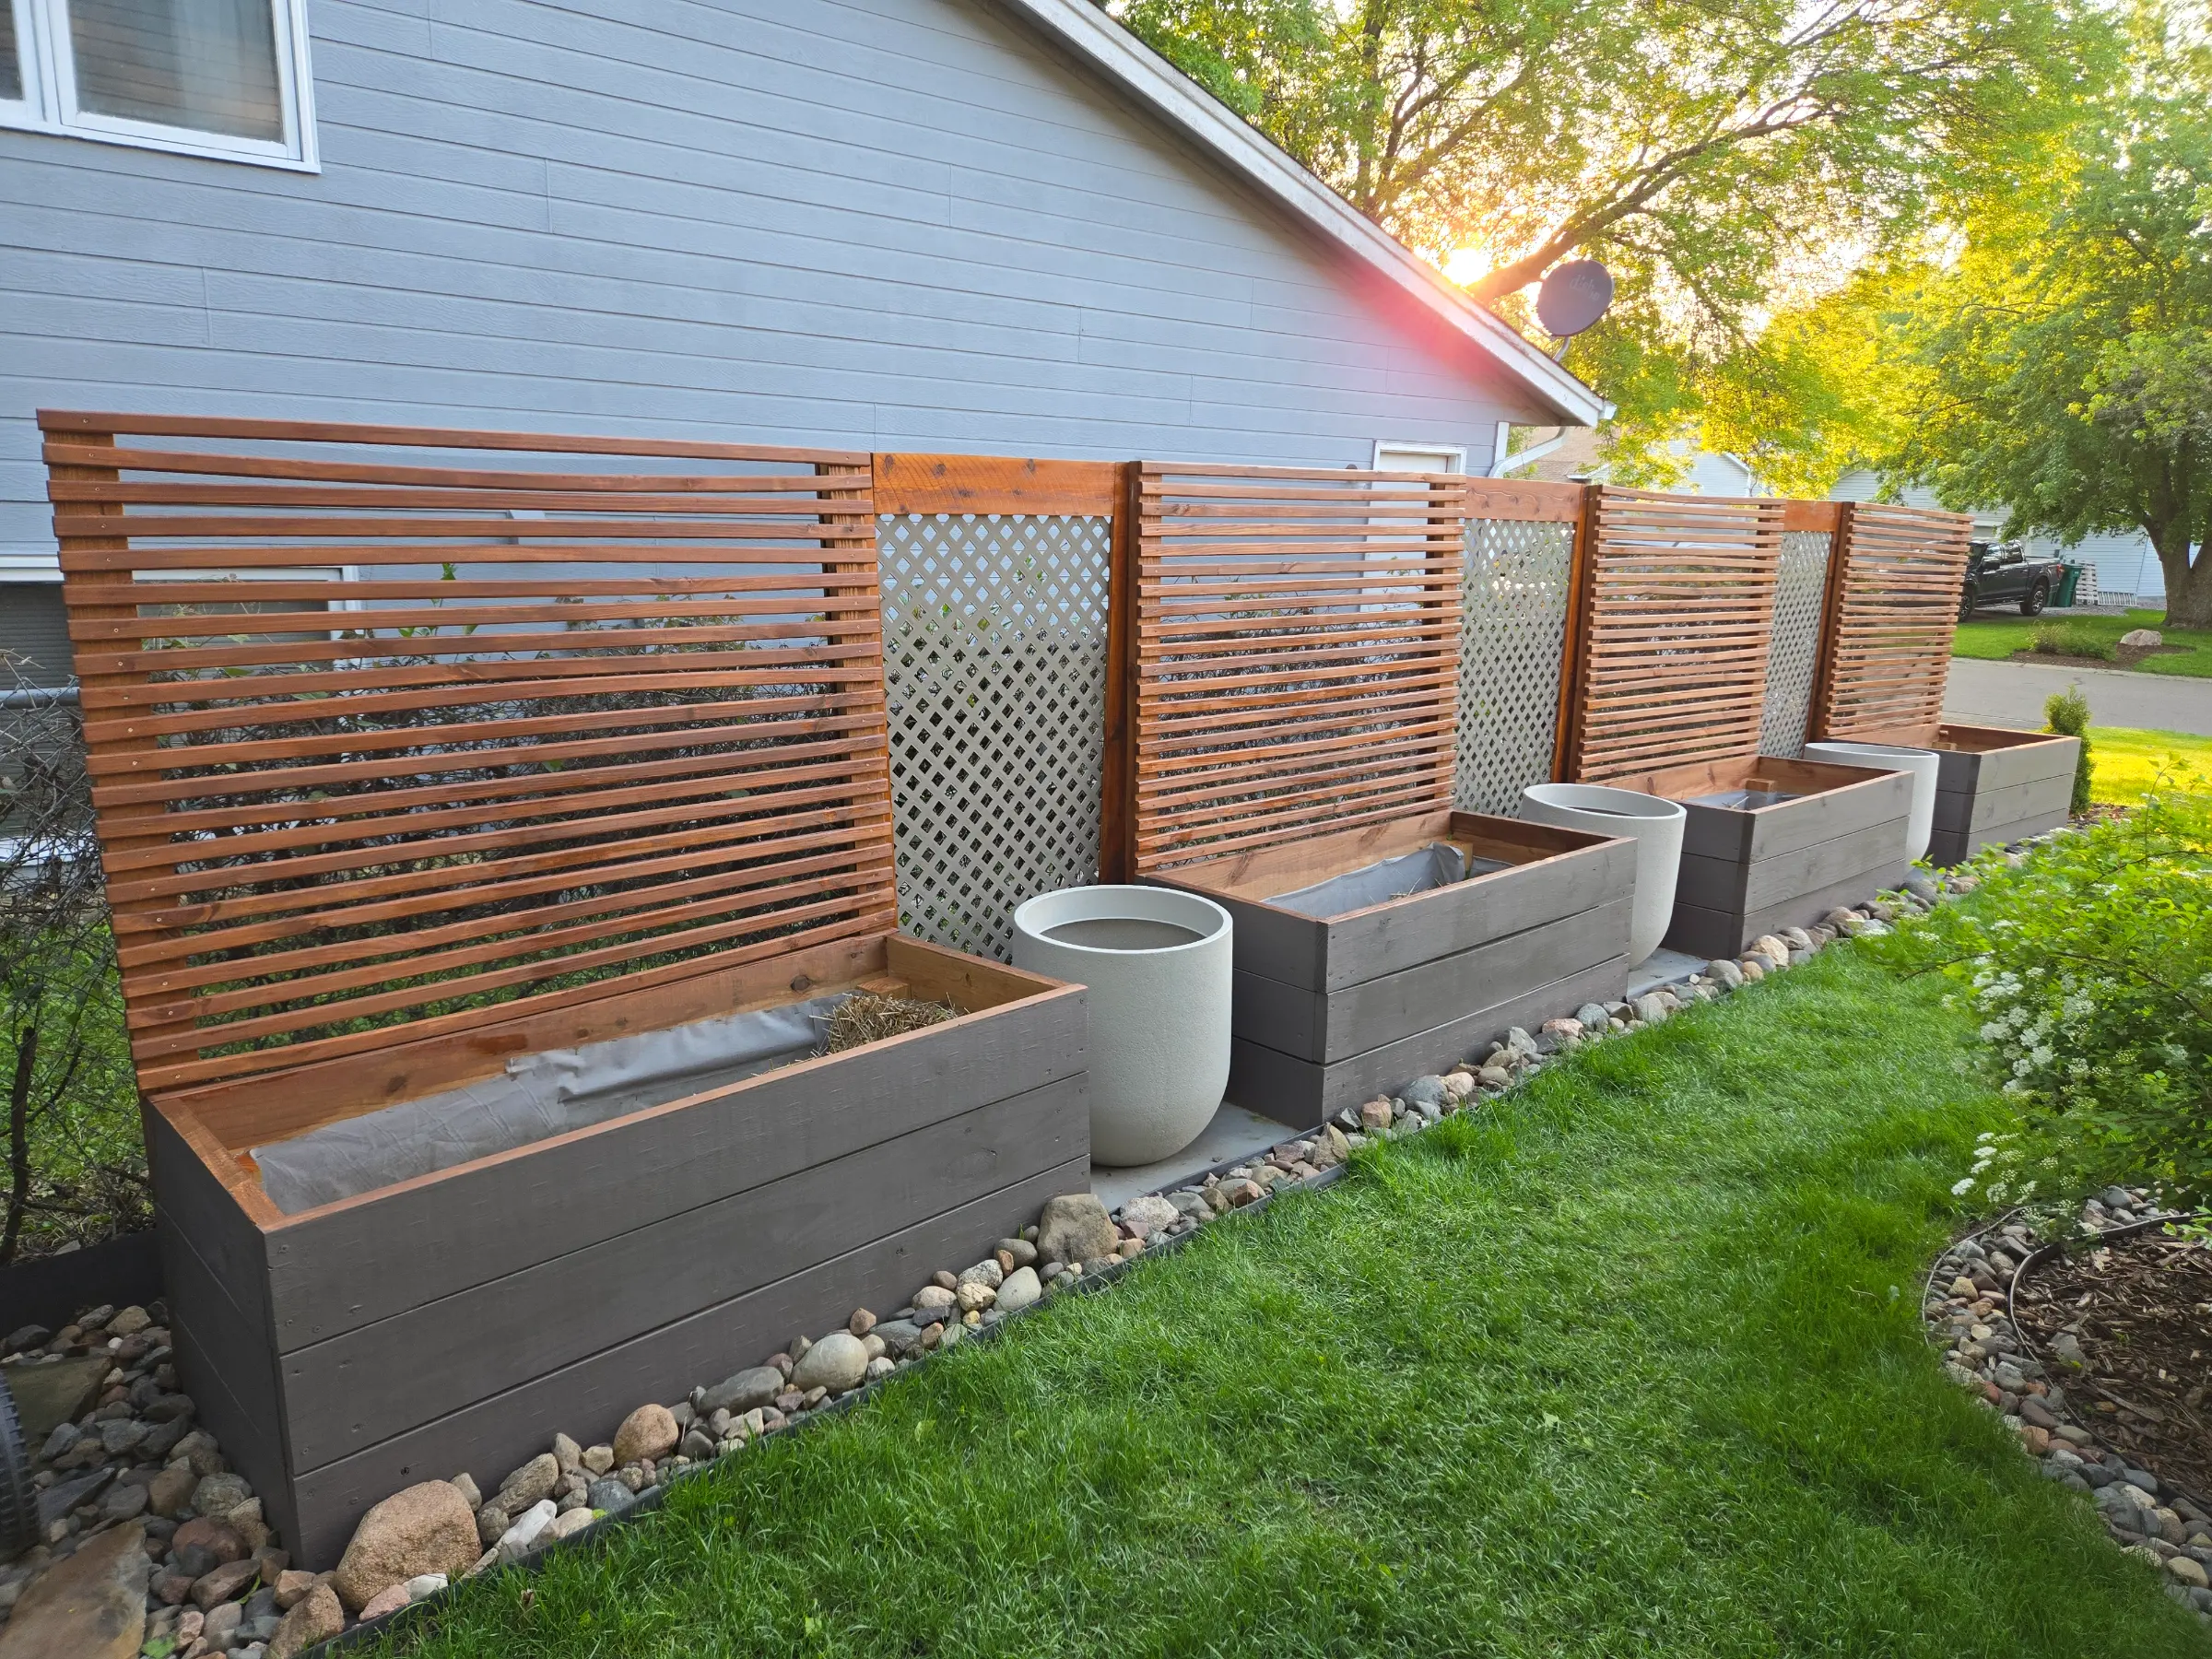
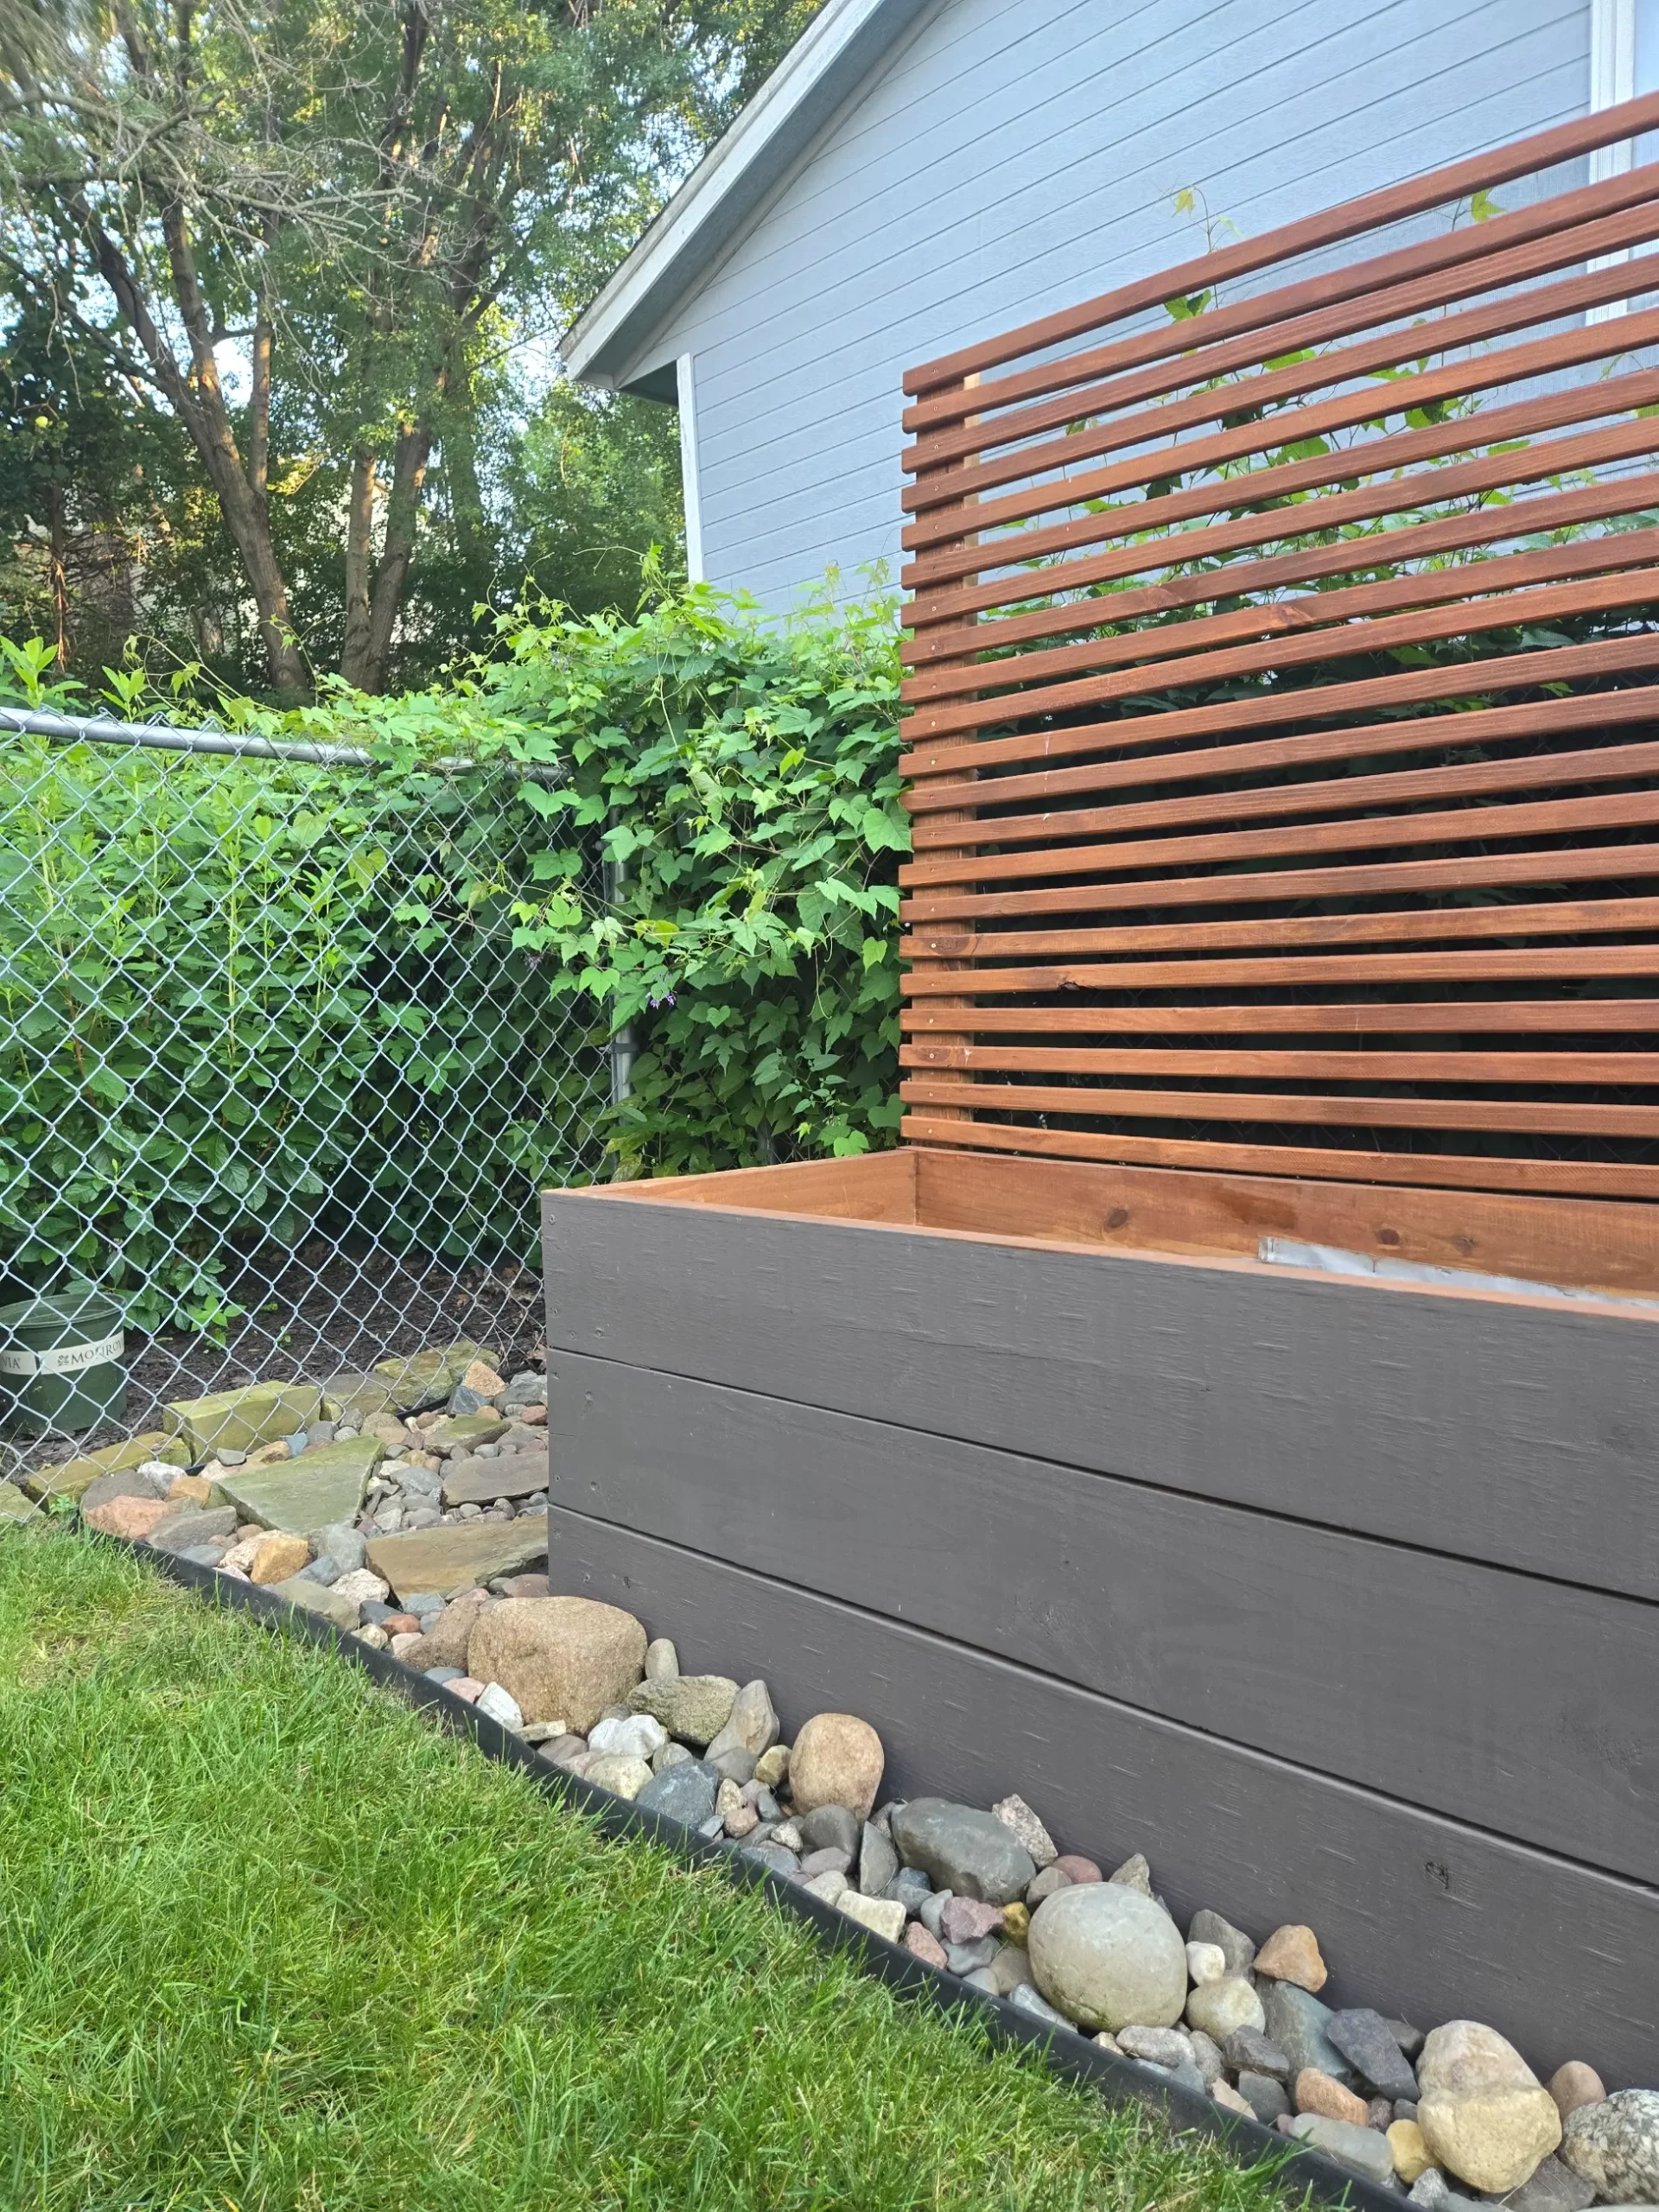
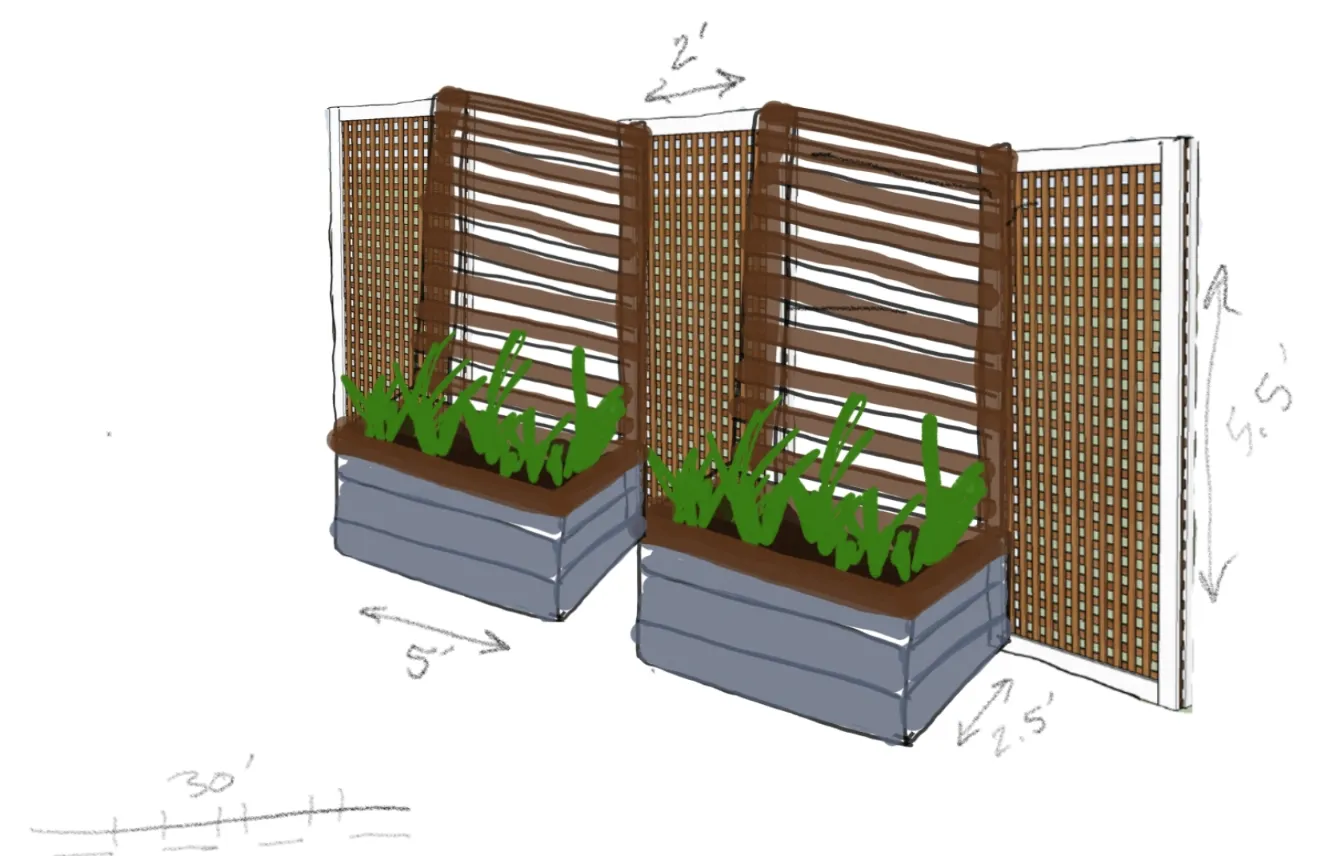
Unlike most raised beds that you see with just the base to hold the soil, I needed something that would hold back these vines as well. I decided to build a back panel that would allow me some privacy, look nice, but specifically hold back the vines from hanging over the garden beds.
Privacy Hedge Was Not An Option
You might be thinking – won’t these vines just grow straight through the slots? You are correct! I thought long and hard on this, even before having the garden bed idea. I wanted to plant tall arborvitae that would eventually grow a privacy hedge. That’s when I realized these vines would just grow through and around, and become more difficult to maintain (as I will still need to cut them back each year).
I had imagined building posts behind these arborvitaes and using a large amount of screen cloth to shield the vines back. This could have looked quite horrendous to be honest, so I kept thinking of possible solutions. At the same time I had been itching to start growing a garden, but had a hard time deciding where we received enough sun to grow most of the vegetables I would like to plant. As I clocked the sun during the season, I started to notice this was truly my only best spot, and that’s when the planning began.
Raised Beds Were The Solution
I decided to build raised beds with a tall enough backing that would allow me to utilize my screen idea without the unsightliness, as it would be hidden by my wood slots or the neighbor’s vines.
Best Type of Garden Bed
However now I had to decide what type of bed I’d want to build. I’ve always loved the look of beds built with galvanized steel and a wood frame, so I started pricing out the materials needed for something like this. I began watching plenty of videos to understand how to build these too, which didn’t look all that bad. However I decided against it after realizing I didn’t want to have to deal with buying these steel sheets and then cutting them to my preferred size. I felt more comfortable dealing with wood, so I went that direction instead.
Sketch Out Your Design
Before I begin a project, I need to visualize what I’m working with, and what I’d like it to look like, so I went outside with my tape measure and spray paint and started marking up the area. Then after I got an idea of how many beds I’d like to build, I went back inside to start sketching a rough draft for the look of the beds and made note of the measurements.
Plan Ahead
When I realized that I was intentionally spacing my beds apart so that I can easily access around them for fall cleanup, I was dealing with a decent 3’ space between each of them which was a welcome space for vines to make their appearance. I had to solve that problem quickly, which is when I started looking up how to build privacy panels using lattice fencing, knowing that it also had to be removable so I can still get behind each bed. It’s amazing how much planning goes into what started off seeming like a simple enough DIY.
Trial & Error
I ended up finding a product online called a ‘keyhole hanger’ that I thought was a perfect solution (at the time) to mount the lattice panels to the back of the garden bed. Spoiler alert, this was not ideal and very difficult to line up perfectly between both bed and lattice panel. We nixed that idea pretty quickly.
My husband thought up the idea of using really strong magnets, which too, sounded perfect! We started looking up strong but flat magnets that we could screw into the wood post, and panel frame. He found some magnets on Amazon, and we gave those a shot. They arrived, and we both got to work. It all seemed to be going well at first, and we grabbed the lattice panel to hold up to the now mounted magnet, and it latched on instantly which brought a smile to my face. We did it! Until we let go of the panel and it just dropped. I think I laughed pretty hard, my husband not so much, haha. I just realized we didn’t factor in gravity. Sure it was a strong magnet to pull things together, but not hold things up.
Finding The Right Product
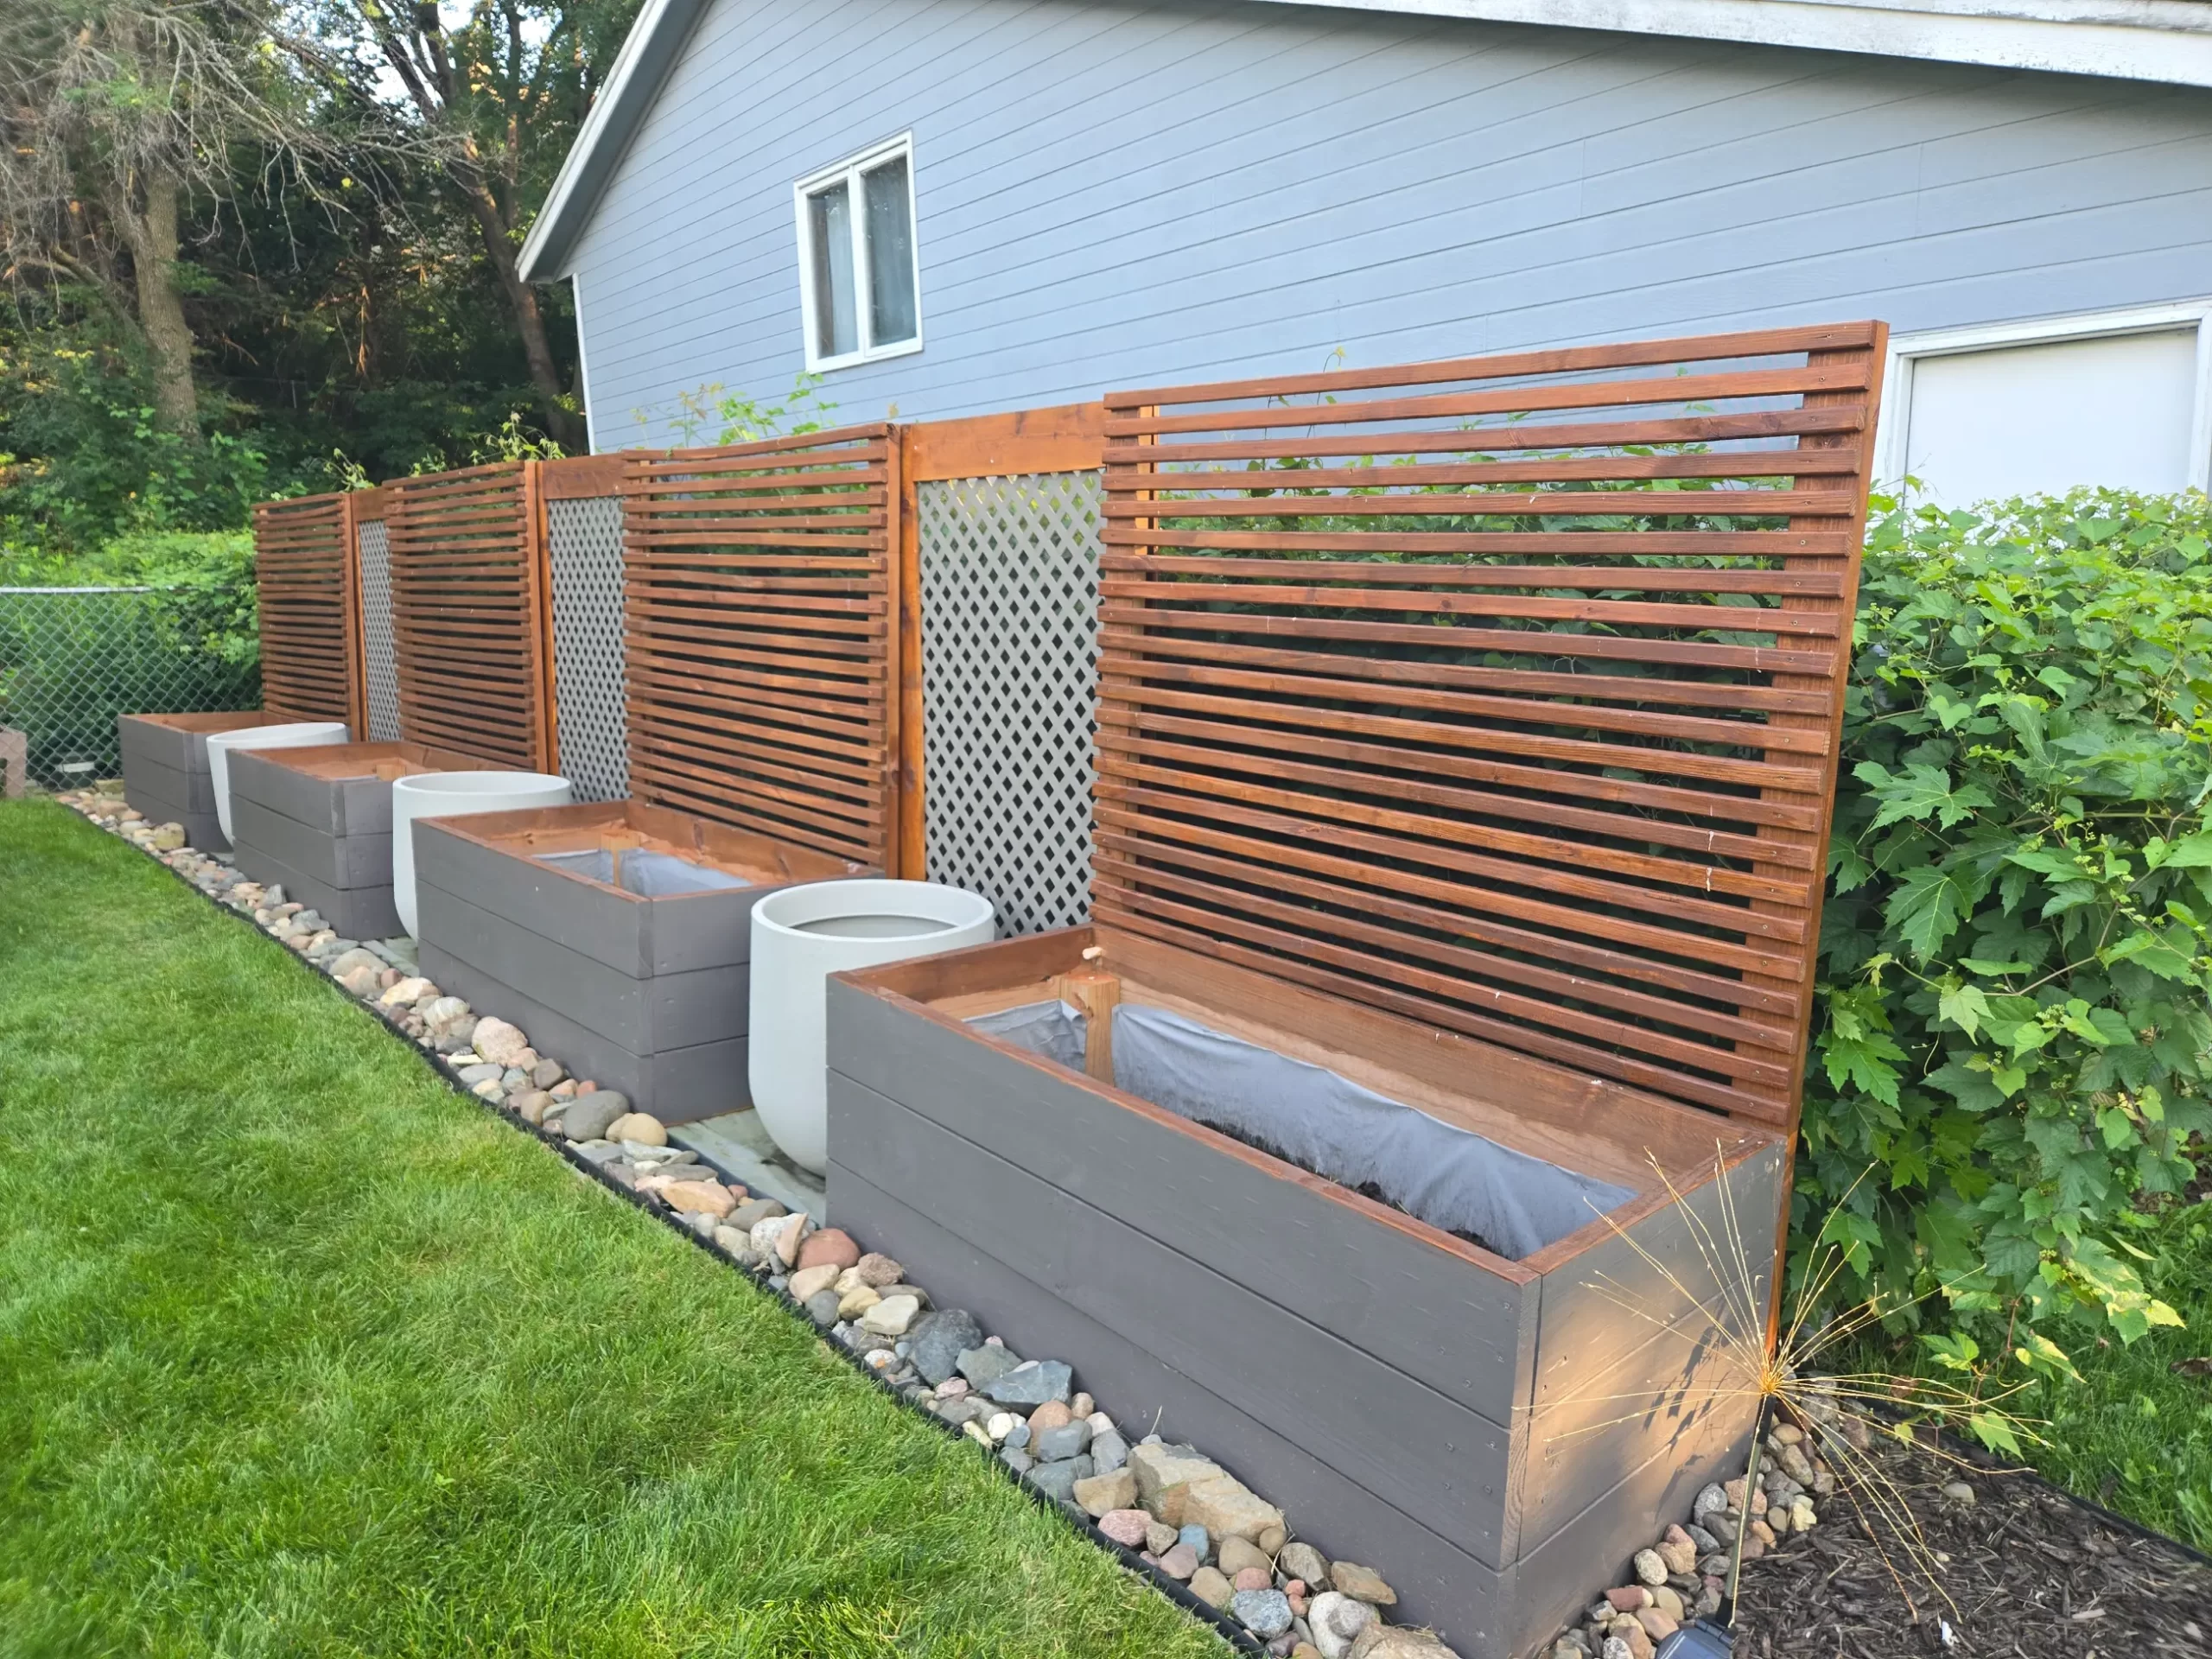
Back to the drawing board we went. This is when we came up with the idea of adding ‘U’ shaped brackets at the bottom back of the garden bed, which we could rest the lattice panel on to bear the weight, and the magnets would pull the top and hold it in place. Ding, ding, ding! This was our solution, and it worked wonderfully. It’s so easy to pull these things off now and place them back.
Make Sure To Complete Your Project
I do need to add in another failure that occurred, but this was only due to the fact that we had not finished the lattice panels before eagerly using them between the beds. My design on the panels wasn’t the best, as I wanted wood that would be light enough and cheap, which is why I went with ‘dog eared fence’ to frame the lattice. I only bought enough to frame the front, in such a way that got the job done. If you look closely I framed the top (bottom) fence shorter than the vertical side pieces for the frame. I had not been thinking at the time, and thought this made sense structurally in my head.
When making lattice panels, make sure you have a solid frame on the back as well. Without a frame on both sides, you will be dealing with a wobbly panel. This was the reason our magnets eventually failed too. The sun started to warp our lattice frame, and with the heavy winds we were getting, I’d find these panels unlatched and not lining up as well.
I thought I had to find another solution, so I found these wide furniture clips on Amazon, which was my cheap fix to holding the panel to the garden bed. It worked great, but I wasn’t happy with it. This is when I realized we needed to finish building a frame backing to our lattice panels to straighten them out again. I used the same wooden slots we had used on the bed as we had leftovers that were the perfect length. We screwed them into the lattice and the dog eared frame in the front. Noting, we had to find the perfect length screw so it would not go all the way through, so please make note of this if you make it a DIY of your own.
Final Touches
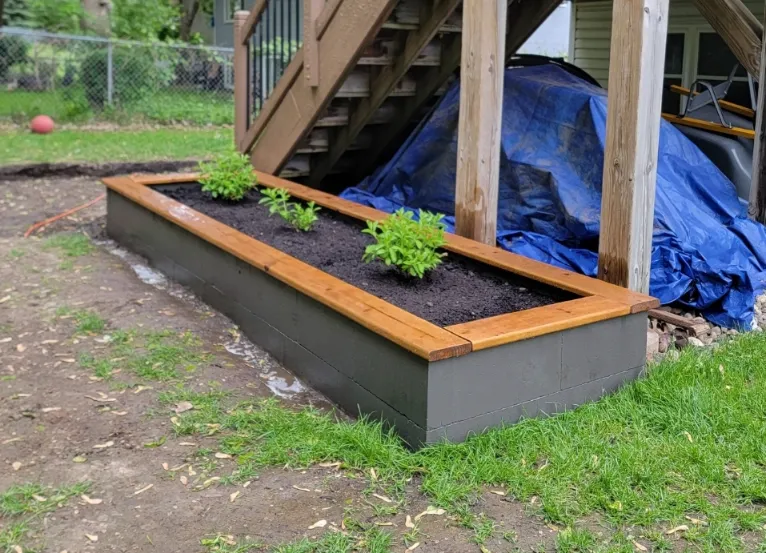
This was the completion of our project. Everything is still holding up nicely, and I no longer have to use the furniture clips. The vines are remaining behind the garden beds, and the screen cloth is working to keep them from growing through. I’ve added some stain and paint to the beds to match up with another raised bed I built out of concrete blocks in the back, and now I just need to fill them with dirt and start planting my vegetable garden.
Another project in the books, and reason to enjoy our yard.