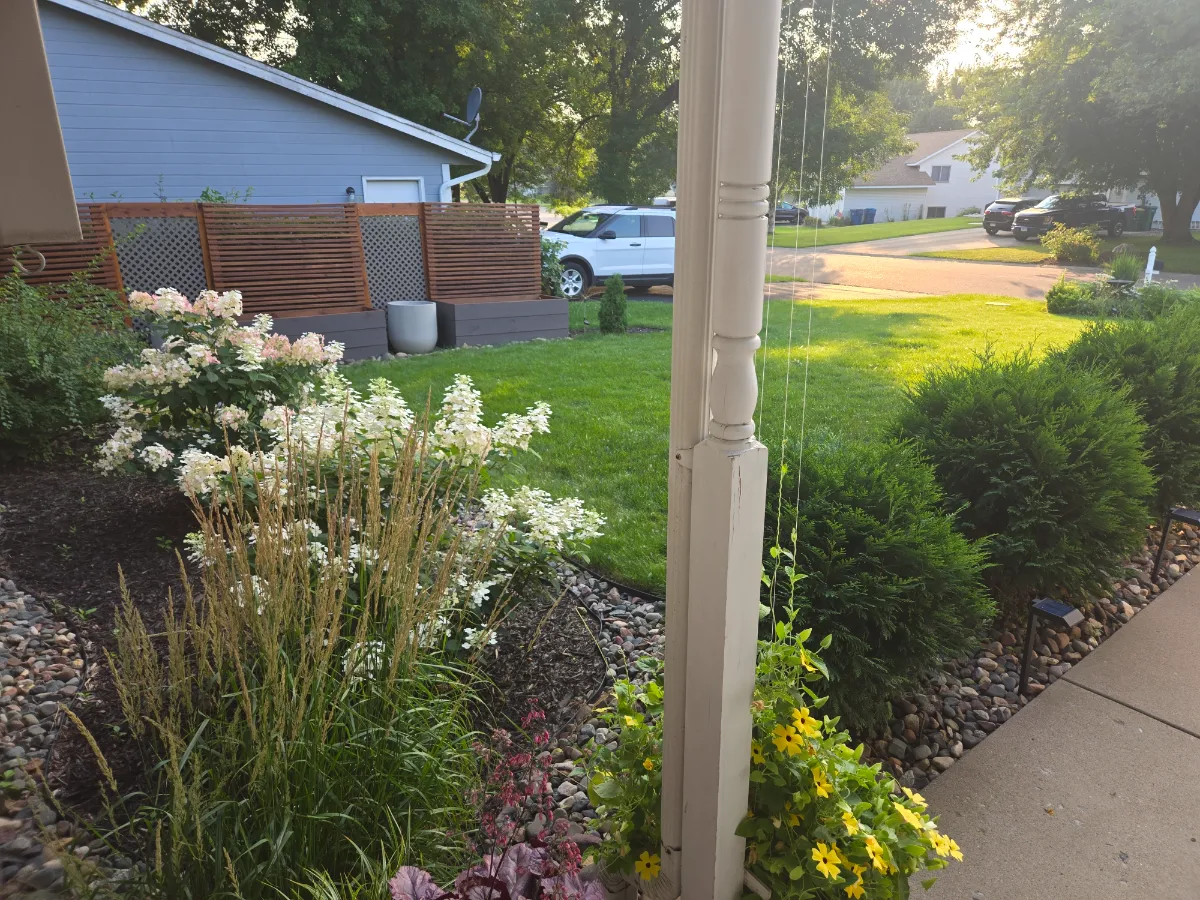
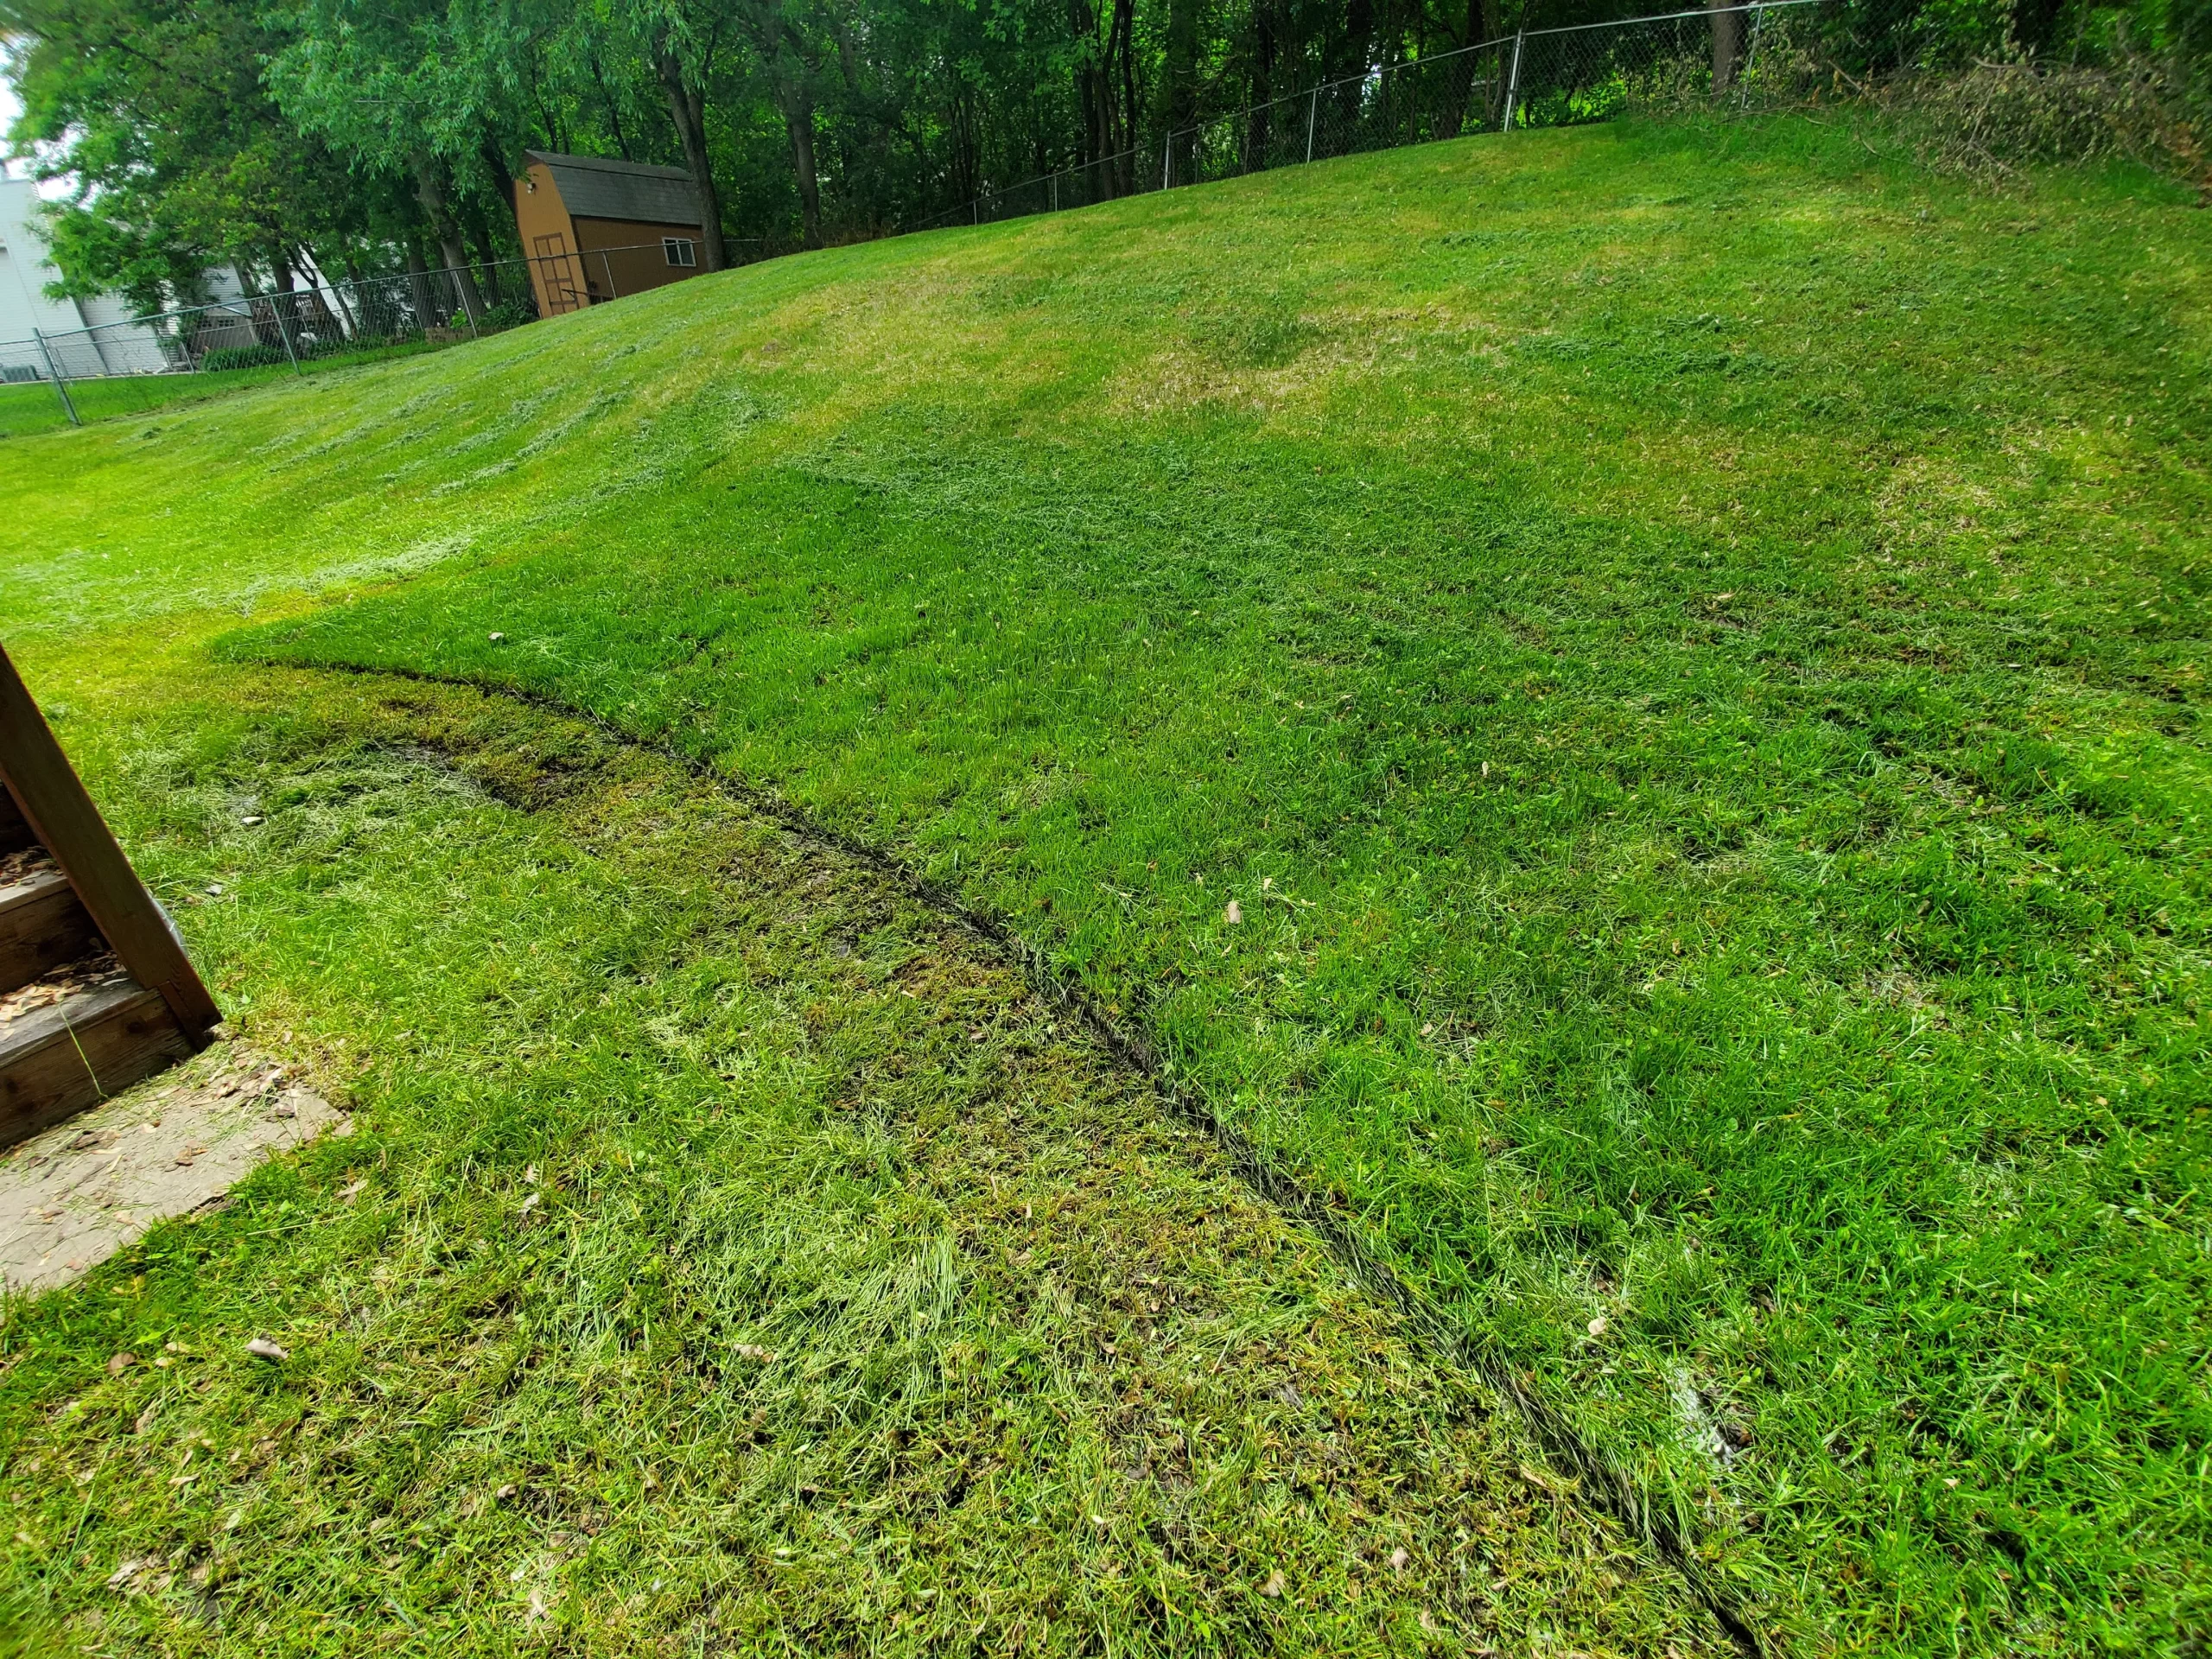
One thing we did not know when purchasing our new home back in 2018, was just how bad it could be, come Spring after the snow had melted. Yes, of course there was the expectation we could be dealing with some aftermath of wet soil, being at the bottom of a pretty steep hill. However, the length of time it would take before it would dry up.?.. Now that was not something we thought we’d encounter…
For a long while we were unable to mow this section of our lawn, and let me tell you – that grass was certainly starting to get tall. We ended up purchasing a lawn trimmer just to “cut our grass” before it got out of hand. This worked for us, but we wanted to enjoy our new backyard, and this section was where we’d walk off our deck. I was done walking through this mud that felt like quicksand (disclaimer: I don’t actually know what quicksand feels like, but I feel like I can imagine it well enough – haha). My feet would sink into the muddy soil and you’d walk out covered in heavy wet mud stuck to your shoes.
What comes next you wonder? Loads of research and YouTube videos on how to install a French drain. I was all ready to do this, as it seemed “simple” enough as a DIY. However that’s how I am when I start an idea. I figure if I learn everything I can about something, I can do it myself – but knowing just how much would have been needed to do this right with sloping it appropriately, the materials and labor needed to pull this off correctly, it was worth paying a professional. AND IT WAS! I can go into more detail on this if interested under a different post.
Now fast forward a year – Winter has past, Spring is upon us, and although we aren’t dealing with the same standing water we had prior to this drain installation – we are now proud owners of our new puppy, Archie. He made it easy for us to realize that we are STILL going to be dealing with a muddy mess at the bottom of our steps as he loves to run down and jump onto the ground when we let him go out to play or do his business. It was cute at first, easy to clean off those little paws, but he grew bigger quickly and his jumps off the stairs after a rainy day got old pretty quickly. 🙂
THE PATIO PLANS BEGIN
I remember watching so many videos online and looking up images of patios that people have installed to get my inspiration and understanding of what would be needed. I knew having this added by a professional was just not in our budget (since we just spent $$$ having our French drain installed). However that was ok with me. I wanted it bad enough, that I would put in the effort to figure it out because I knew once done – I’d no longer deal with so much mud at the bottom of our stairs after a rainy day.
What about Brick?
I started by thinking I would make a small section using brick, but after thinking about the process going into this, and having to make sure I had a good flat foundation to start laying, I started to think this was not what I wanted. I consider myself an imperfect perfectionist, and I didn’t feel that this patio needed to look perfectly placed. Besides, although I do want my projects done correctly as possible, I don’t want to have to get out the string/levels, etc. to perform the job… I like to be able to eyeball what I’m doing sometimes. ;-P With brick, I felt in order for this to look nice – I’d need to do everything perfectly. I didn’t completely knock the idea right away though, as I did make my trips to Home Depot to check out prices, and style options. In the end, I wanted something more natural looking.
Why not Cement or Concrete?
I figure I’d add this idea to the mix as well, as it was brought up as another option when discussing the idea of putting in a patio to deal with this area of our yard that remained muddy after a good rainfall. However as mentioned above, I just didn’t have it in me to want to deal with the effort going in to make it look perfect. Also I strongly believed we would deal with some cracking eventually with the soil shifting from being wet/dry – and again, it just wasn’t worth it to me or the look I was going for.
Flagstone it is!
Not only does flagstone look great no matter where it is, and how it’s used …. It provides you the flexibility of making your project imperfect, but still look great. Another bonus, is if you have yourself a landscape supply company nearby where you can buy a pallet of flagstone – it’s much more affordable, in my opinion.
We had already been purchasing our river rock and mulch through this company, so when we explored the flagstone options, I was itching to get started right away. I was happy to finally have found something that we were ready to move forward with. However now that we know what we want to use, how do you begin?
How To Install a Flagstone Patio:
Spray Paint Helps Visualize
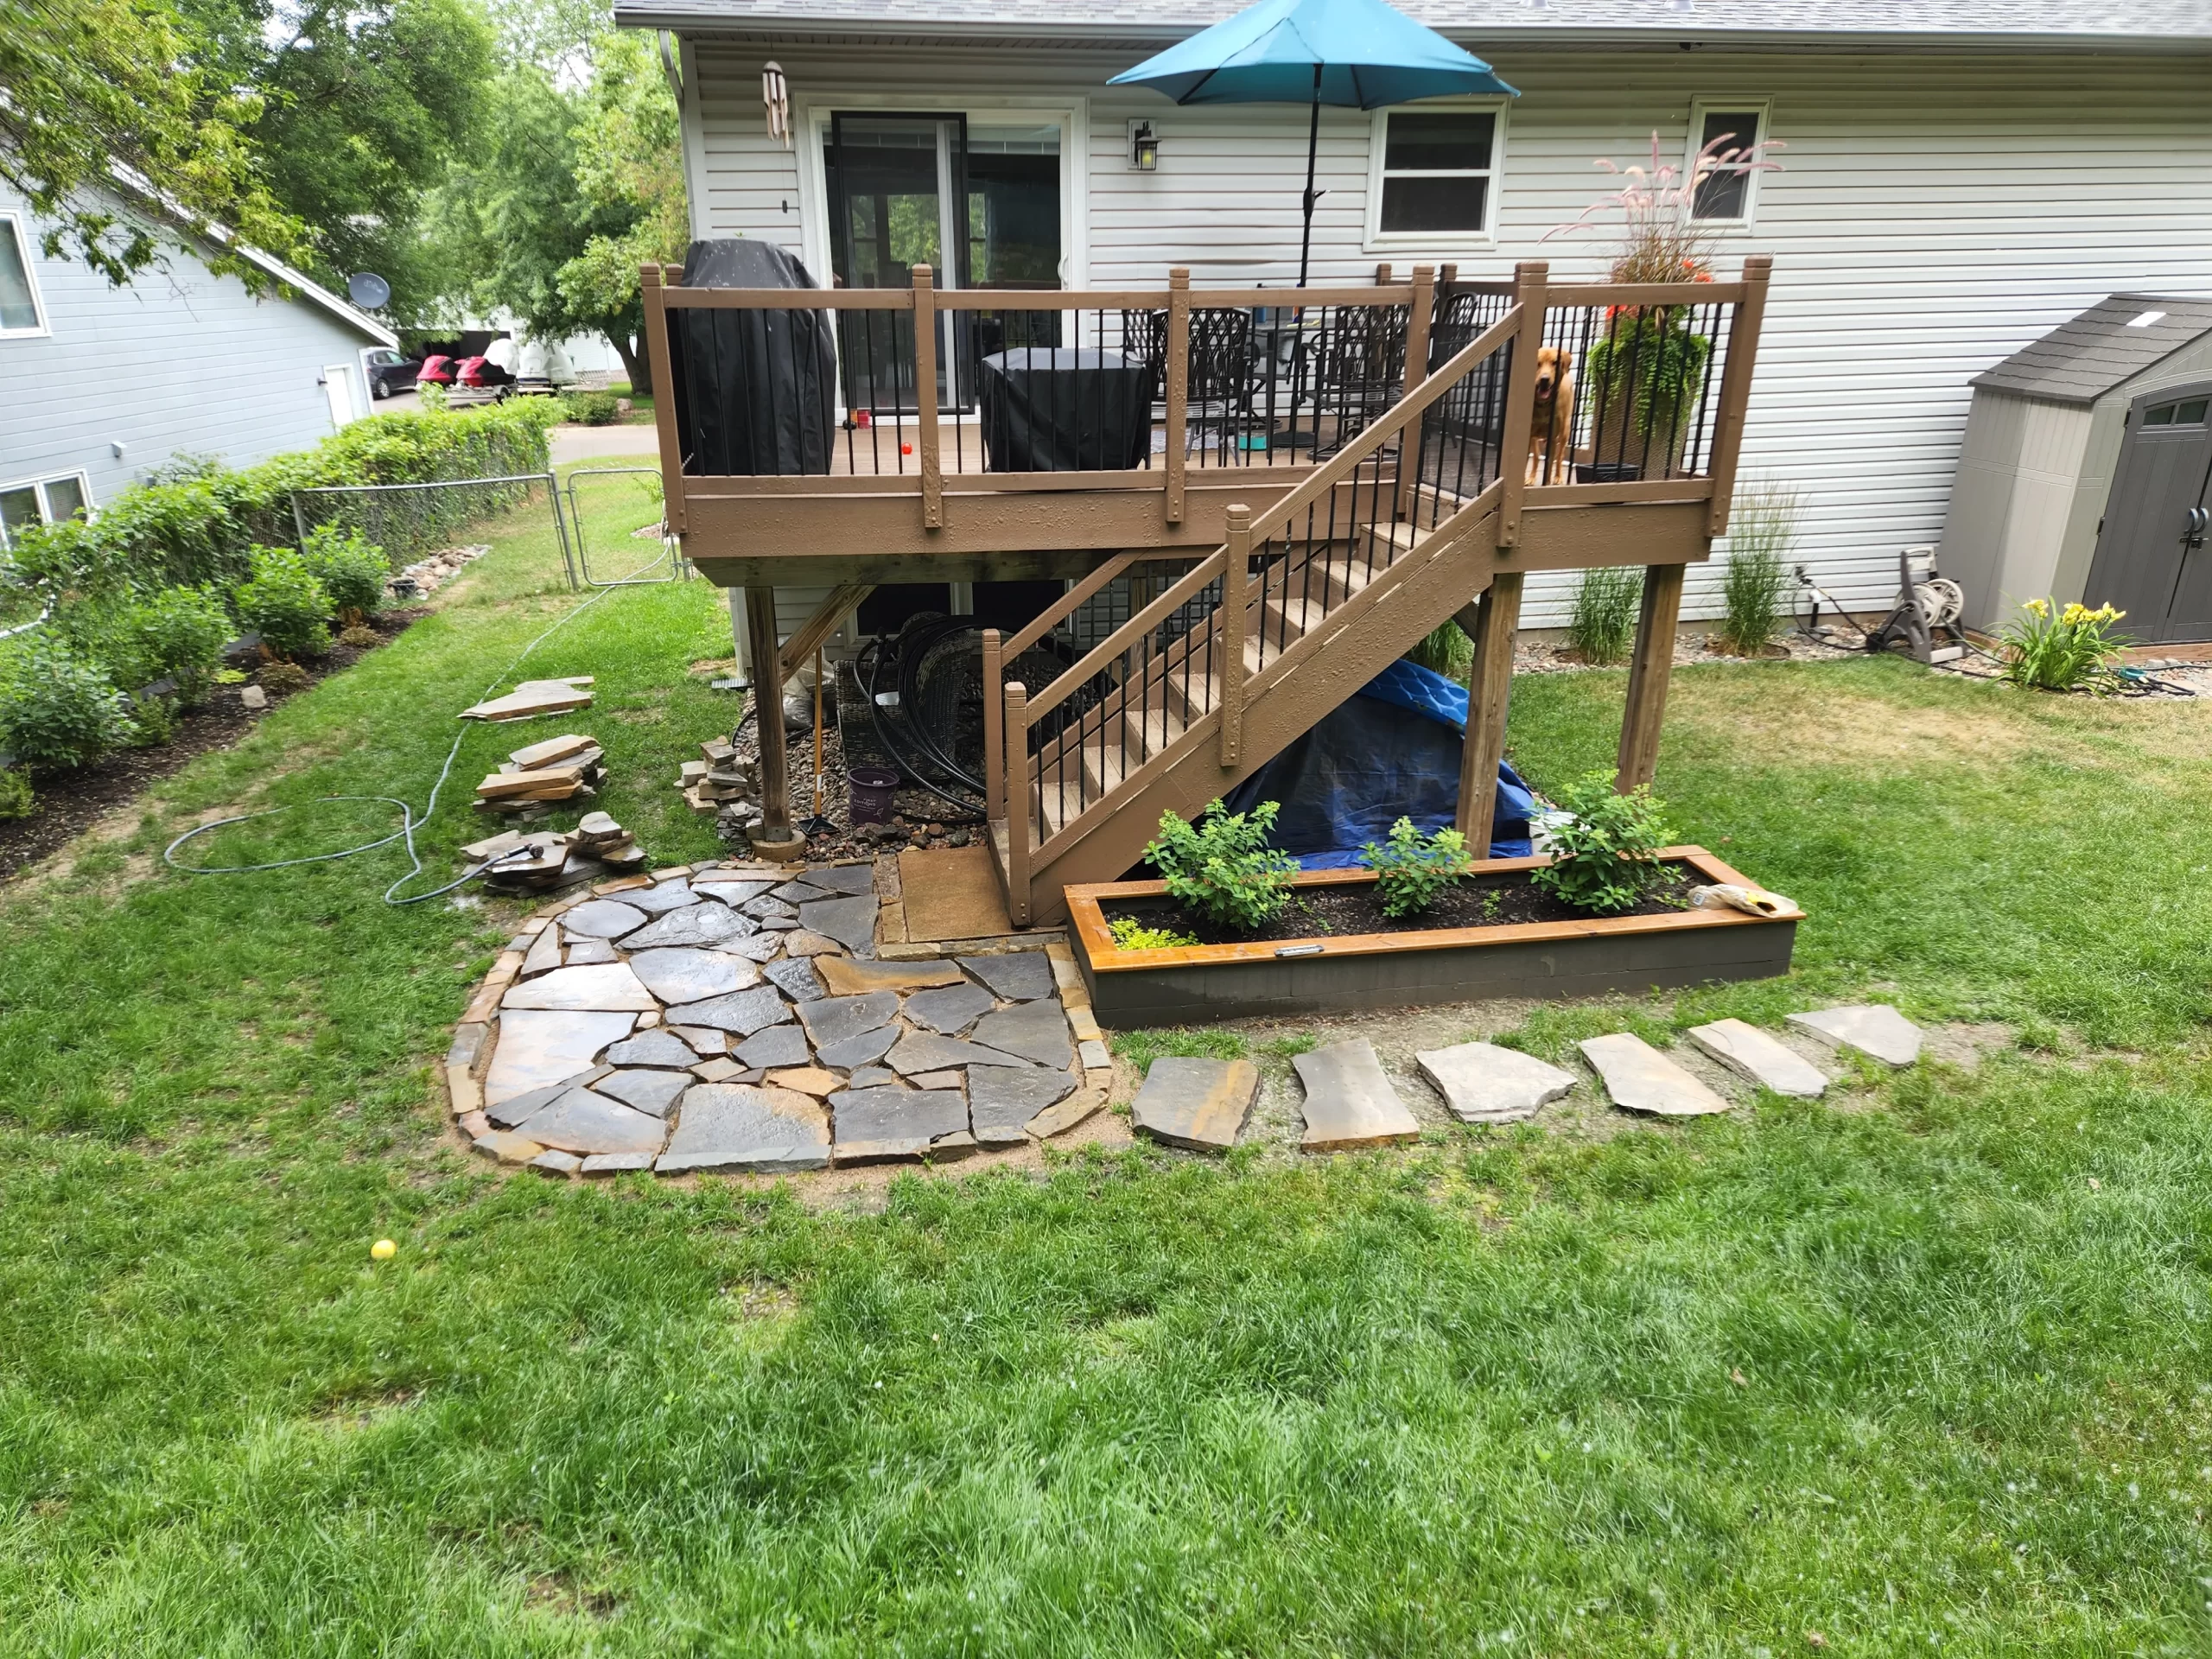
I have always found it helpful for me to visualize my plans by getting a can of spray paint, and marking out where I want it to be. Once you start marking out your design/layout you sometimes realize you need to make some tweaks in your design. Do you want this straight edges, round, or what? Does this need to be larger, wider, what? Once I started marking up our grass, I liked a more curved look. I made it a bit larger than originally planned as well because I was trying to think ahead on what I’d like to do with the space.
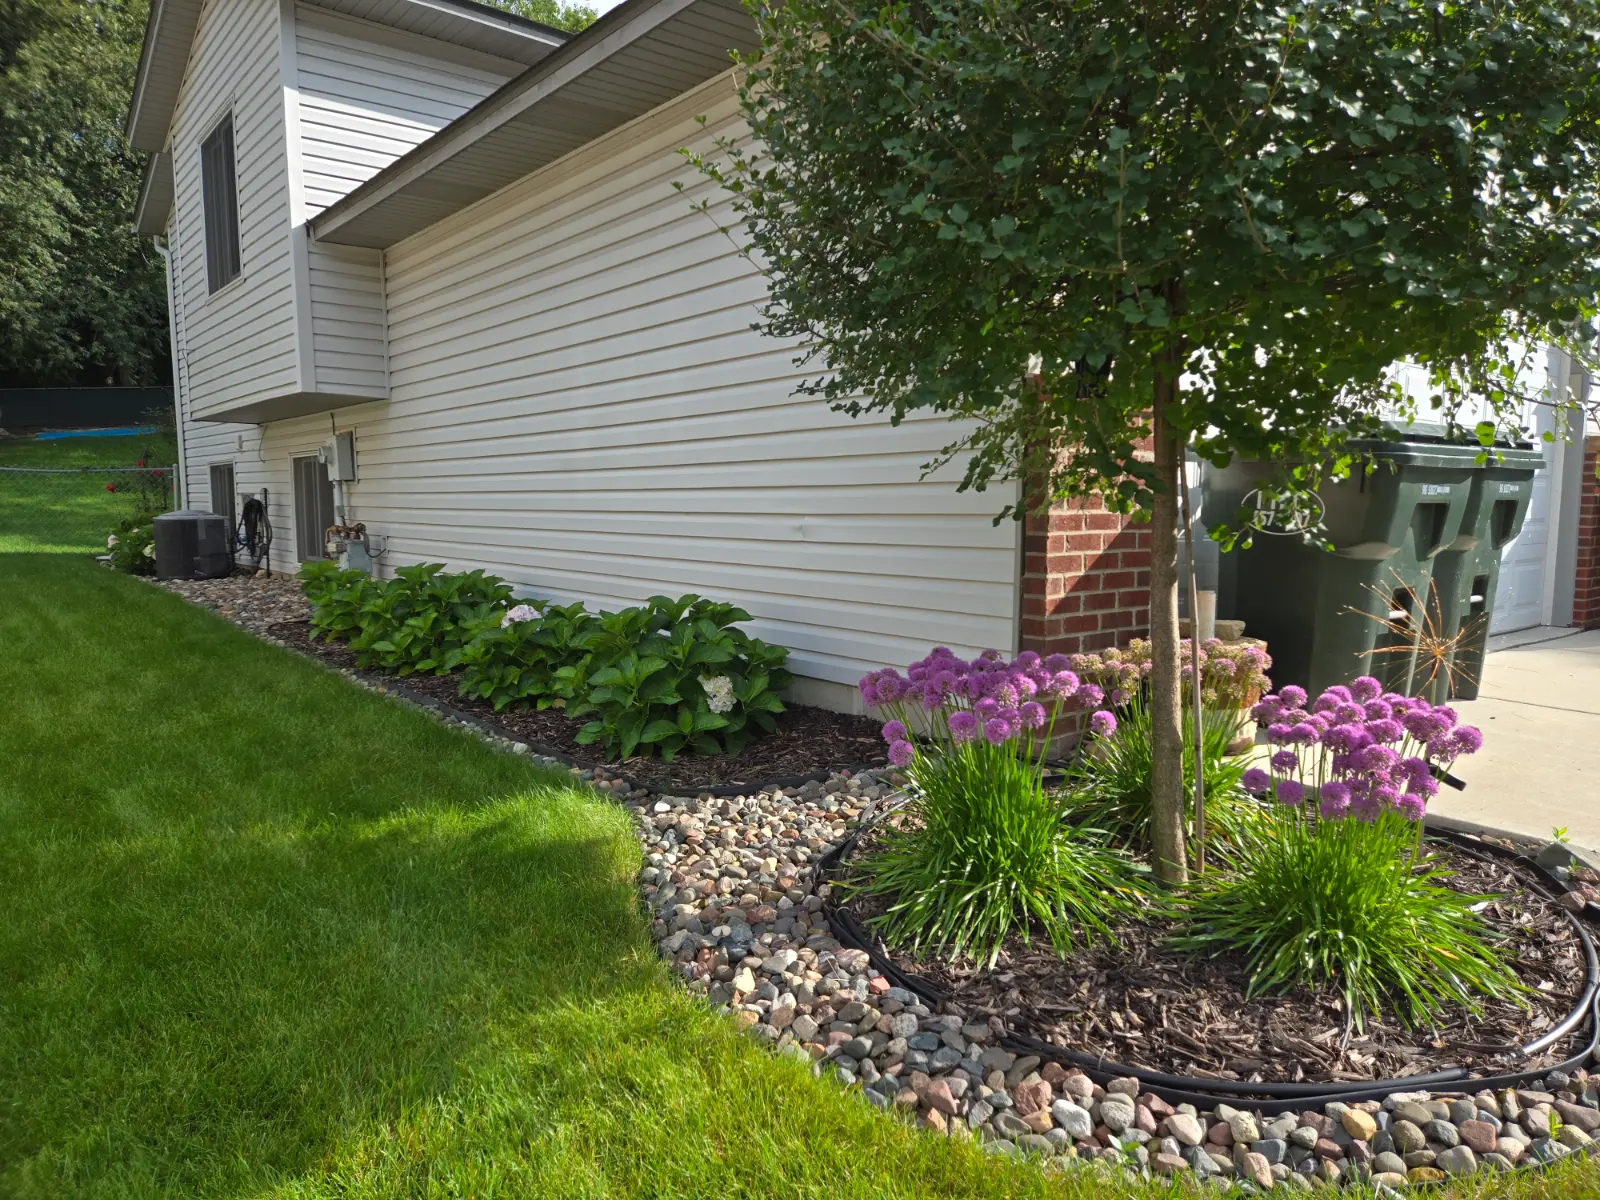
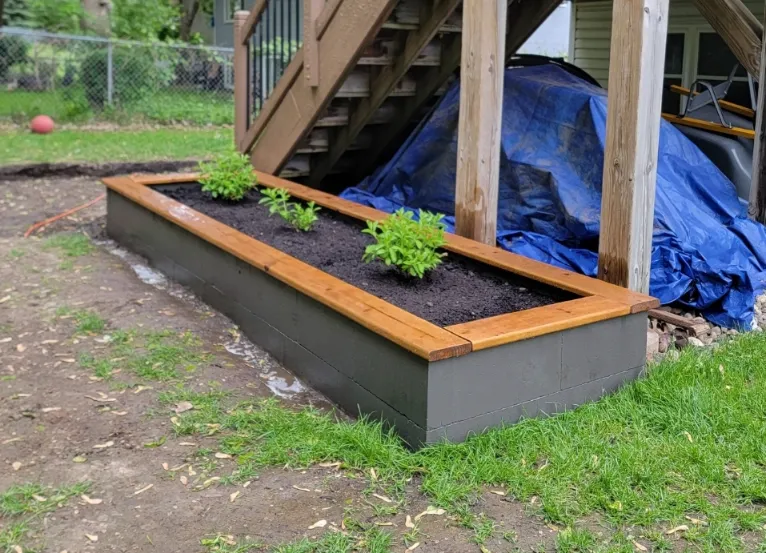
I built a raised garden bed near our steps recently to lift my recently planted hydrangeas, that would deal with standing water anytime we had a lot of rain, and I knew they wouldn’t last if I left them as they were. Plus they would be the first thing my dog’s large ball would hit coming down the hill, when he was out tossing it around. I found several broken branches when this happened, so I knew I had to adjust my plan. **Getting off topic – you can read more about this project ‘here’ :)**.
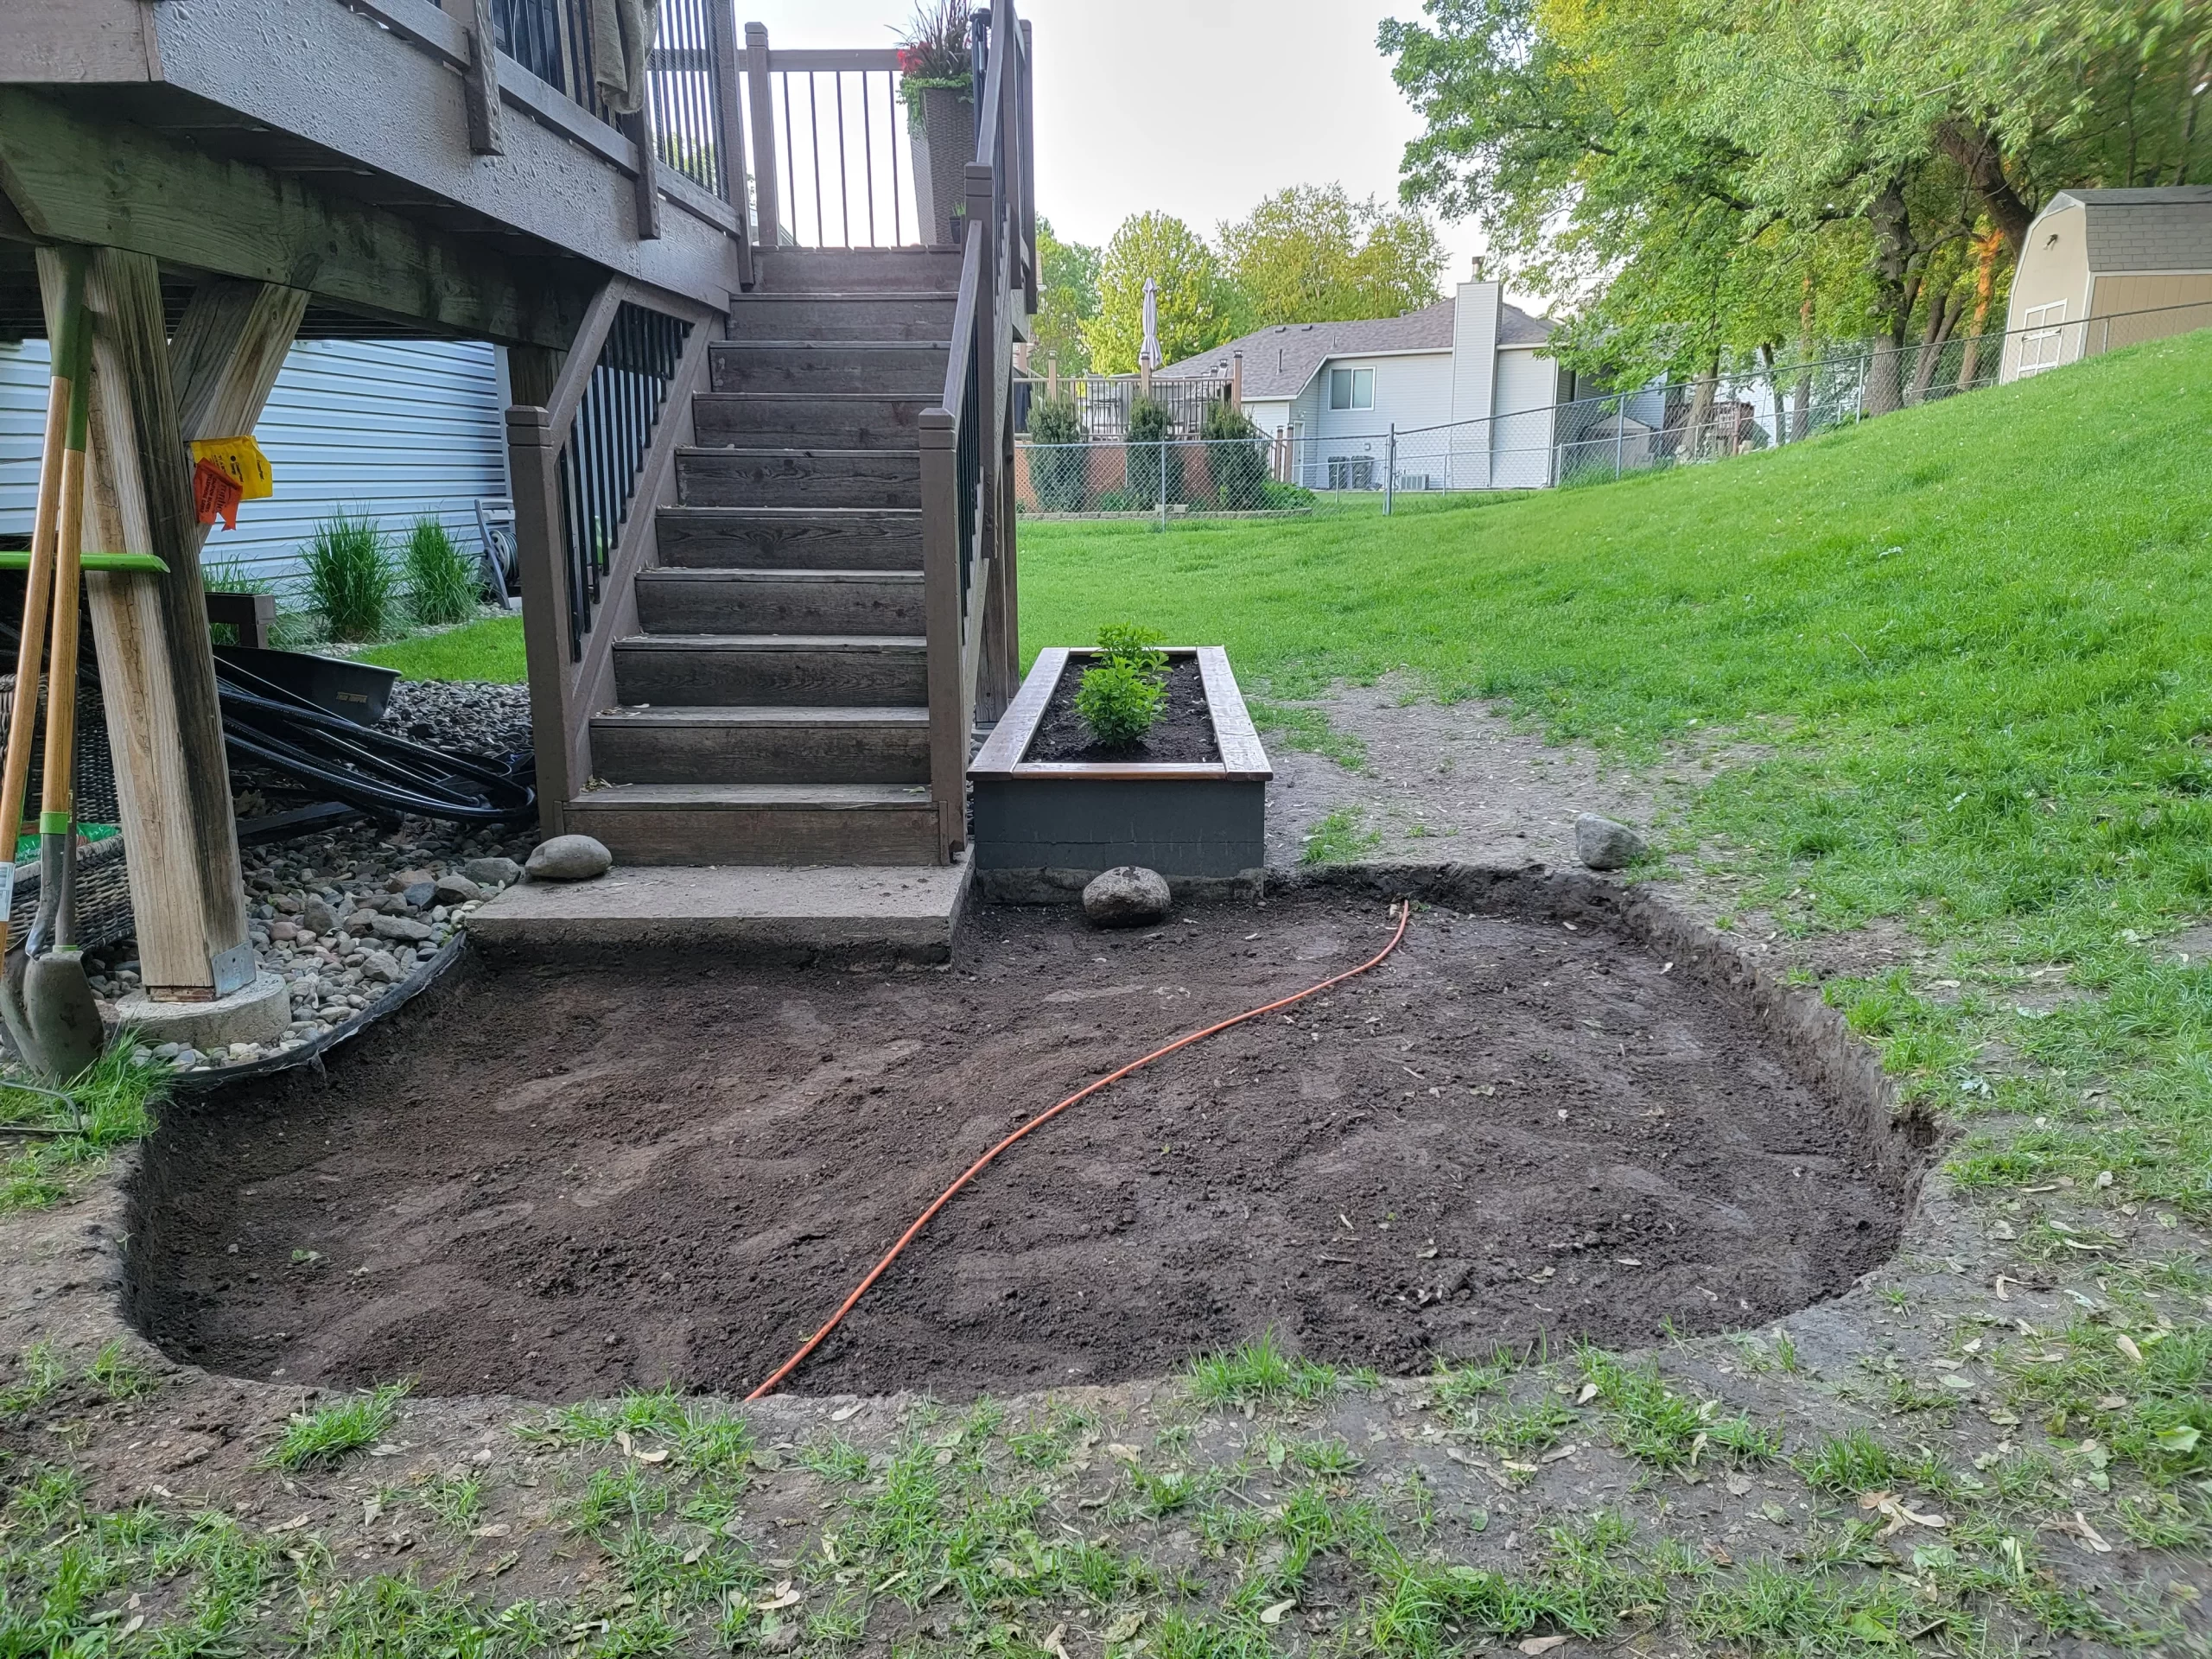
Ripping Out the Turf
This has to be my least favorite part of landscaping. If you have an area of your lawn and do not have the patience for laying down cardboard to kill the grass, you will need to rip up the grass yourself. I’ve found this tool I picked up from Home Depot called a Steel Landscaping Edger by Ames to be incredibly useful with all of my landscaping projects. Linked above if you want to check it out. I’m not affiliated *yet, but feel it’s still worth sharing such a useful garden tool.
I can use it to edge/mark out my design, and then squat and push forward at as flat of an angle you can crouch down to to allow you to cut beneath the grass and rip the turf up cleanly. This is the best way I can explain this action, so I hope that made sense. I found this great though because there were times I’d have a nice slice of grass/turf that I could repurpose elsewhere in our yard that had a dip or where grass wasn’t coming in. It’s worked so well too.
Time to Start Digging
It is always best to call ahead before you start digging, and regardless of the area being marked by your city – if you are new to the property, it doesn’t hurt to still be mindful as you are tearing through the earth. I knew from prior projects, digging in our yard, that there was a cable running around our home that was installed by the prior owner. I fortunately found this while shoveling dirt away, and not jabbing my shovel through whatever cable they had running underground (although it’s likely serving no purpose anymore – we believe it was a satellite cable they put in long ago that’s no longer being used).
Making Layers
You will need to dig deep enough – it’s best to go about 6-7″ down to allow you enough depth to provide you with a solid base for your patio.
Keep in mind what you are using as your patio though, as you need to factor in the depth of your rock, brick, or whatever you are adding to the top. In my case the slabs of flagstone were roughly the same, but some thinner slabs we’d simply add more sand to raise them up with the rest.
Crushed Rock – Class 5 Gravel
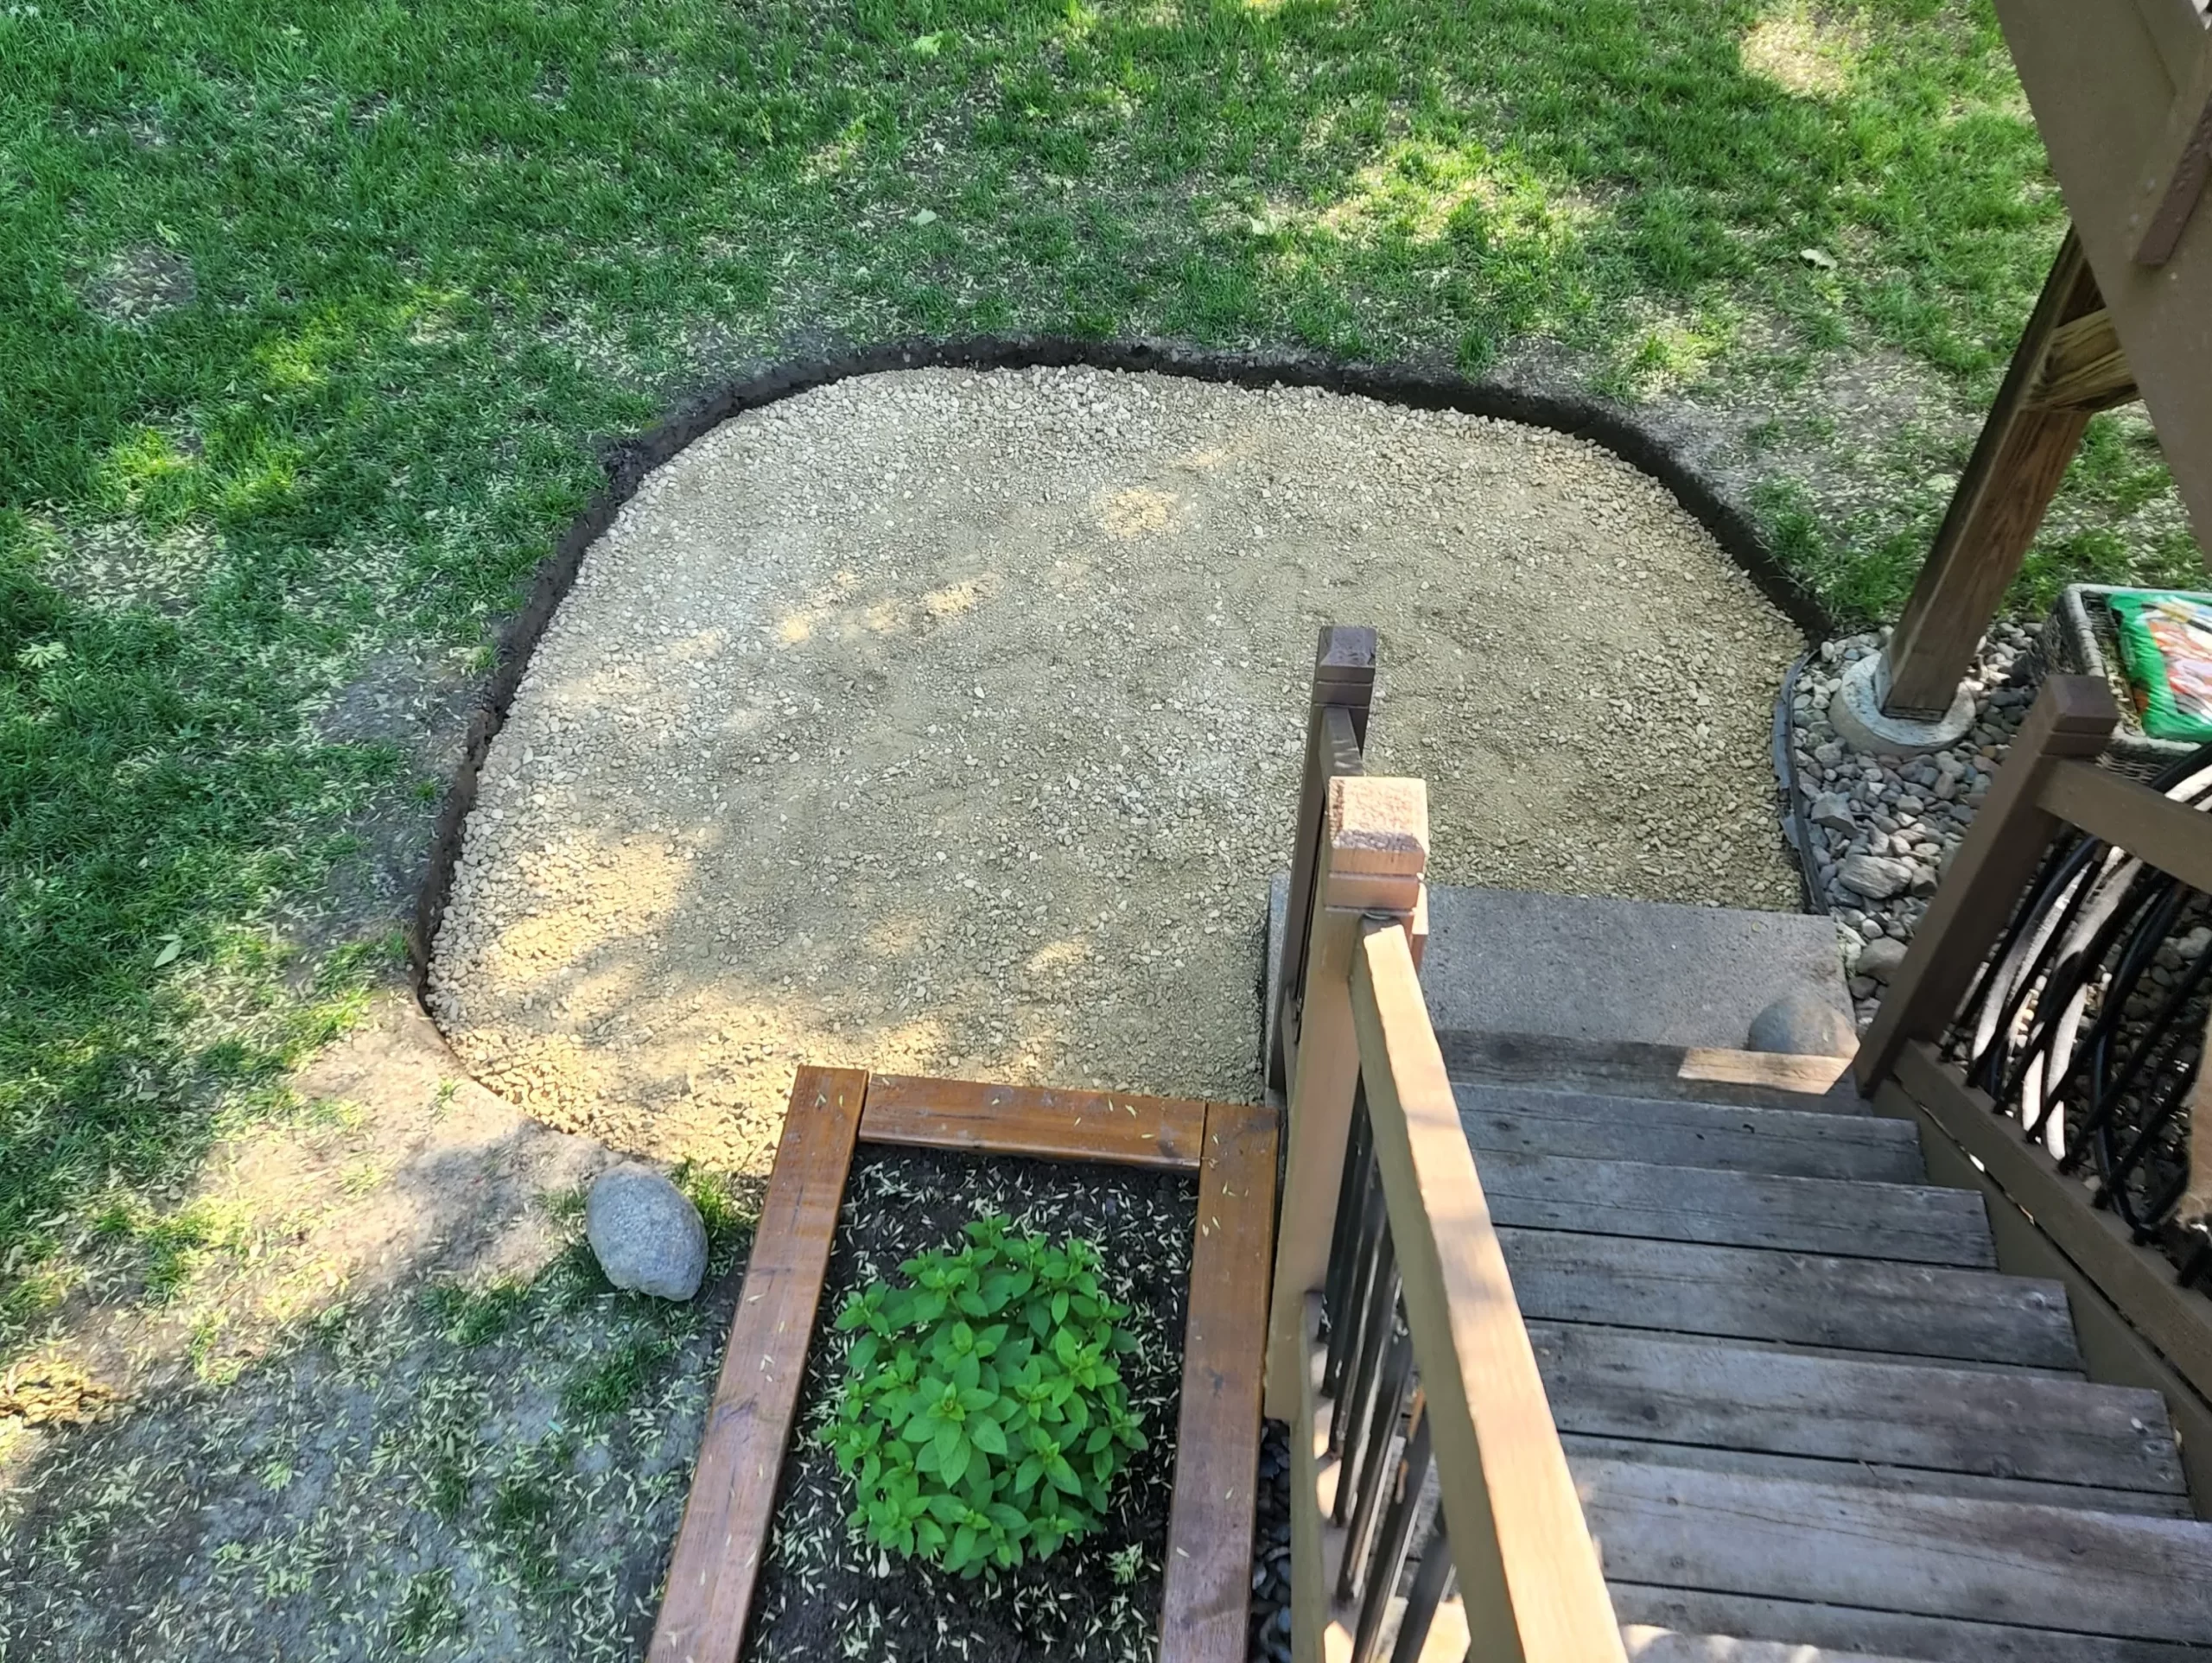
Your first layer should be to add a couple inches of Class 5 gravel. This will help with drainage and provide a stable base. We picked up a truck load (bed of an F150) and this was enough for us for this space of about roughly 100 square feet (+). If you are unsure how to get your square footage, just take the length x width of your area to get the square footage for your project.
Note: In between each layer, don’t forget to tamp down your rock or sand. This will make sure you have a solid layer without loose areas that may shift or weaken your layers later. We used this Steel Tamper by Ames that has worked well in several of my projects.
Sand
Our next layer used was sand, which this time we just picked up bags of it from Home Depot since I think they were running us about $3-4 per bag at the time. Here is the sand we had been using, called Paver Sand. This worked well for us, and was fairly inexpensive. I can’t recall how many bags we used, but I think we might have purchased around 6-8 bags.
We too needed to make sure to add our edging before adding too much of the sand so we could ensure we had a good frame for our patio.
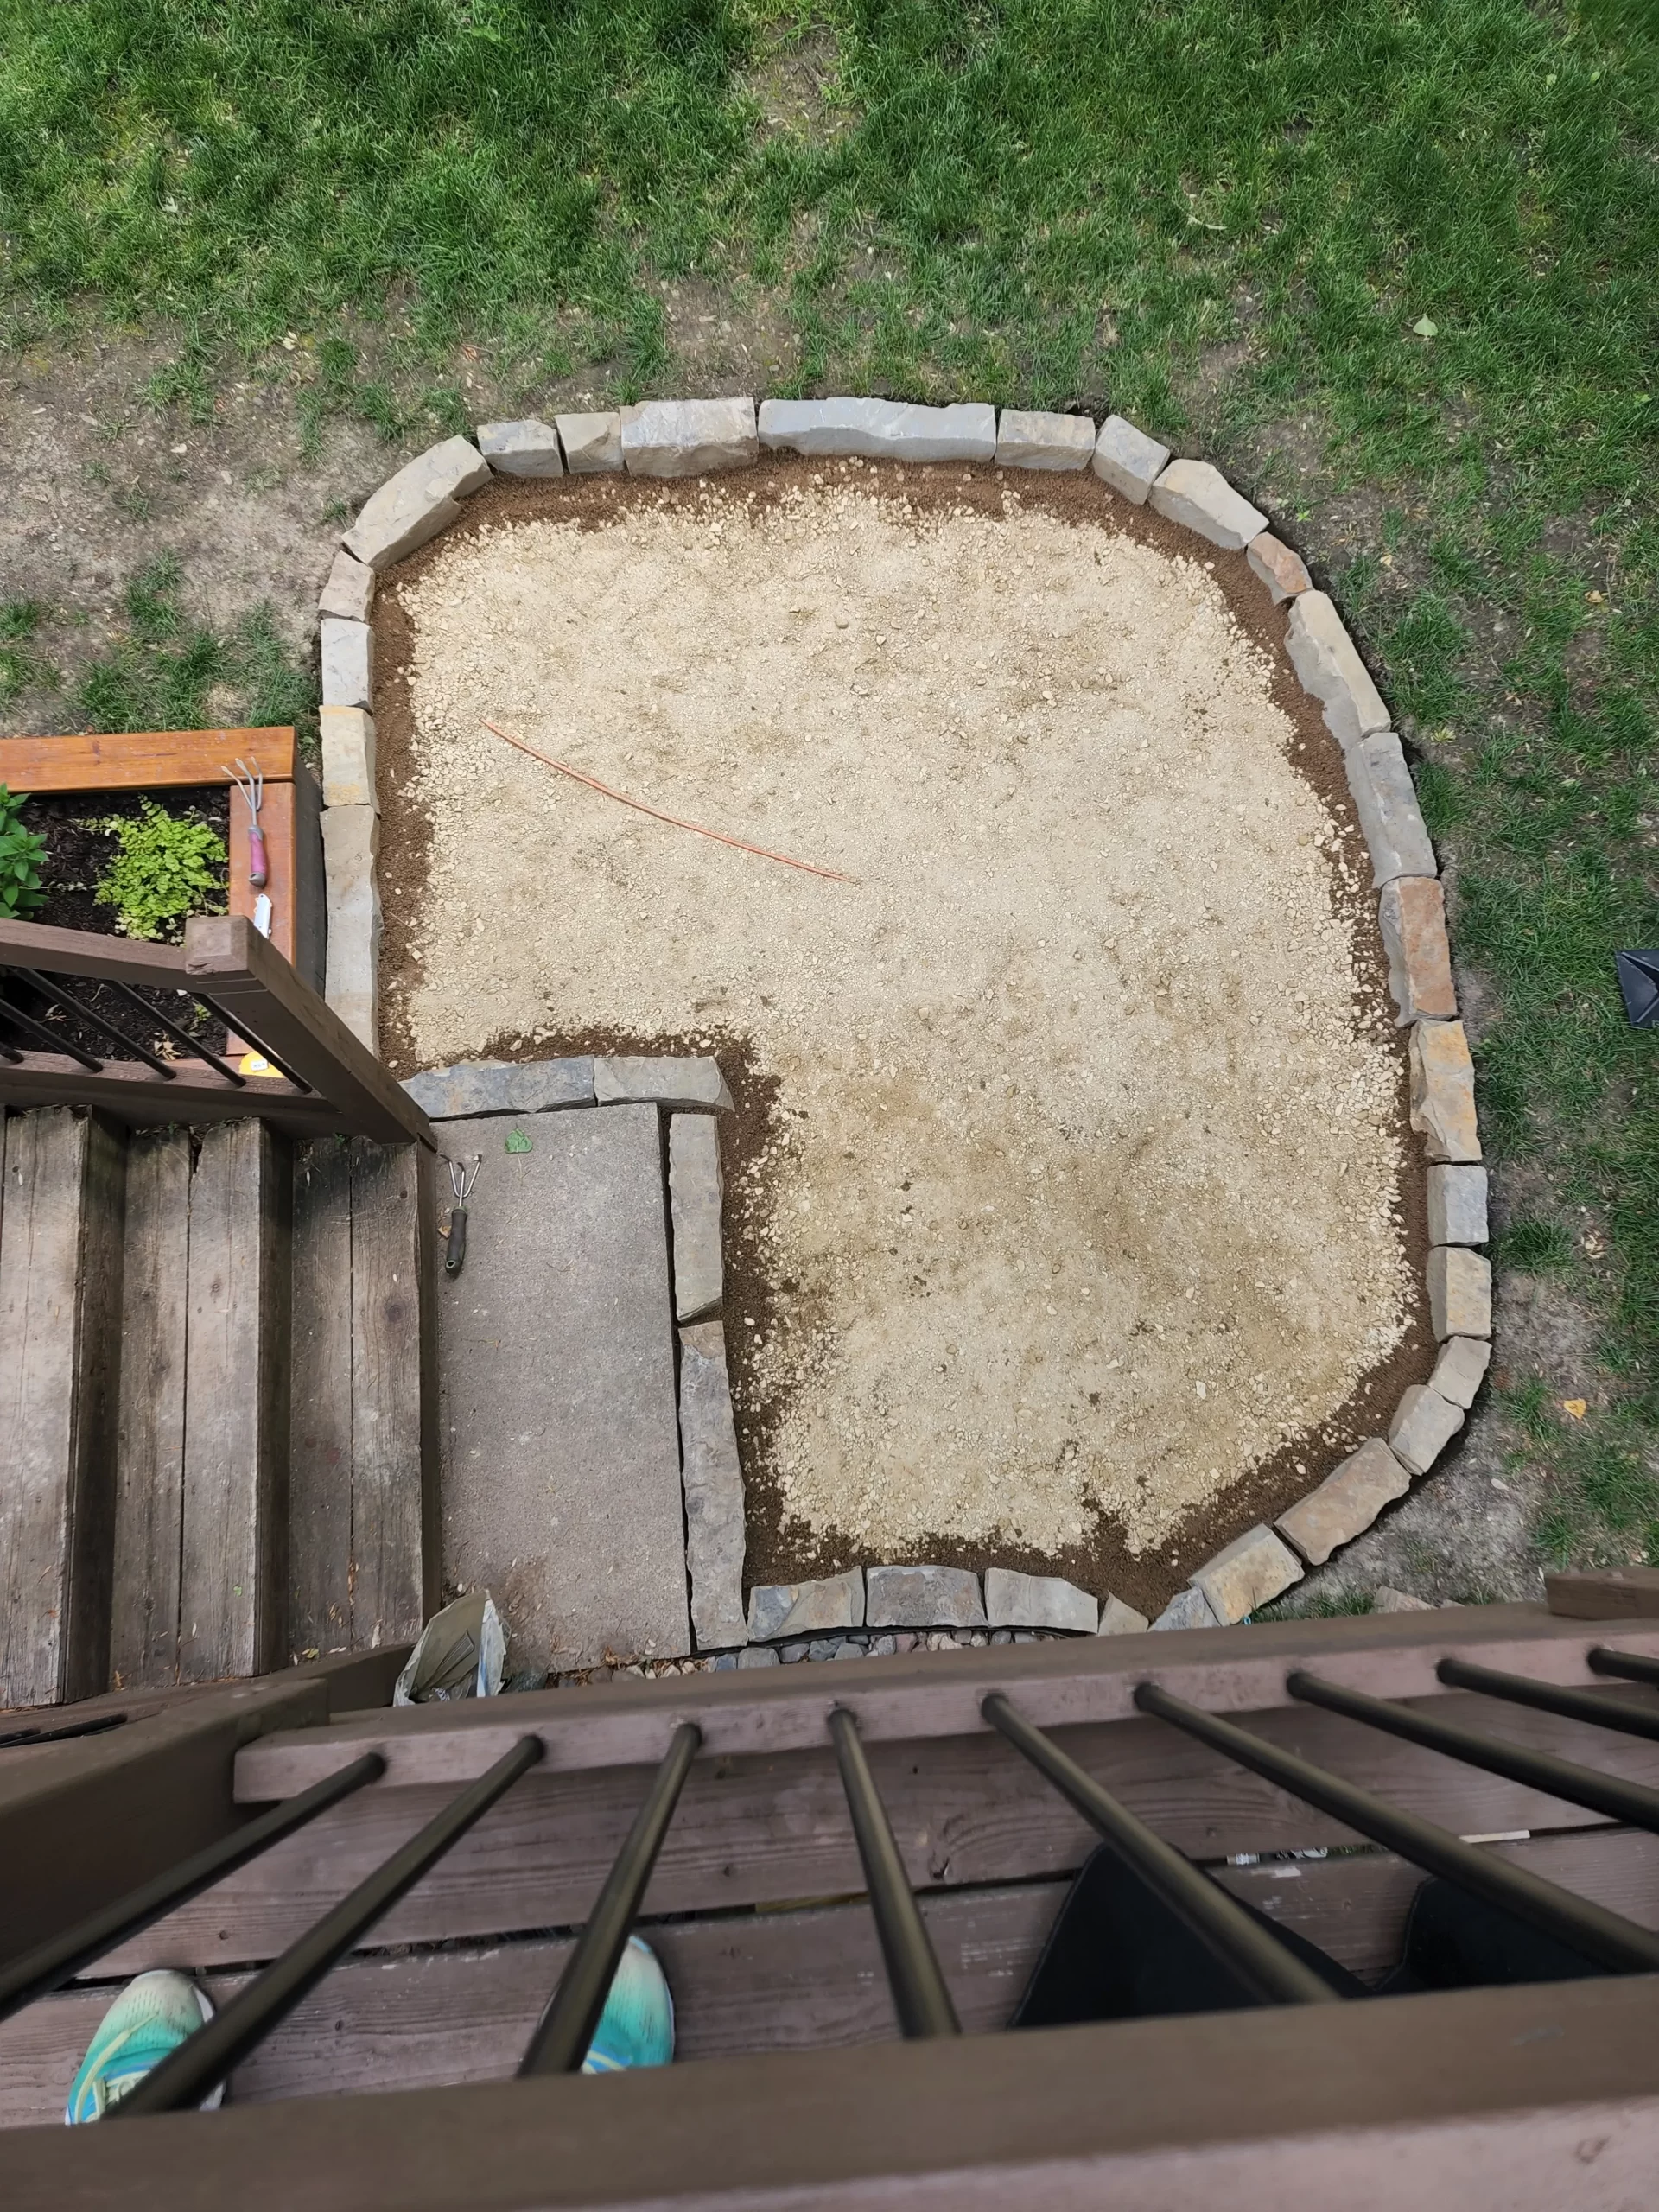

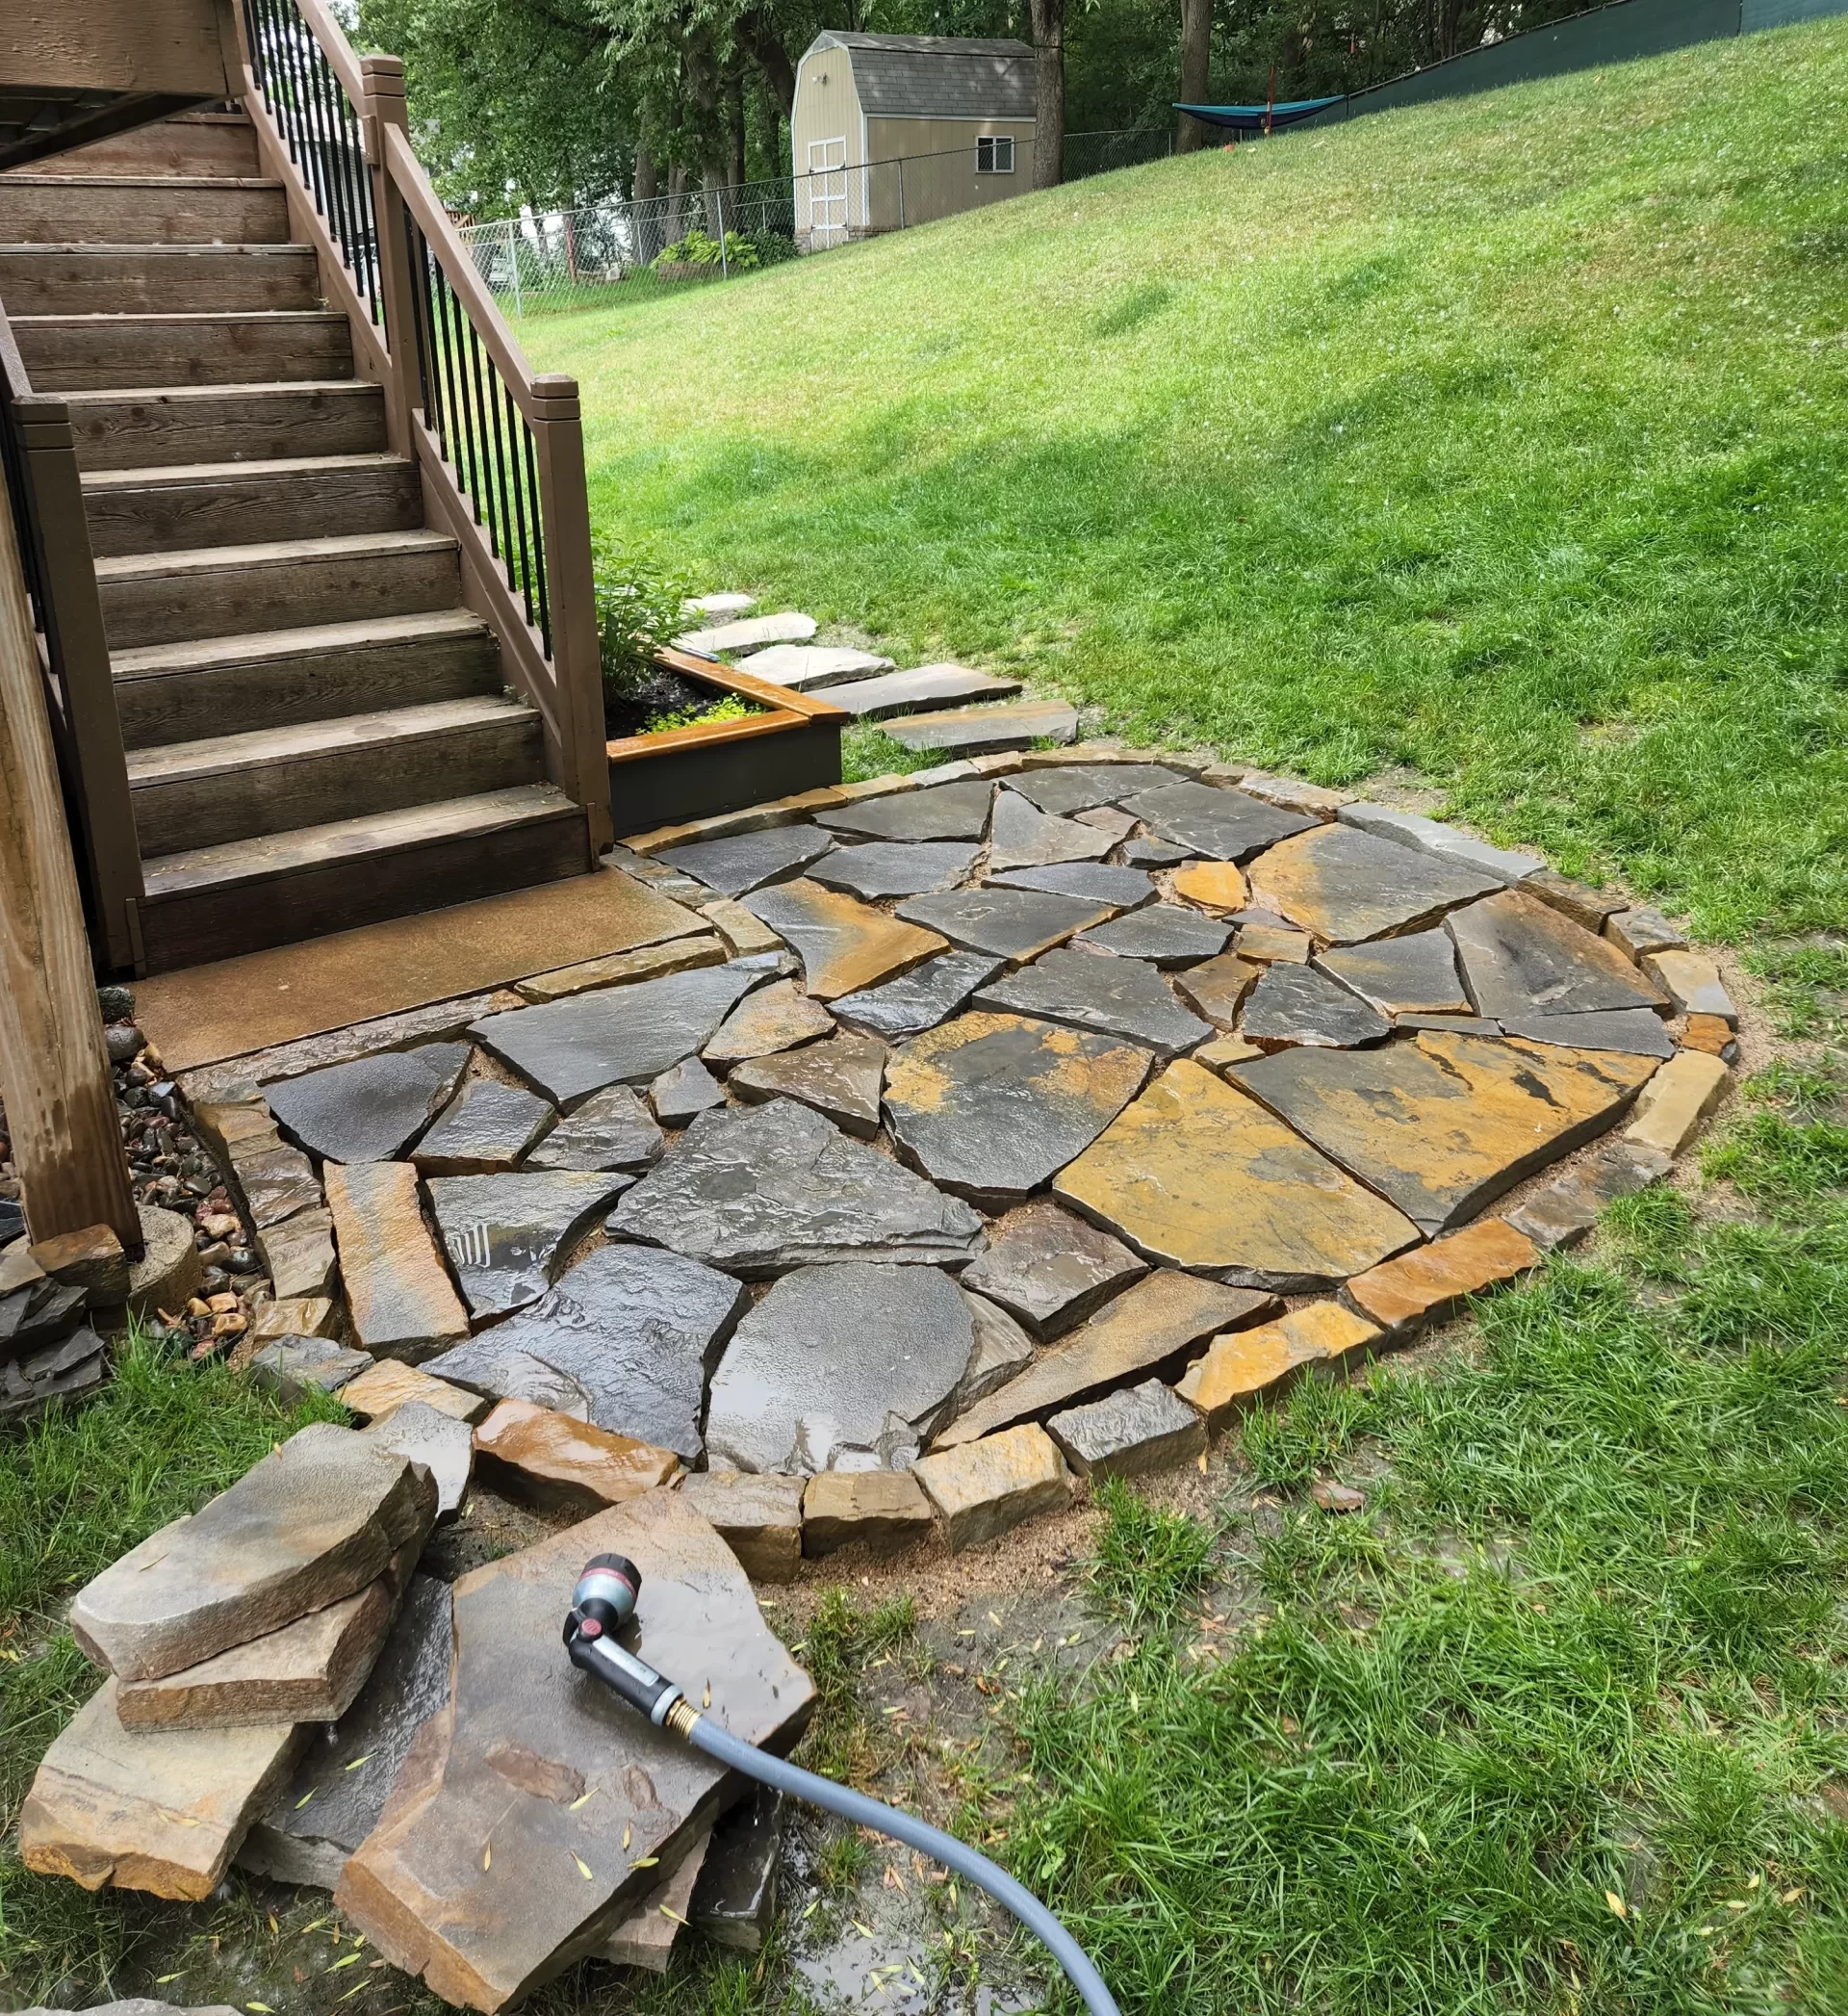
Flagstone
This portion of the project is definitely a two person task, as some of these large slabs were incredibly heavy! They don’t appear this way at first, but just wait until you experience this for yourselves. I find projects like this, an incredible workout – just remember to lift with your legs! 😉
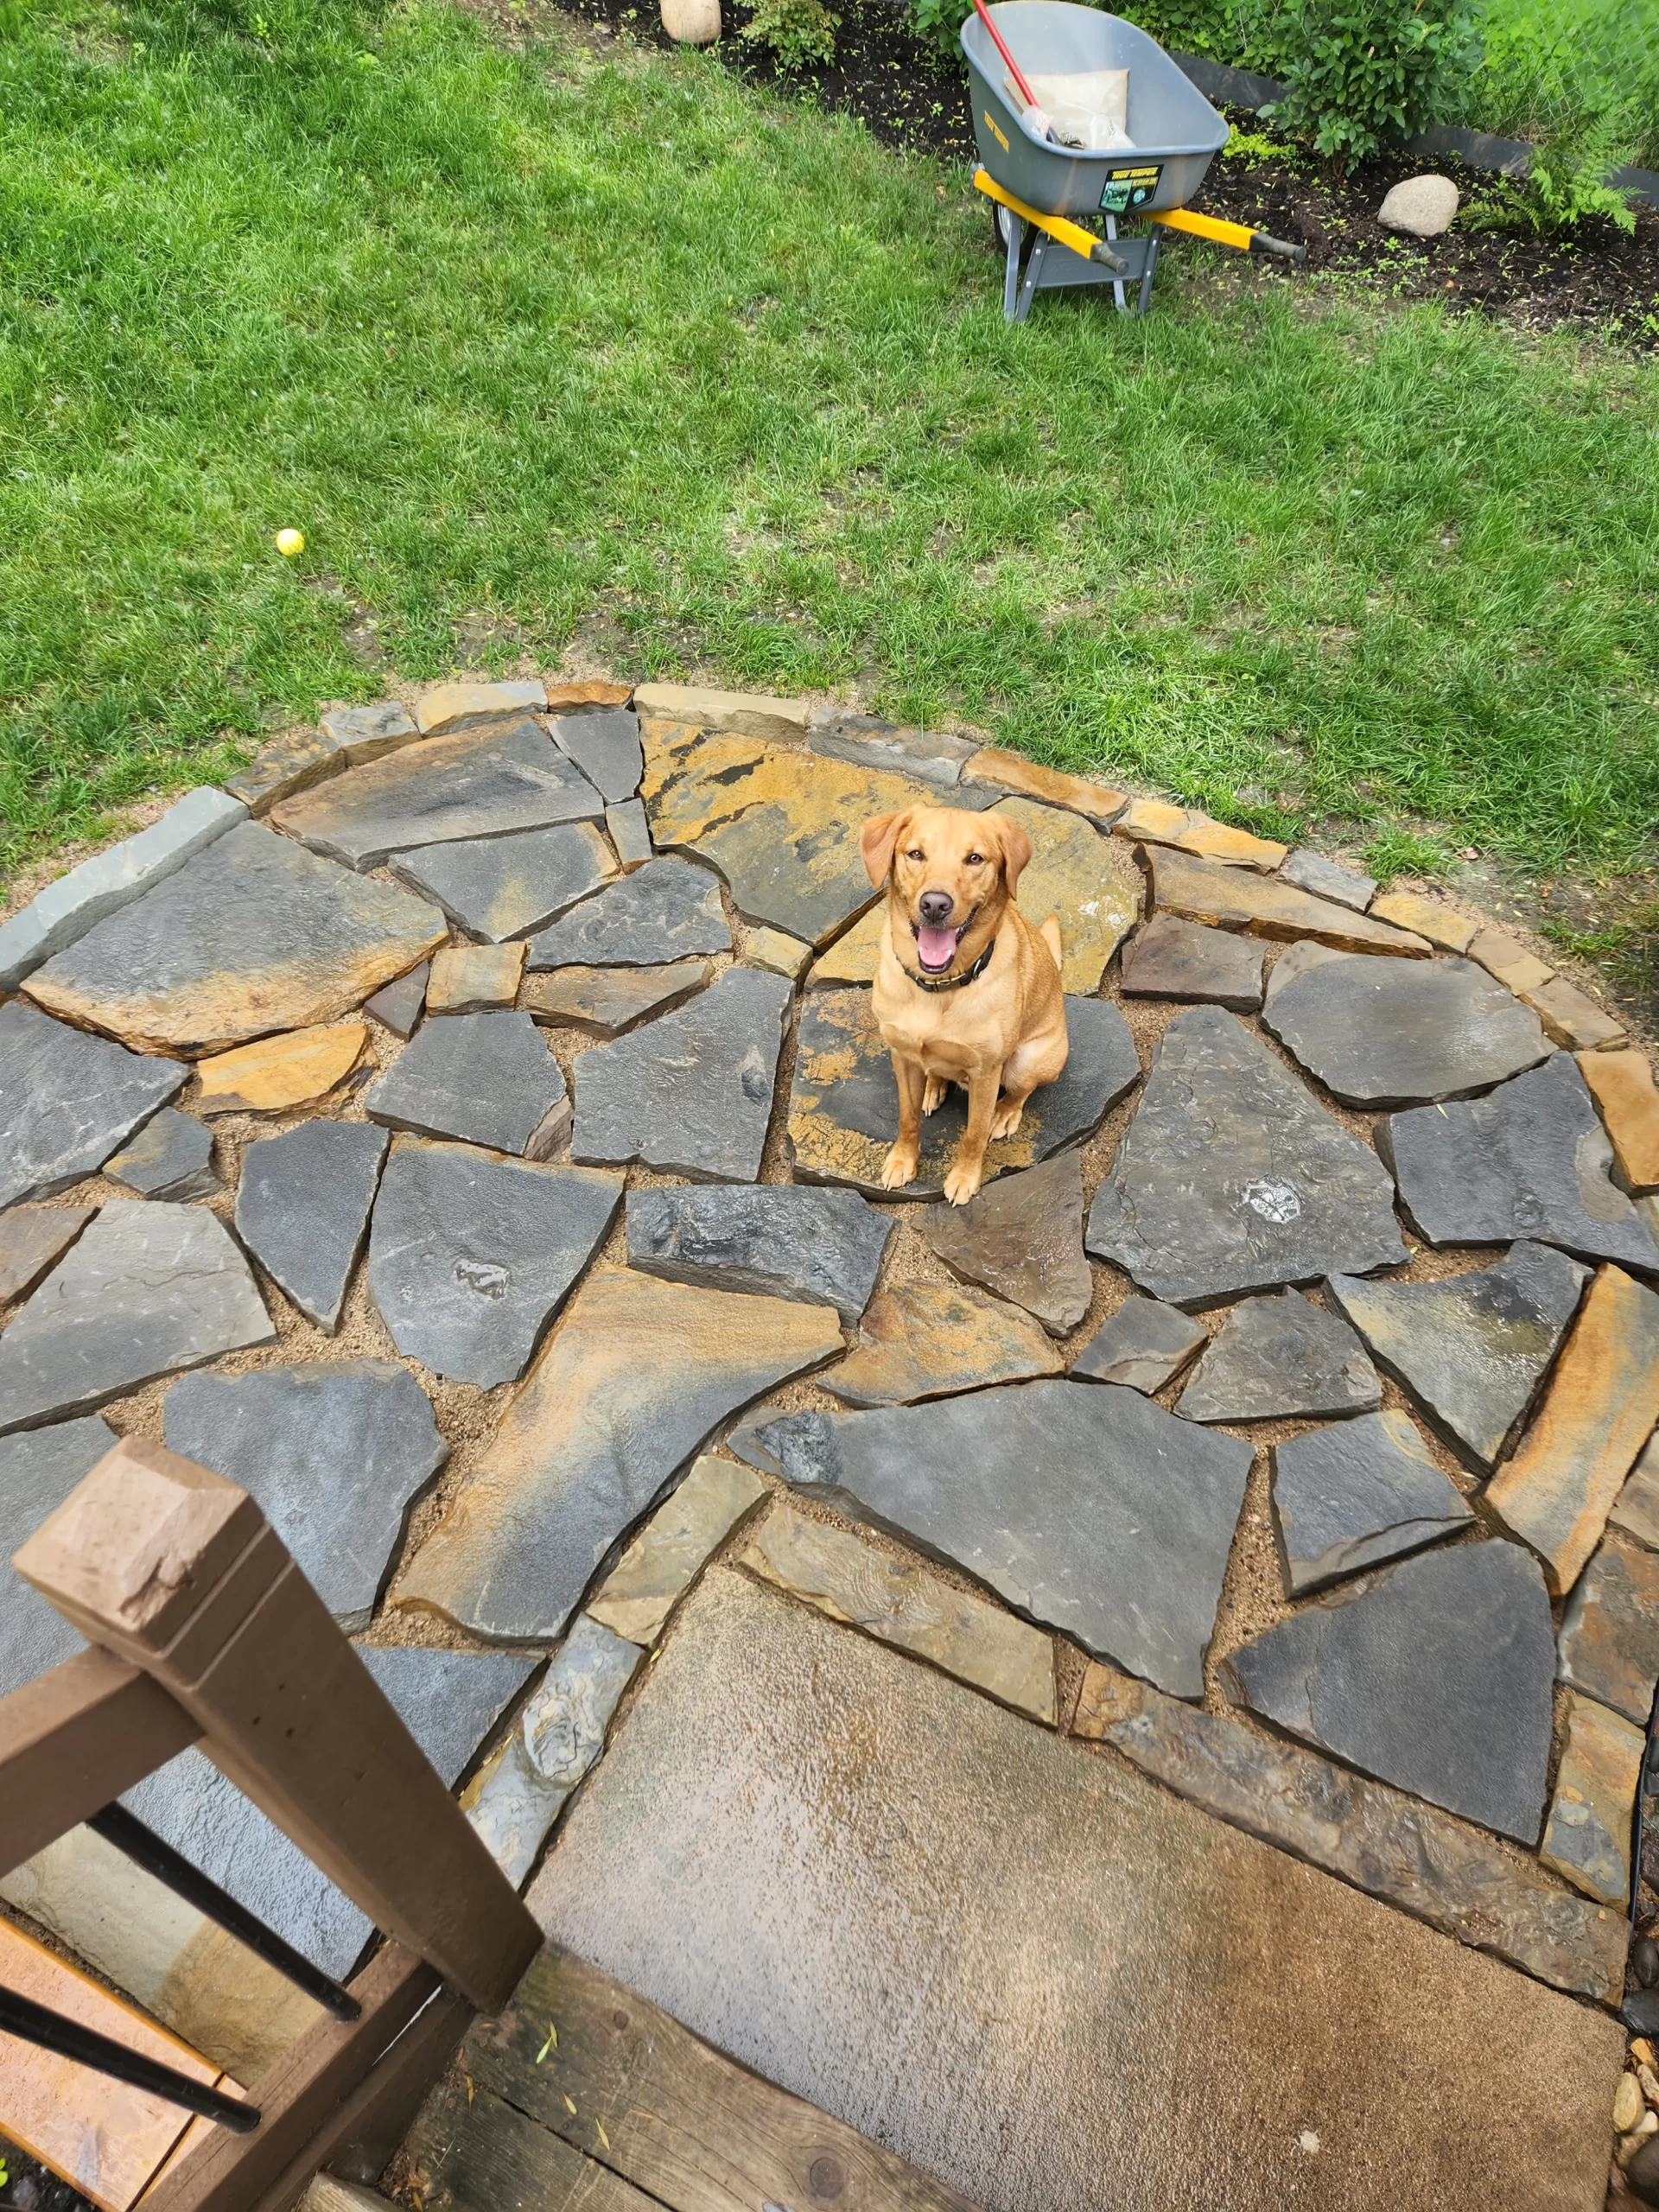
The tricky part of this next step is finding out how everything will piece together. I still have no idea how we got some of these pieces to align so well, but there was quite a bit of rearranging. Don’t jump into this part right away. You might need to lay some out, sit on it for a bit, and do some more rearranging.
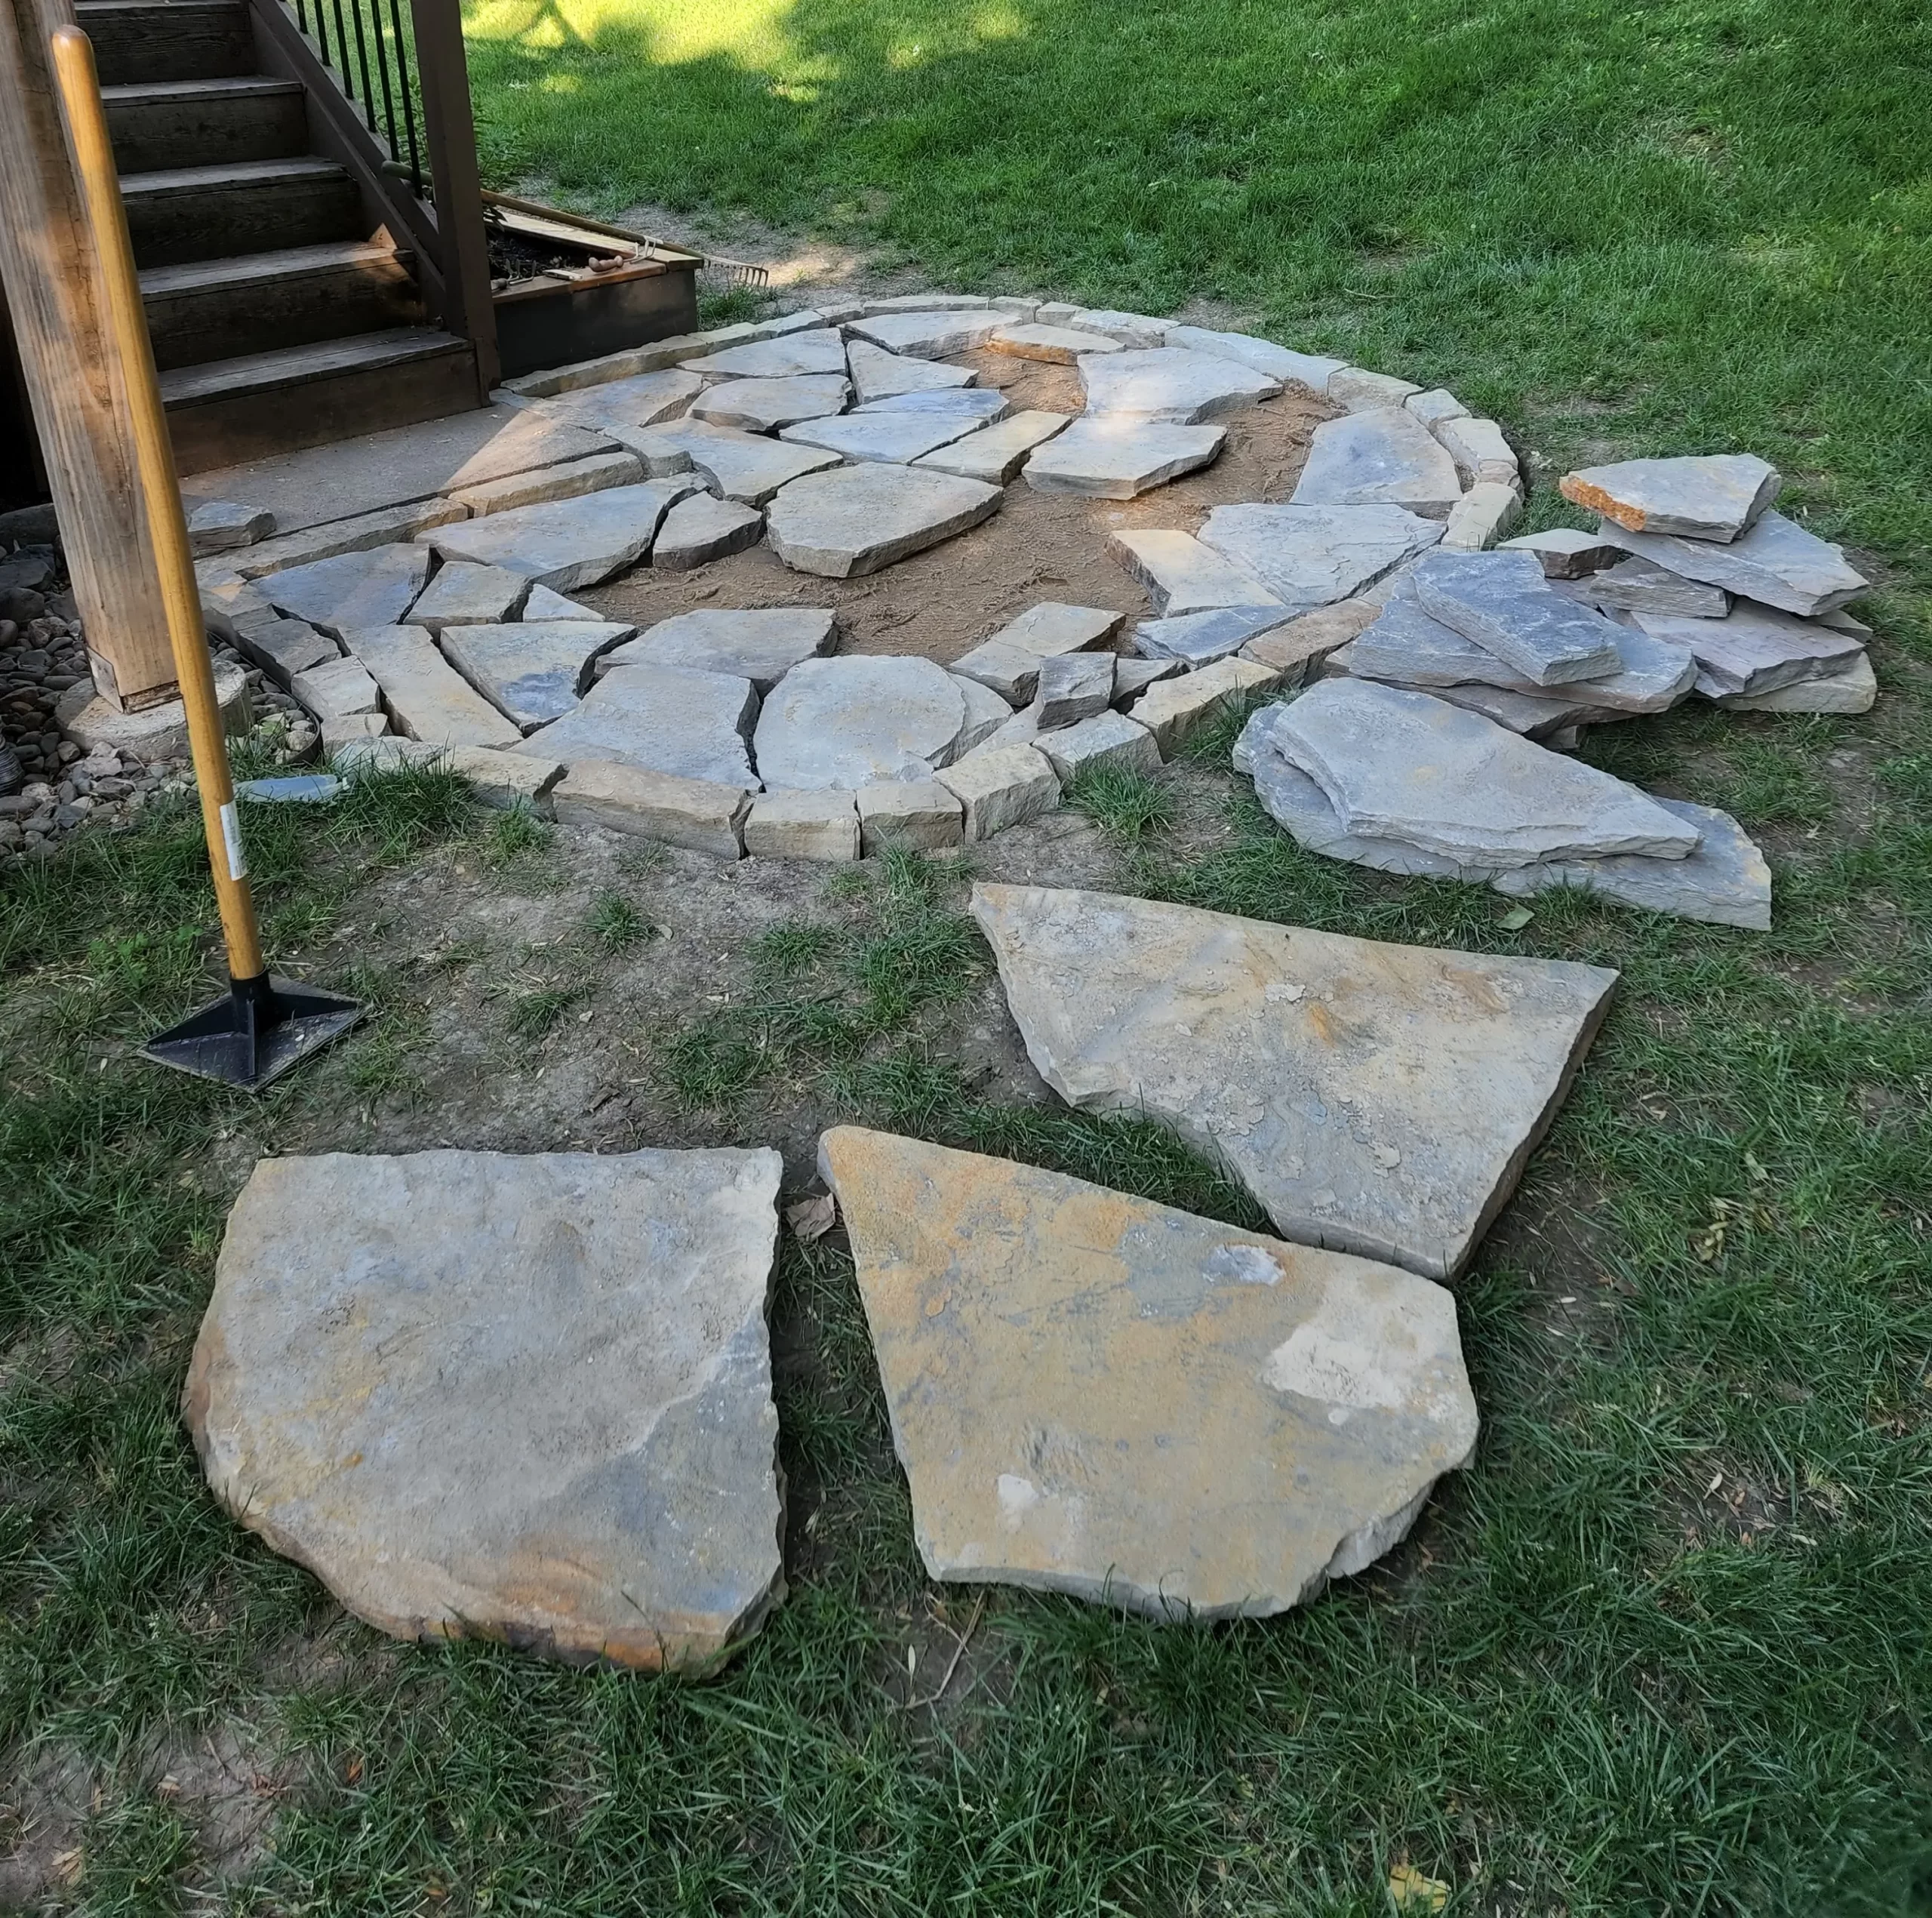
We started with several of the larger pieces around the outside, although I think the “rule” is to start in the middle and work your way out. This is where I remind you that I’m not perfect. I go with what is works for me, and I believe this turned out quite beautifully.

Last Step of this Project
Crushed Granite
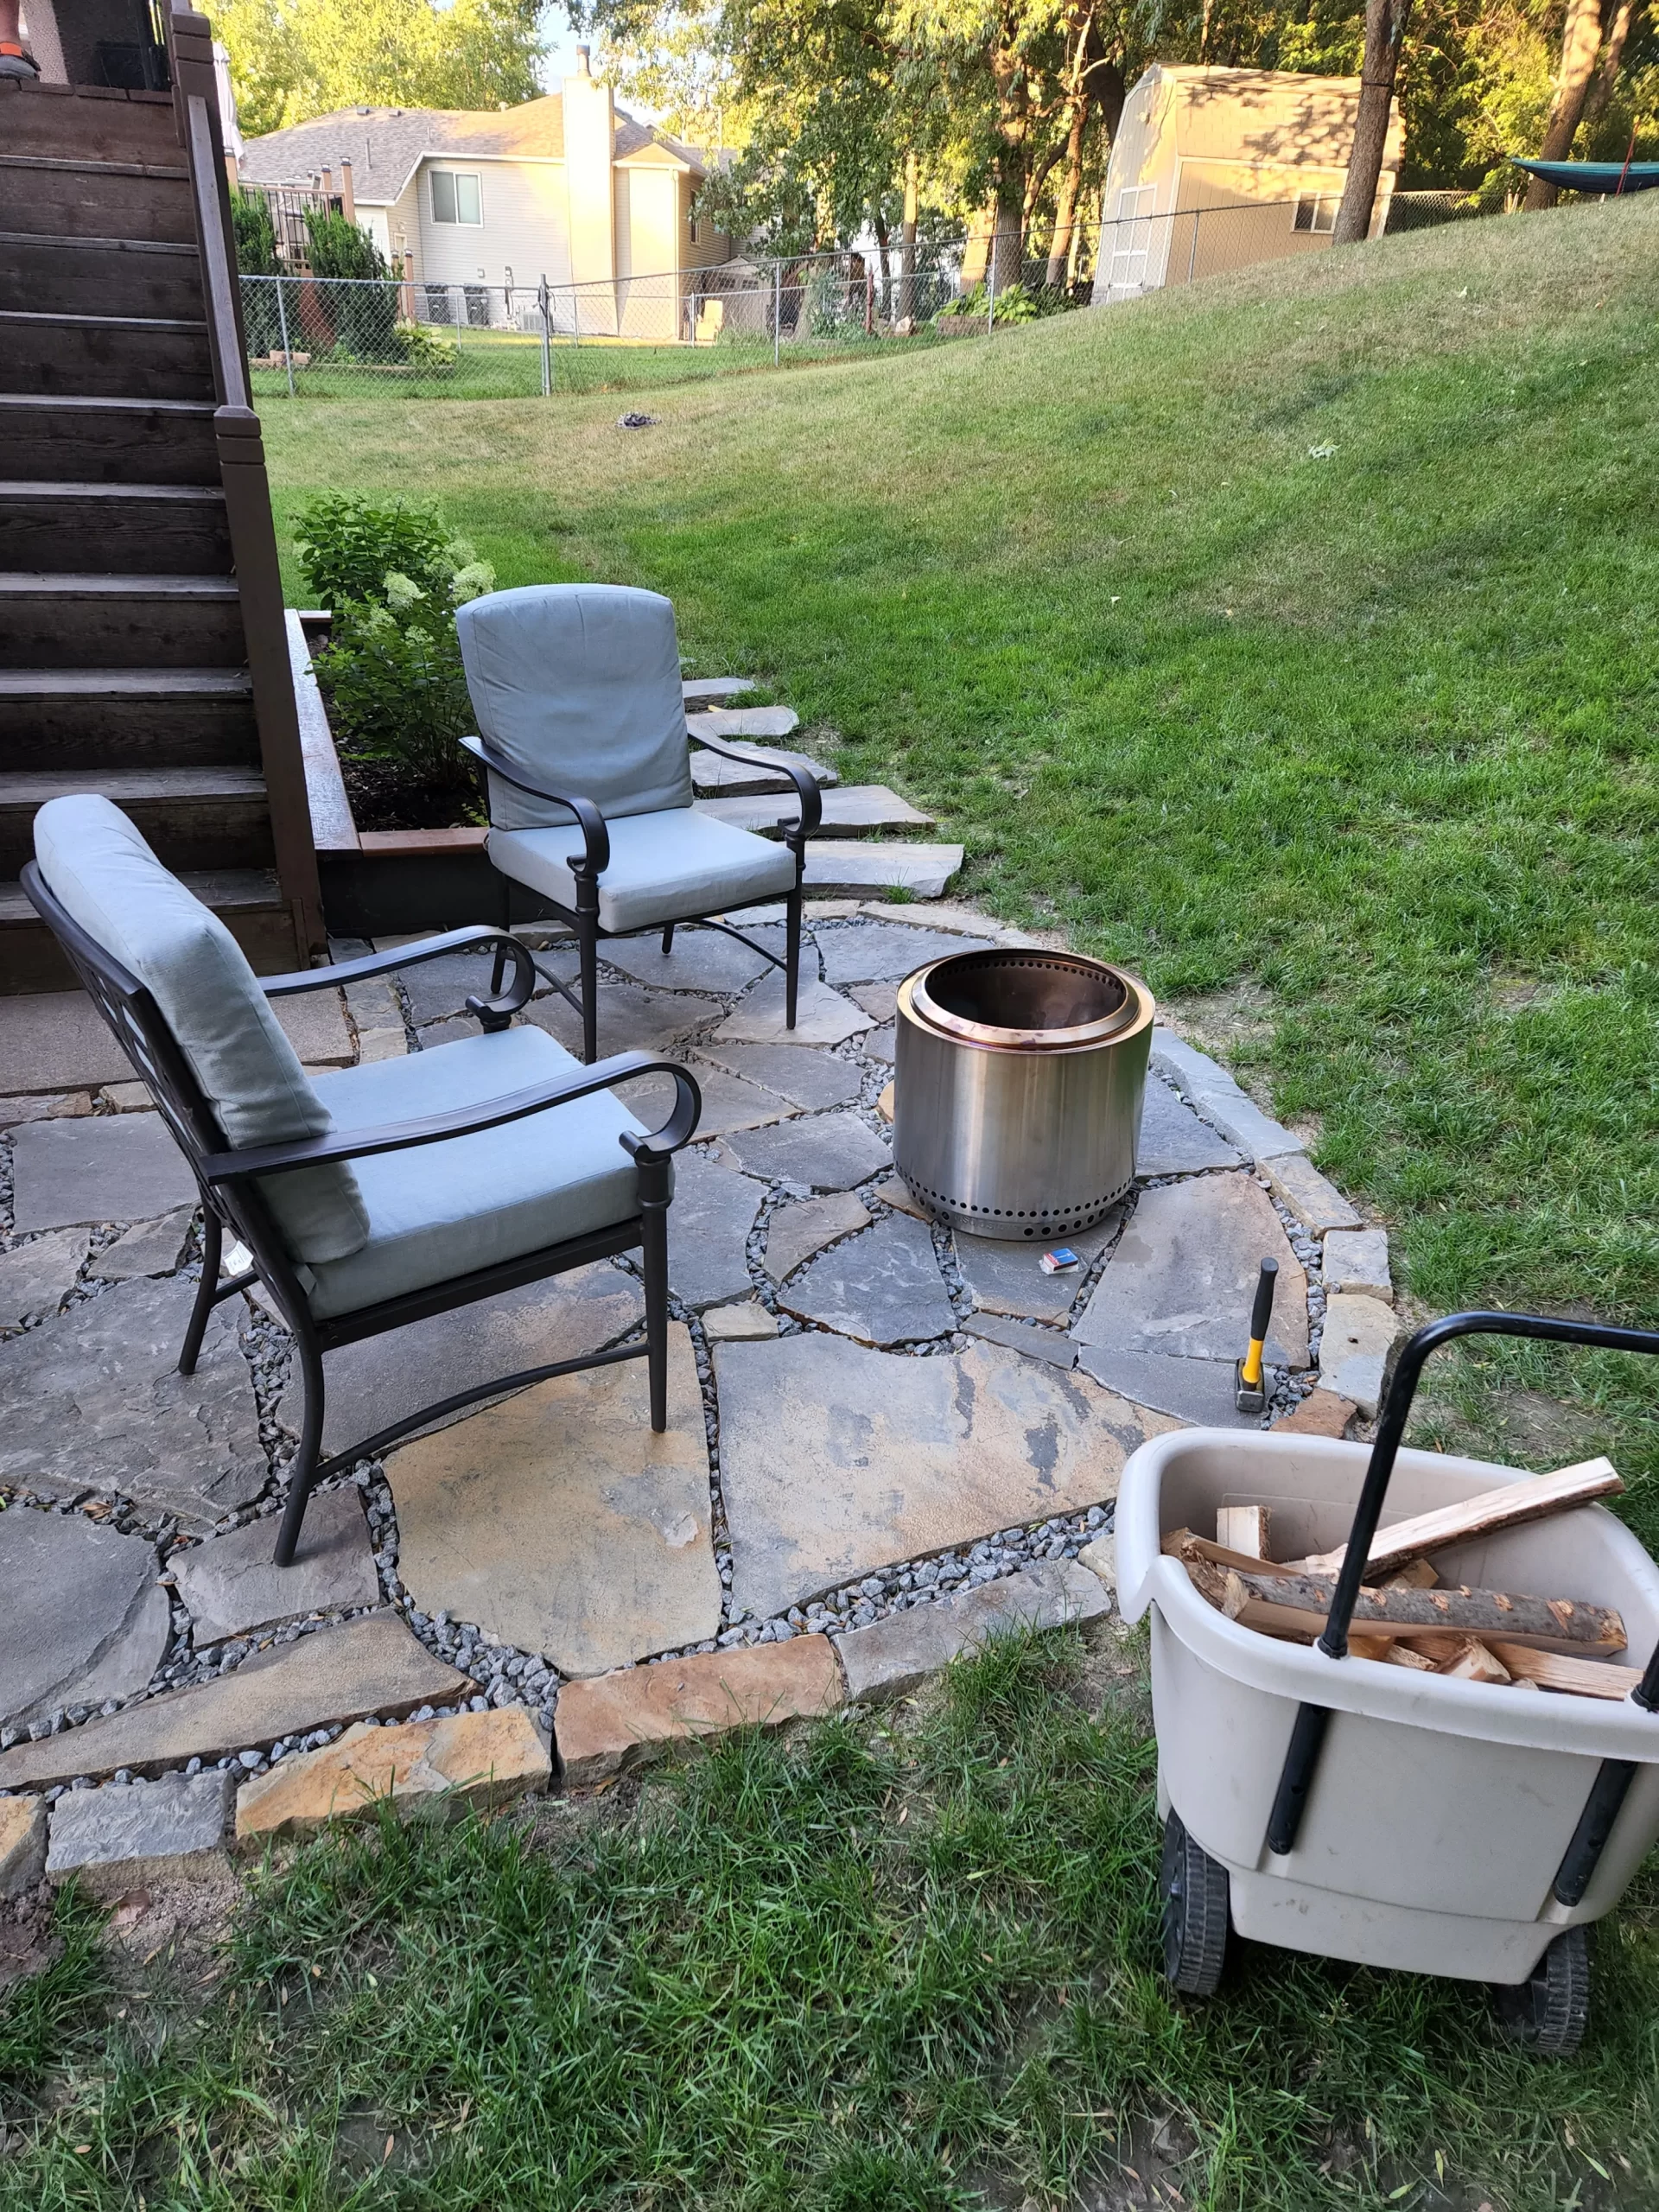
The last step to complete this project was to add in the crushed granite. We chose this over small pebble rock or more sand (which I think would have looked nice as well), but the crushed gravel pairs well with the flagstone I think. Plus unlike pebble rock (so I’ve heard), the crushed granite doesn’t move around as much. I have had very few instances where too much of it has escaped from the patio area and ended up in the grass. In the fall we have taken the leaf blower at this, and the rock will barely move. Just a few will fly out, but easy enough to see and throw back in.
End Result
I’m very please with this patio project. It wasn’t too expensive to complete. I don’t have the exact numbers since we completed this project awhile ago now, but it was in the range of $1000-$1500 to complete with all materials used. We no longer have to deal with the muddy paws, or shoes and I love being able to step out off our deck and stand on this beautiful patio we built ourselves. Temporarily being used as a nice little seating area when we have a personal fire of our own. Future project to be shared, as I plan to add a firepit area on the top of our hill that will seat at least 6 of us, so we can enjoy a bonfire during the nice summer nights.
Thank you for reading! I hope you found my personal experience useful in your own planning, and that I could provide you with some inspiration to start a project of your own.