We moved into our home in 2018, and I was so excited to finally have a yard of my own to do whatever I wanted. At that time I didn’t know what I’d be working with in regards to the amount of sun we would receive, but I knew I had a clean slate. Believe it or not, there wasn’t a single plant on the property (besides the single tree in the corner of our backyard).
I was so new to all things related to gardening and landscaping that it took me quite some time to know where to begin, so I started searching online to gather inspiration.
At the time I was so focused on which plants I thought looked pretty, little did I know how important it was to pay attention to things like sun requirements, mature size, growing zones, or even the care that would be required later. I’m so glad that I’m a planner and realized all of this ahead of time.
When I was making my list of plants I liked, I would take notes of the plants requirements, so I had a good idea where I could eventually add them into our landscape once I understood what I would be working with in our new yard.
Why Landscape In An Area That Is Not Used?
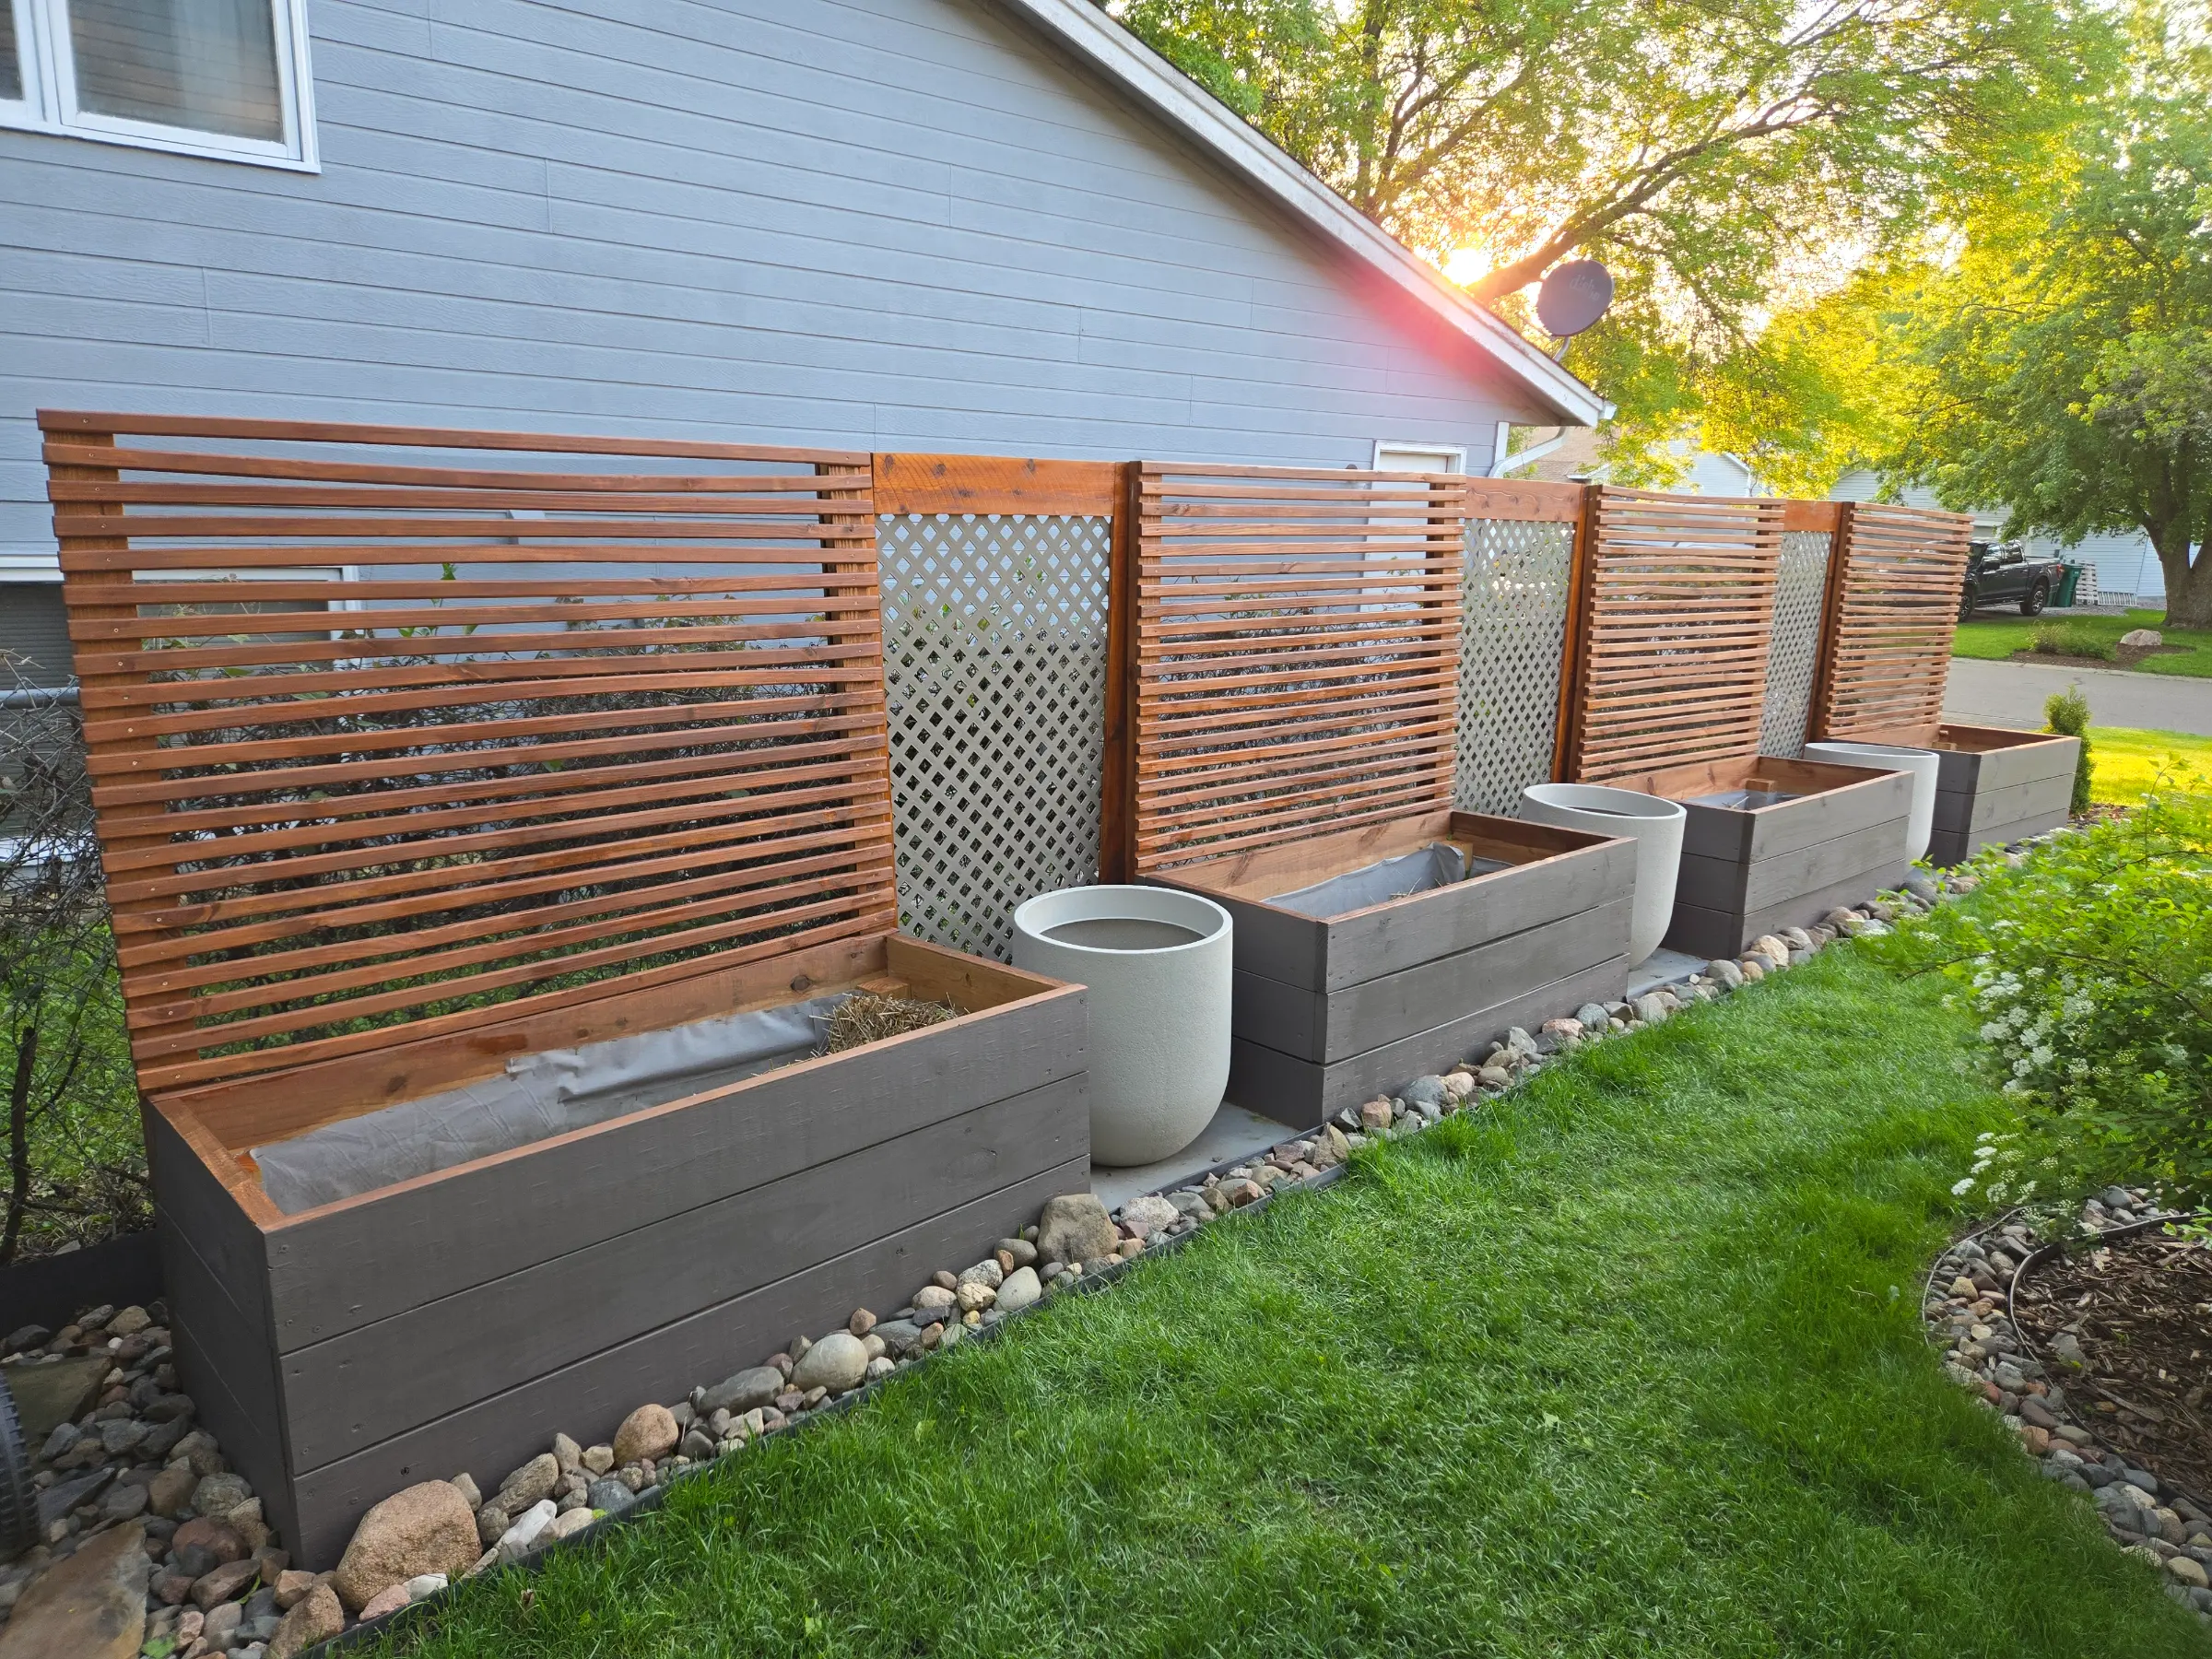
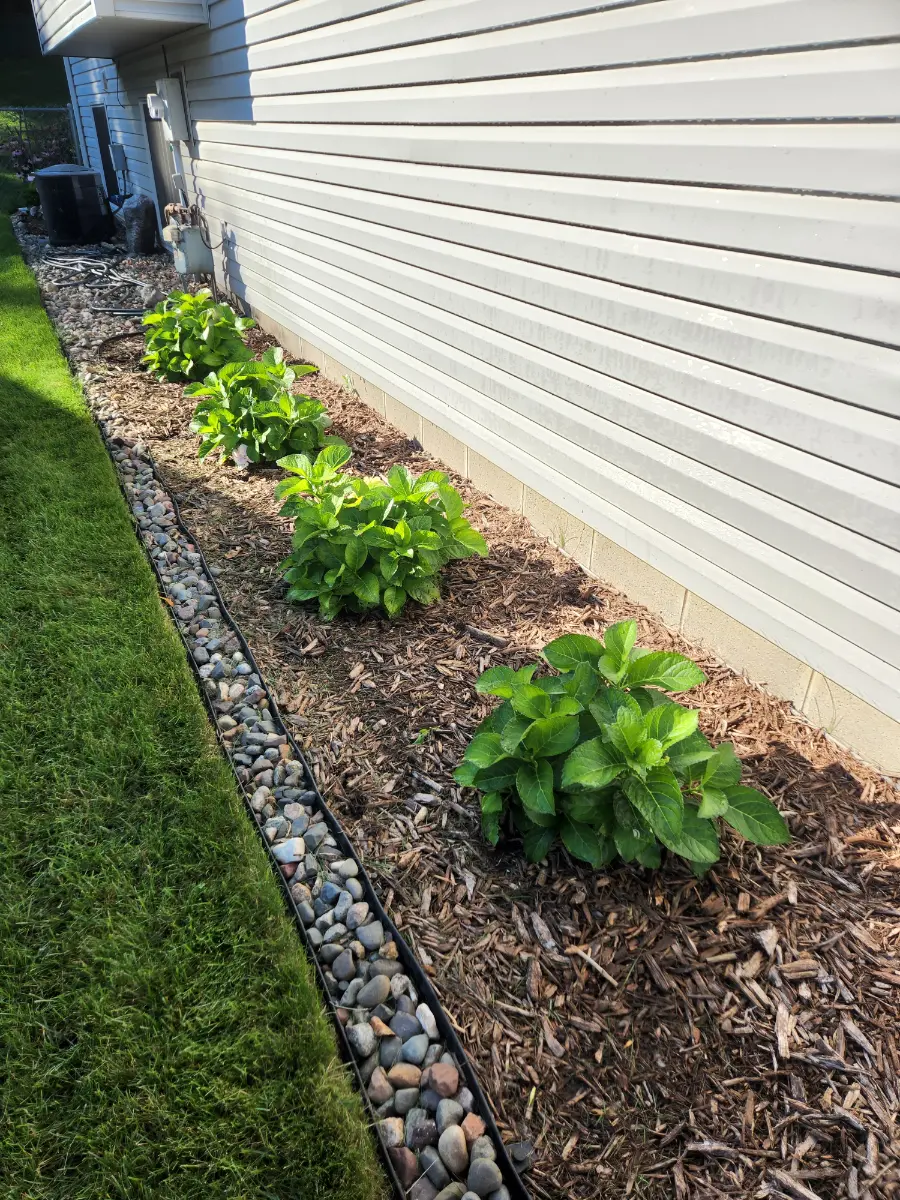
One particular area I really wanted to add some interest to was the Northeast side of our house. The funny thing though, it wasn’t even a place we ever spent much time as it is simply a strip of our yard that doesn’t even have access to the backyard since it’s fenced off. I really only spent time over here mowing the lawn.
Easier Lawn Maintenance
The previous owner had dumped gravel rock against the side of the house and the grass eventually took it over, so it was just unsightly. It was also a pain to have to mow so close to the house next to these small rocks mixed in, so I knew I’d need to do something to clean this up. That’s when I deemed it necessary to rip out the grass and pull it a few feet from the house and fill it in with shrubs.
Why Choose To Plant Hydrangeas?
Because this side of our house is Northeast facing, it receives mostly morning sun and shade the remainder of the day. I knew I wanted shrubs that would grow to a decent size, which 3-4 feet for this section of our yard seemed good to me. I also wanted something that would be easy to care for.
Hydrangeas not only have long lasting flowers, later in the season, they do seem to fill out fairly quickly with leaves around the end of Spring. There are also several varieties, so you are bound to find one that works for your space.
Disclosure: Please know there are links shared that may be affiliate links, meaning at no additional cost to you, I could earn a small commission if you click on a link within my post. You can read more about this here.
Brighten Up A Shady Space
When you think of hydrangeas, an incredibly common type is the panicle variety. This however would not have worked well here with such little sun exposure. What you would want to look for are the species of hydrangea that do well in shade to partial shade locations.
Shade Tolerant Hydrangeas
Some common varieties in my growing zone that can handle more shade would be known as the big leaf (macrophylla), smooth leaf (arborescens), or climbing (petiolaris) variety. These should be able to handle zone 4 growing conditions. Although this year I found out that Minnesota is now considered zone 5, where I live today, I’m still a bit hesitant on bringing in those types of plants.
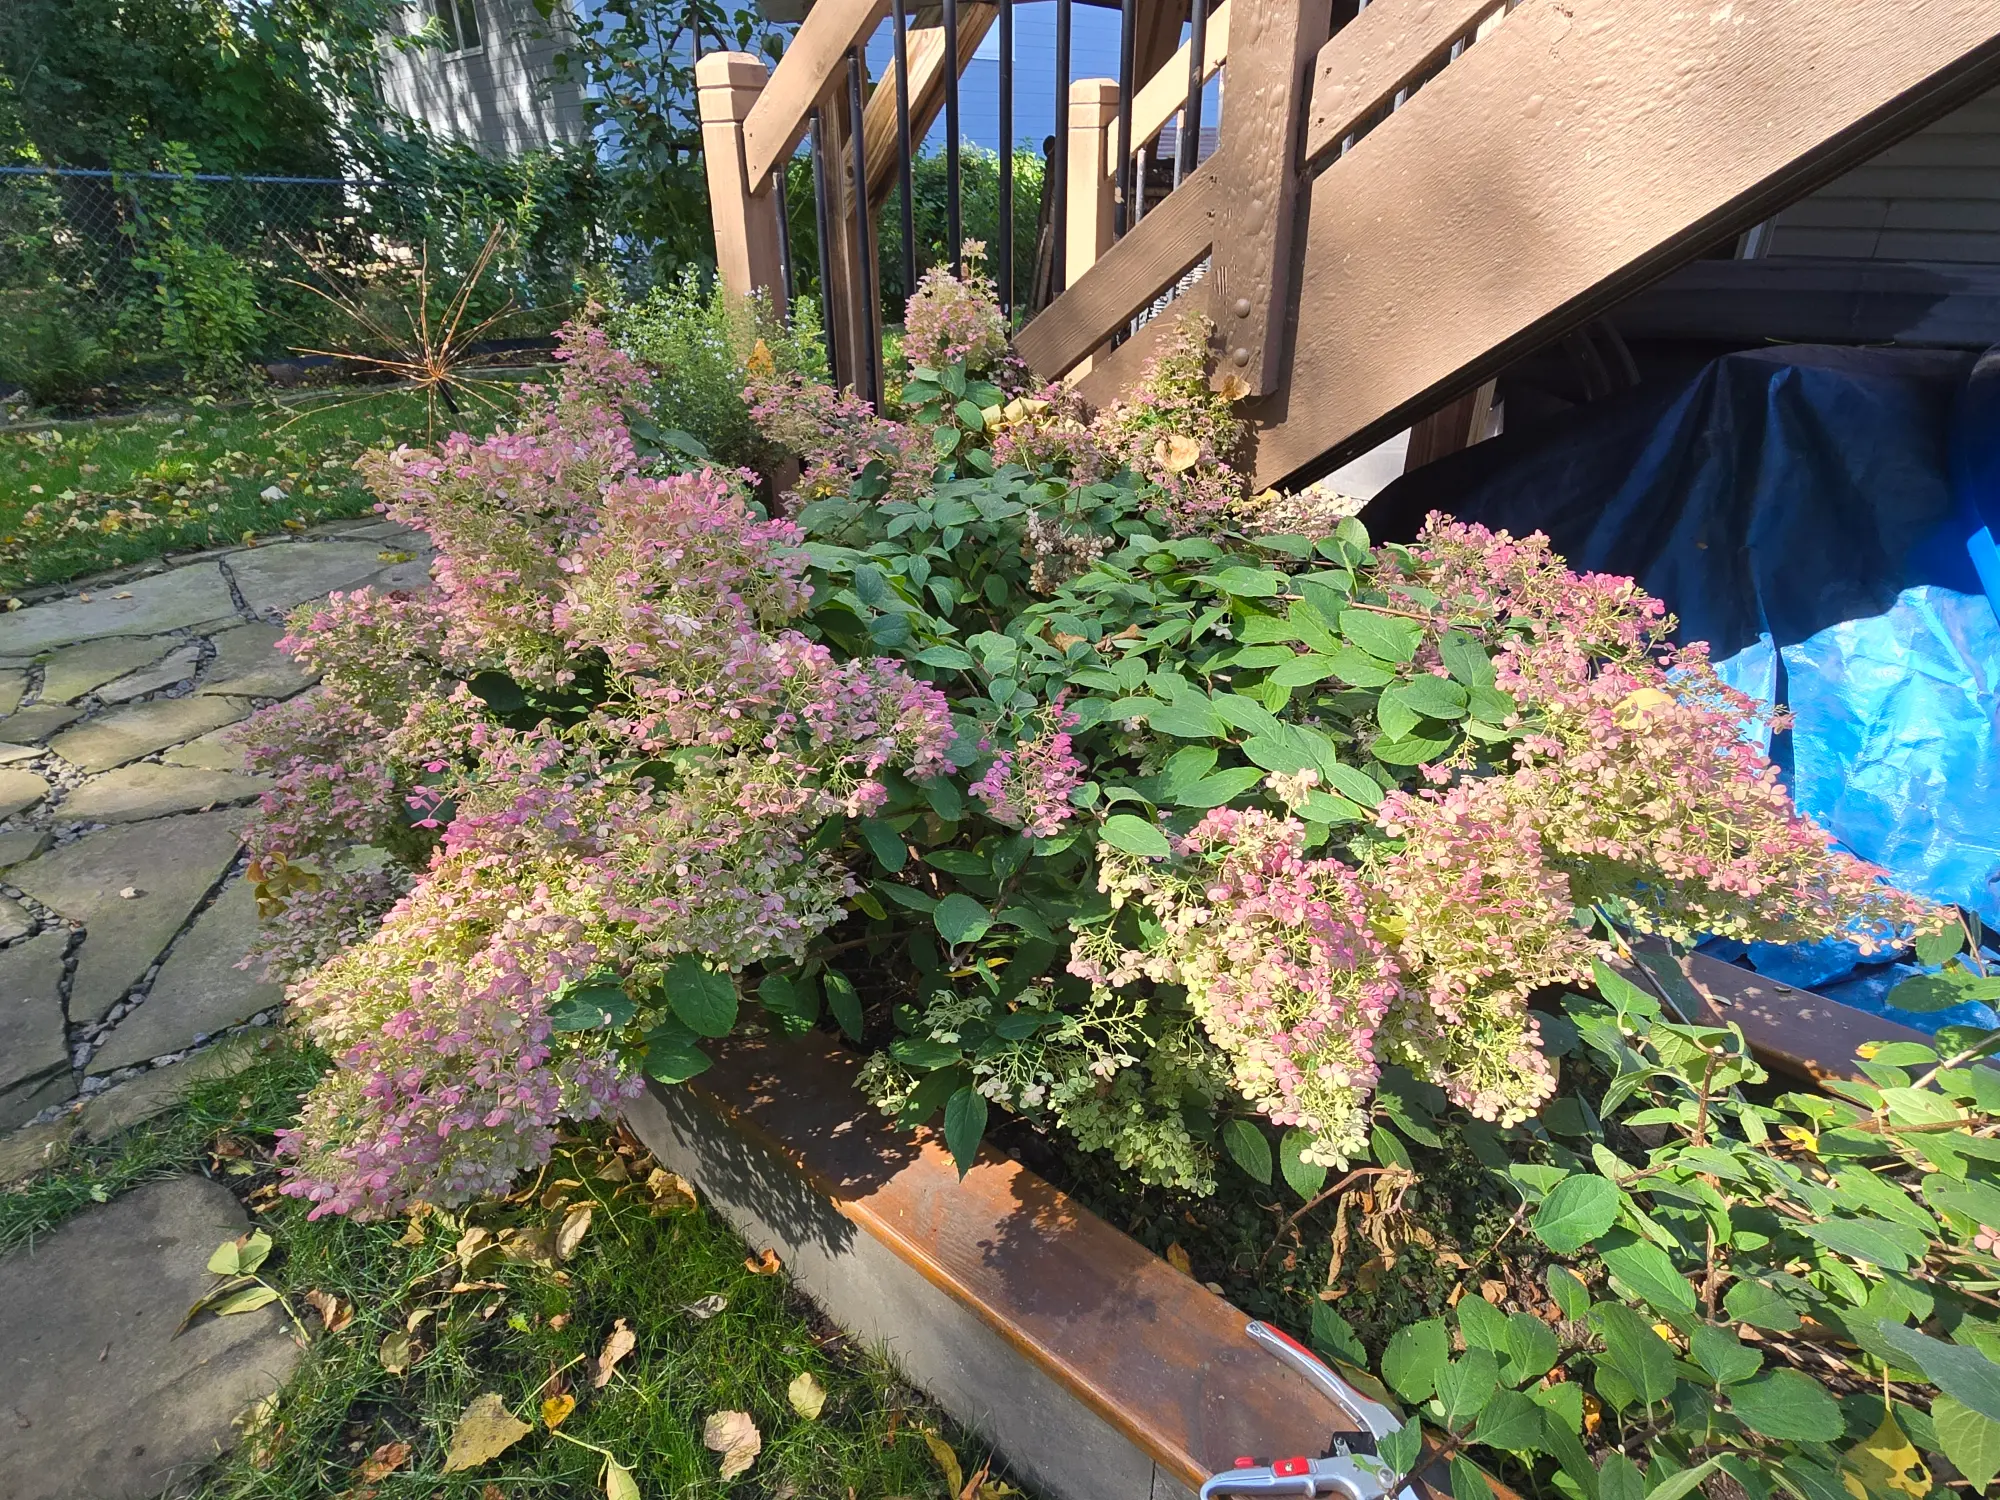
Now I don’t plan to dive into each of these types of shade tolerant varieties in this post, and will spoil the fun by letting you know I ended up planting the big leaf variety known as ‘Seaside Serenade Cape Lookout Hydrangea Macrophylla’. I couldn’t resist when I came across these at one of our local garden centers. I mean, you see in the pictures, they are simply stunning!
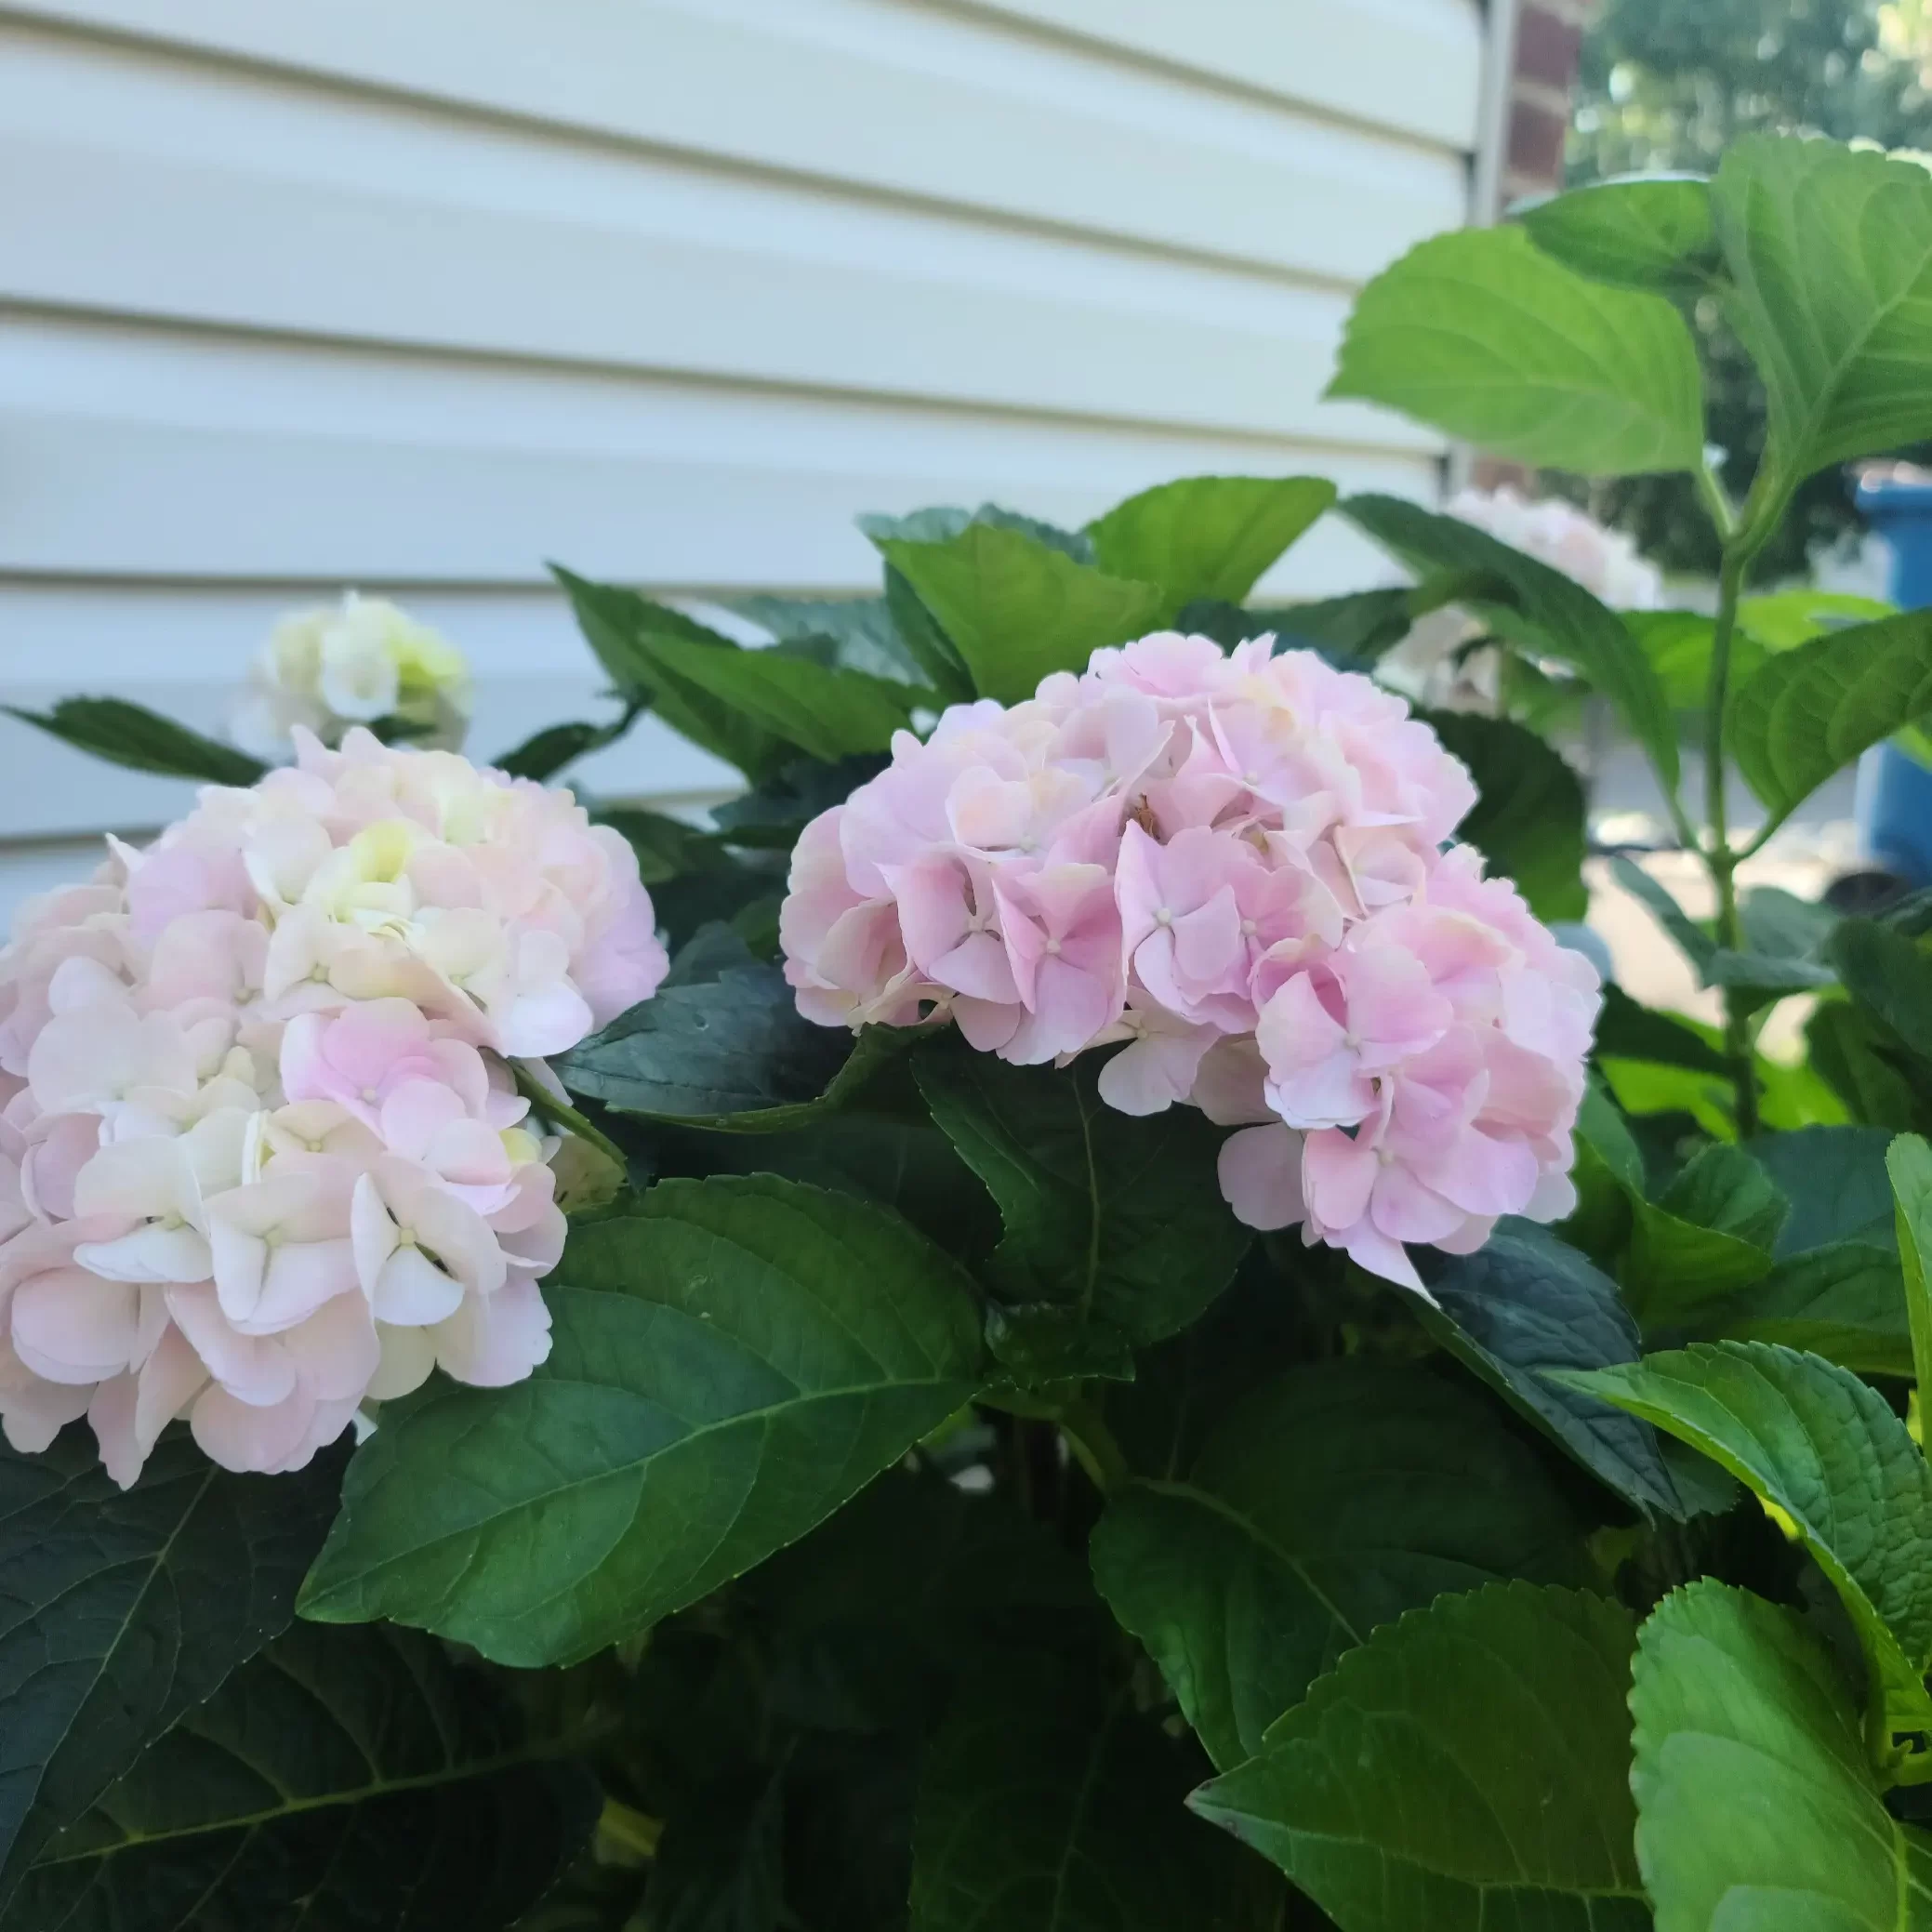
This plant has lovely dark green foliage, and the flowers are this beautiful soft pink, sometimes with almost champagne colored hues. They get so big too, but not floppy! I’m happy I chose to go with this big leaf variety because they stay compact, and despite what others have told me, I was pleasantly surprised that my flowers have bloomed on new and old wood. I must have one of the newer varieties that can do this, as I was sad when my first year dealing with winter burn, I had to cut everything down to the ground thinking I wouldn’t see flowers that year – I was wrong!
How To Add More Aesthetics To The Landscape
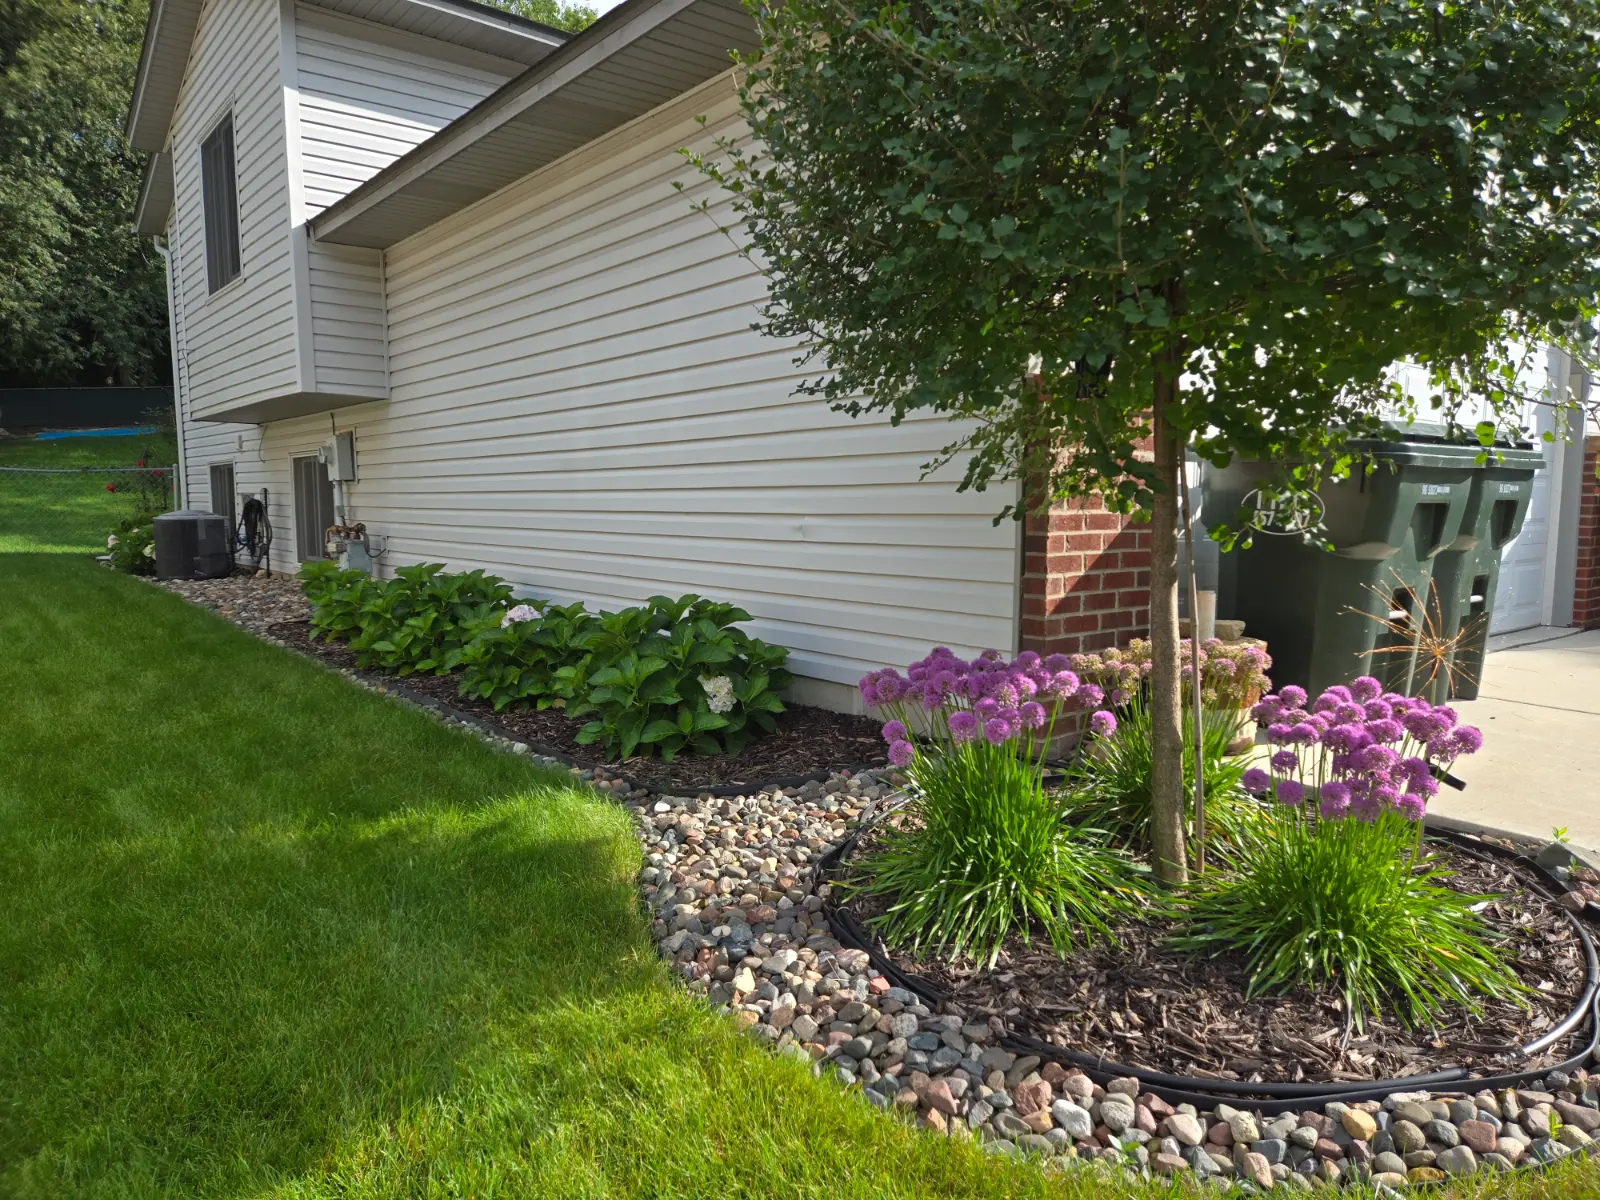
Include Mulch and River Rock
When planning out this side garden, and much like the rest of my landscaping I’ve done around our house, I decided to use both mulch and river rock in my design.
Why go with both? Well, I learned that mulch is a better choice around the base of shallow rooted plants. That is because when the sun is beating down on the rocks, they would heat up and likely burn your plants by drying the soil beneath them. Being in a shadier space, I suppose the chances of this killing off my hydrangeas could be less likely, but mulch was still the easier choice.
When it comes to maintaining my beds, I prefer to pull weeds around a mulch bed than in between the rocks. This also benefits the soil when the mulch begins to decompose, which I imagine would benefit the hydrangeas more than surrounding them with landscape fabric and rocks at their base.
So why still use both? I love the look of clean lines, and being able to see the contrast between my mulched bed and the river rock bordering it, is exactly what this combination provides. It’s also easier to mow against this rock than it is mulch.
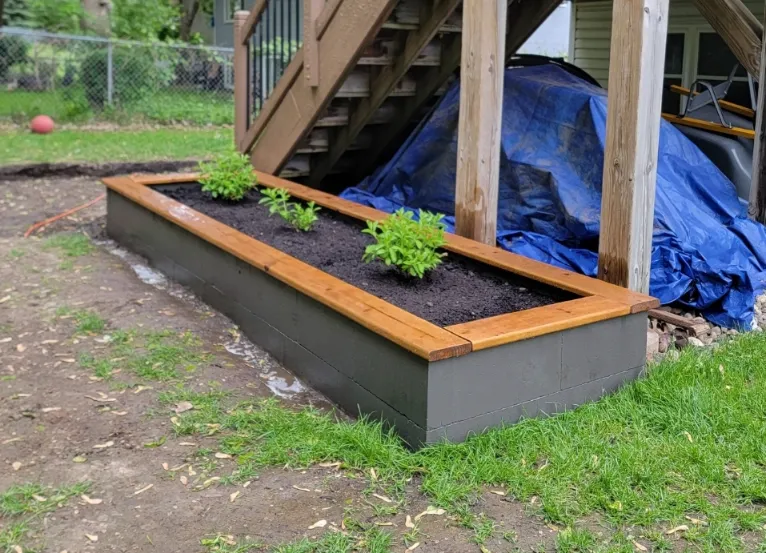
Add An Ornamental Tree
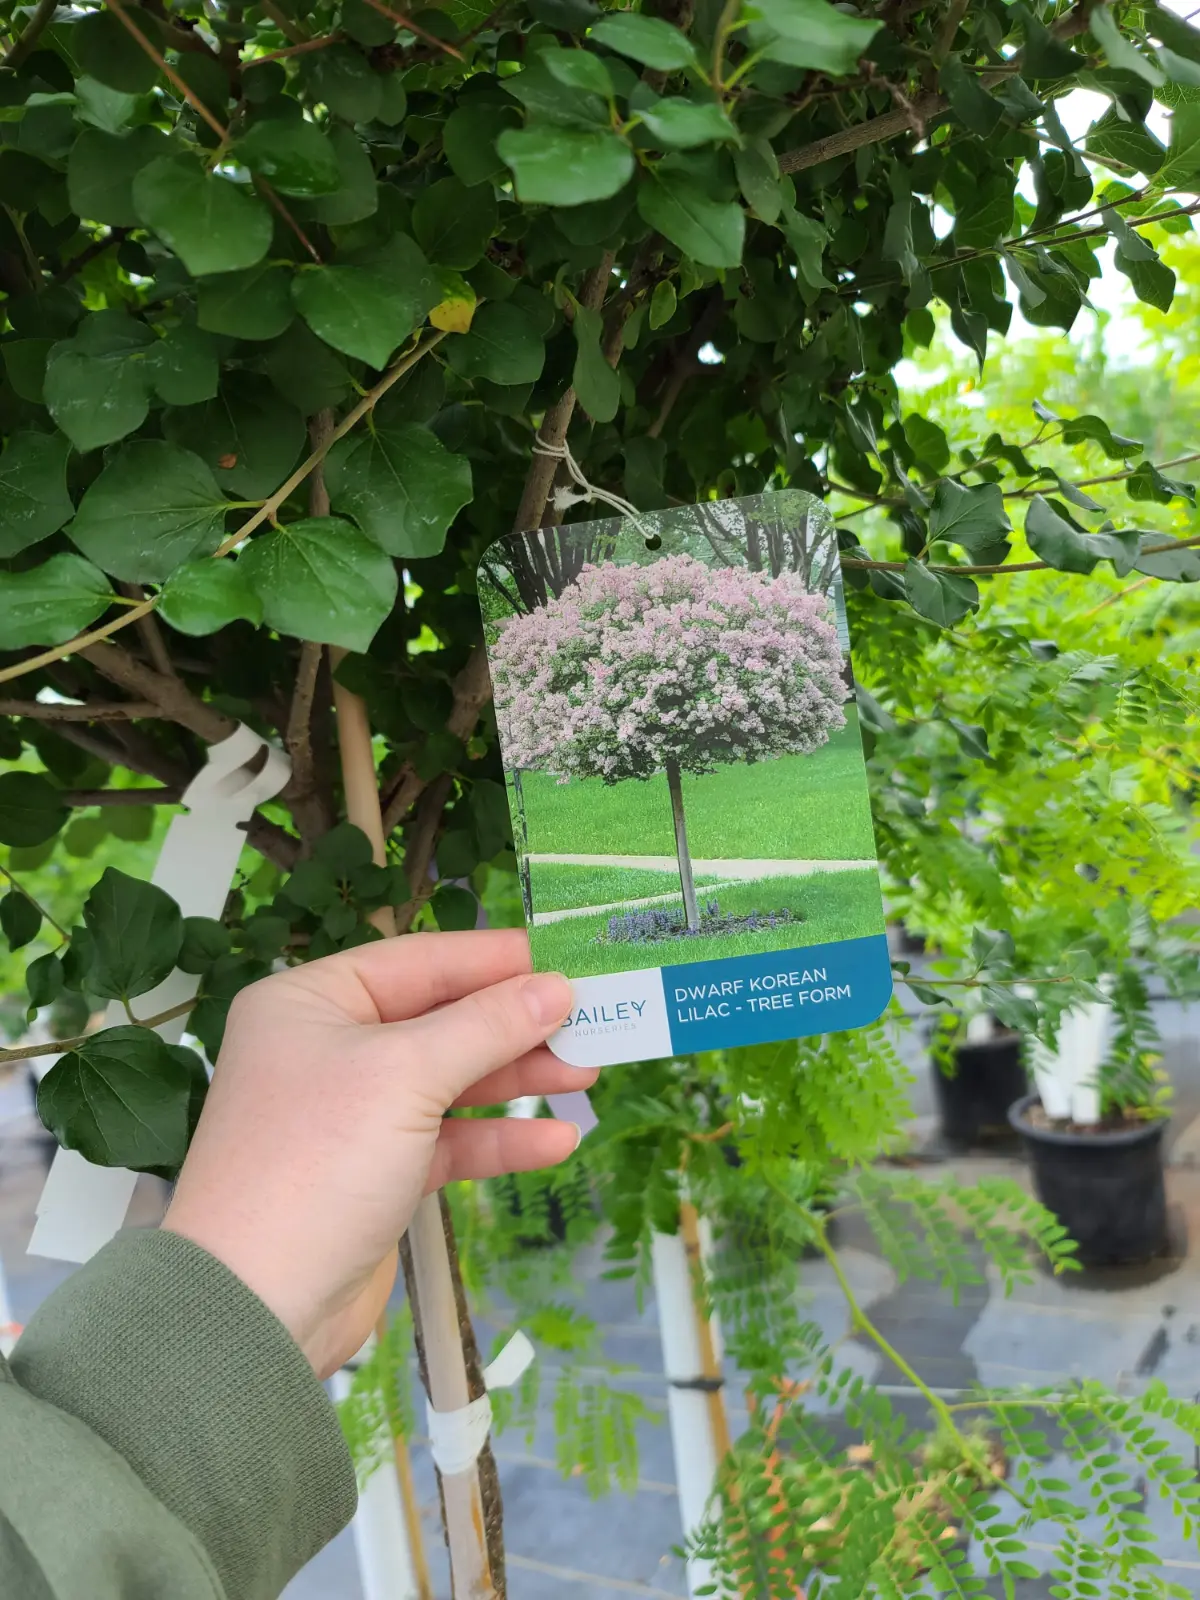
When laying out my design initially, with the plans to add just the hydrangeas, I already wanted to start expanding. I felt it needed more, and was so excited when I chose to go with a lilac tree. The smell of lilacs in the Spring is one of my most favorite things about being outside.
Since our yard doesn’t receive a lot of direct sunlight, I didn’t think I’d ever be able to find the right space for a lilac bush without it eventually getting too large and looking out of place. Then I spotted a dwarf lilac tree at a garden center, and it smelt amazing. I knew I had to incorporate this into my design somehow.
I paid attention to how much sun we were getting throughout the day next to this garden bed at the corner of our house, and between the morning sun and then what we received later in the afternoon I knew we’d have enough to make this tree happy! I told my husband of my plan to add an ornamental tree to extend this garden bed, and I think at this point of my gardening hobby, he began to see that I’m not all that bad at this sort of thing and agreed. 🙂
Use Garden Edging
When making plans to add a garden into your landscape, I find it helpful to get your edging in place and move it around until you can start to see the picture of what it could start looking like before putting in any plants.
Because I’m always trying to keep my projects at a low budget, I found a simple plastic No-Dig Landscape Edging that worked perfectly for me. It has held up well enough for my landscaping needs, and does the job with little effort.
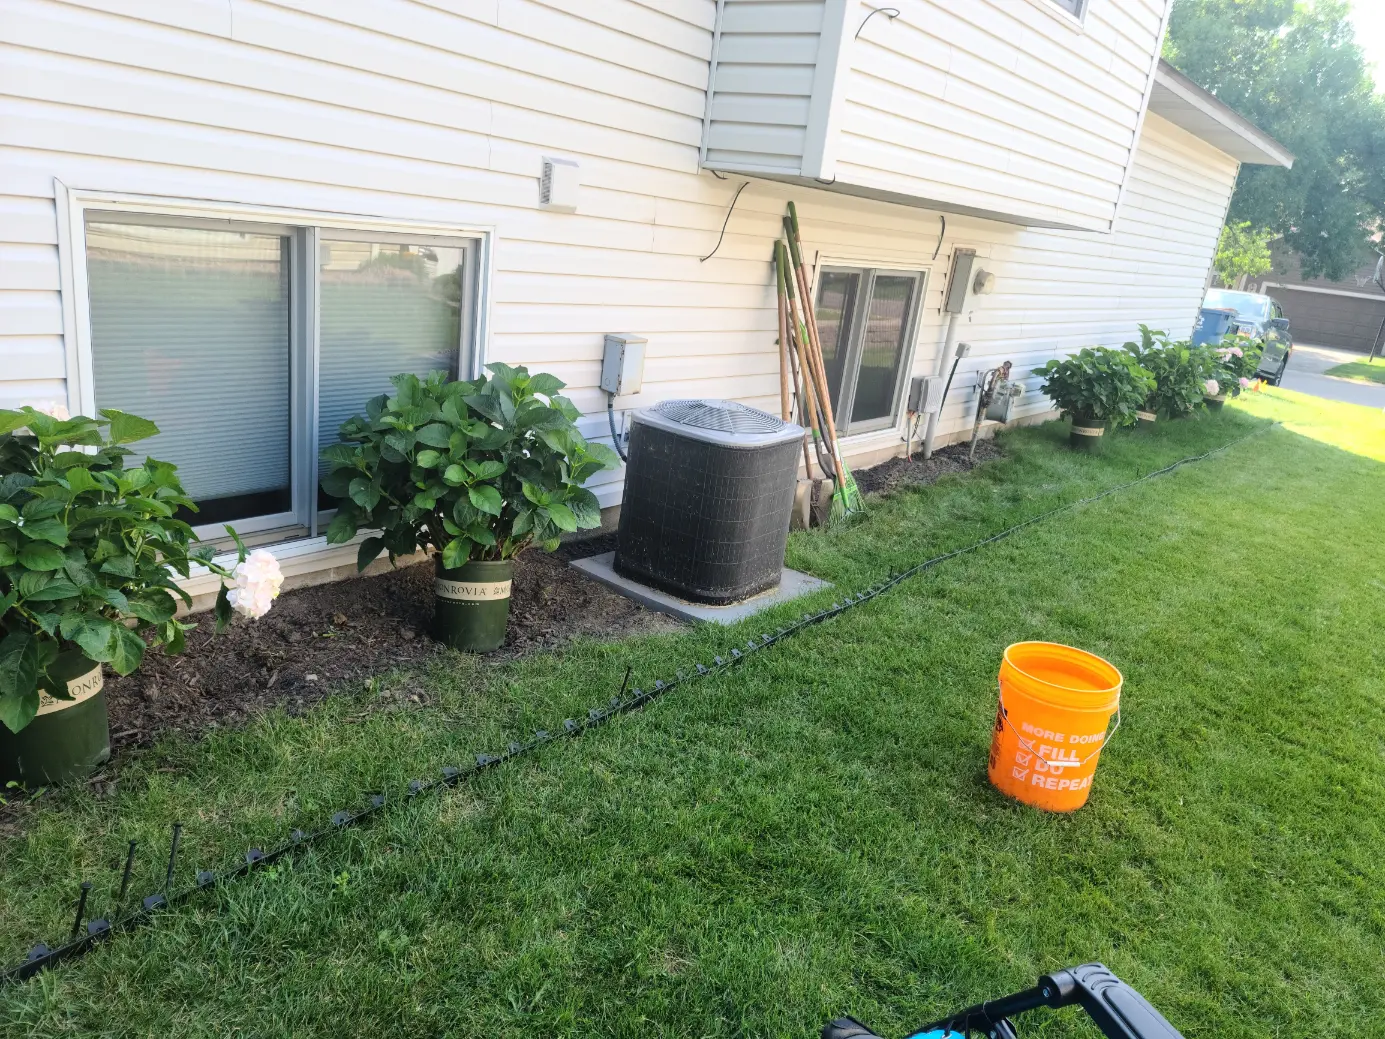
You will see in my picture that I will start with the edging and not shown is how many times I’ve moved it around trying to figure out the best distance from the house, and where I want to separate the rock from the much. This is where I recommend you know the mature size of your plants as well, and measure out a good distance from the house so you aren’t planting too close. Same with the lilac tree, as it’s important to understand how wide it can grow so it’s not rubbing up against the siding. I do think I may have still planted mine a tad too close, but with some pruning I should easily maintain the size.
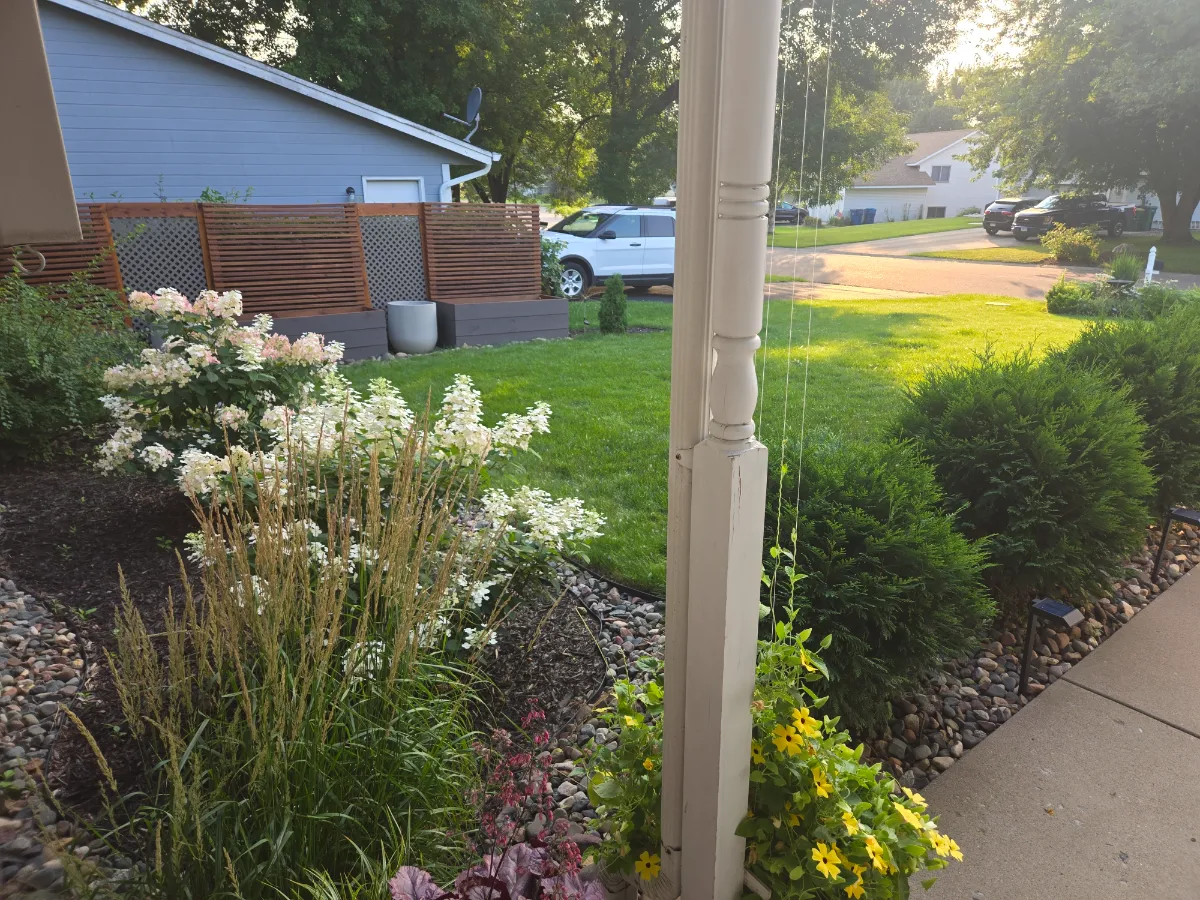
Add Seasonal Interest
After having our garden bed finished and seeing the results, I was very happy with how it turned out. It really does improve the look of your home when taking the time to add some landscaping. After the first season of watching my lilac tree bloom, and the flowers disappear, I started to think about adding some flowers that could bloom beneath and give off some added color once the tree was just green again.
I liked the look of alliums, but knew they were considered toxic to dogs so I haven’t added them into my gardens. When I began my landscaping journey, I focused on keeping everything pet friendly since my puppy at the time would nibble on everything! However this area of our yard would be perfect since he’d only be next to these alliums when we’d be present so I decided to pick a few of these up.
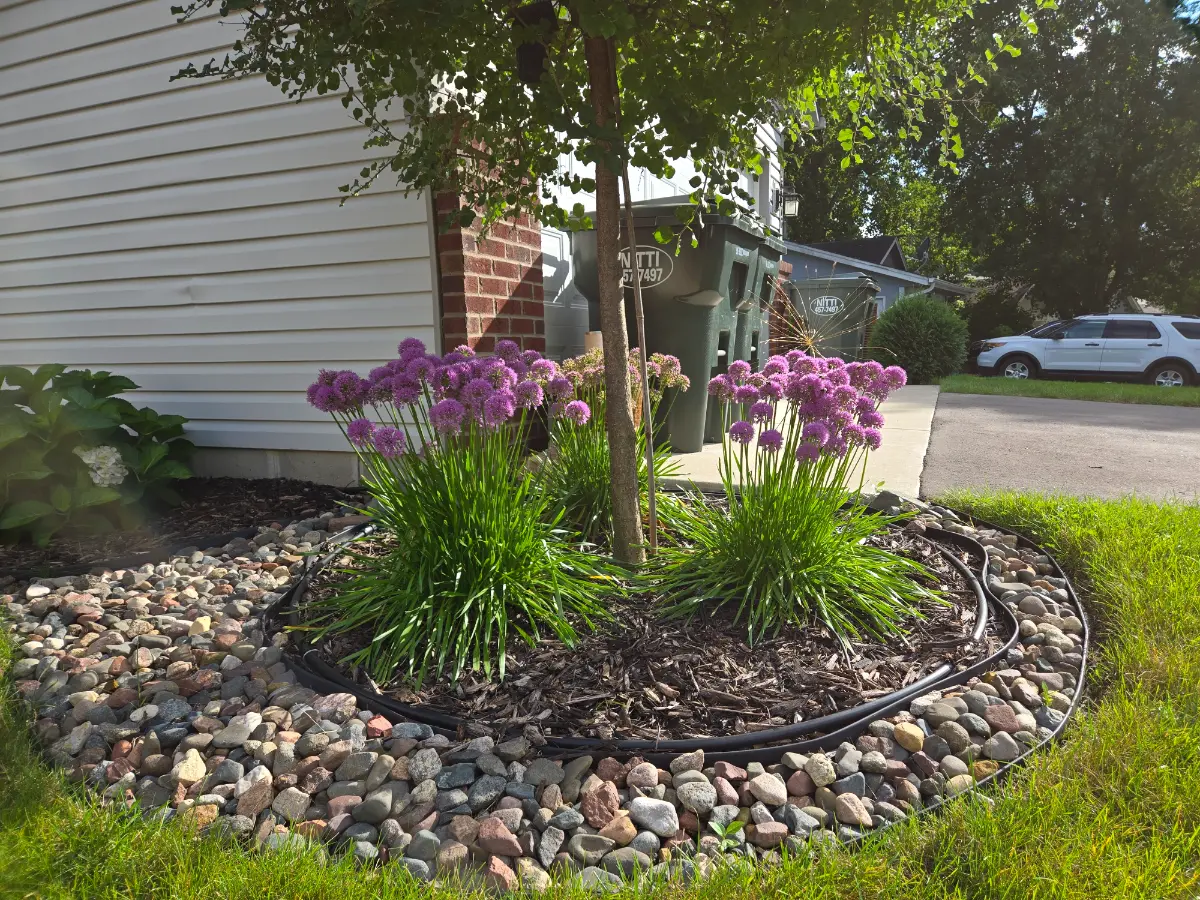
Garden advice: my Mother-in-Law once told me to plant in 3’s (or odd numbers) as it makes for a better looking layout. I’ve always kept this in the back of my mind during my designs.
Having three clumps of allium surrounding the base of my lilac tree was the added touch of color I needed. Plus the honeybees and bumblebees are obsessed! It always makes me happy when I can provide the flowers our bees need to stay nourished.
I may eventually add more flowers (thinking tulips), but I haven’t gotten to this yet. I bet it would look stunning though! Stay tuned as I’ll likely post pictures of this when it happens.